How to: Give Your Wall a Total Textural Makeover with Pennies!

ManMade reader Lizzie has a “manly husband,” Ryan, that she often sends here to trick him into doing DIY and decor projects. It’s even worked several times, she says. “In fact, he ‘allowed’ me to take his fingerprint the other day so that I can make some fingerprint art which is the coolest thing ever. They’re all Illustrator’d up and ready to print!”
As apartment dwellers, Lizzie and Ryan were facing the standard the rental-agreement-says-you-can’t-do-anything-awesome-to-where-you-live woes. Unless, of couse, it’s temporary. So they came up with this awesome copper penny wall treatment that gives tons of color, texture, and detail to the space. And when they’re ready to move? They can just take out a few nails and it’s like they were never there.
Lizzie was gracious enough to share the process here, so read on to see how they completed this awesome project.

1) What was the inspiration for your project? Have you seen cooper pennies used as tile before?
I’m embarrassed to say that our inspiration was from something we saw on a TV show: Flash Forward. I know, right? Super stupid. But it just seemed like such a cool idea and since we had a small accent wall, we thought we’d give it a go. It couldn’t be THAT hard. Well…
2) Tell us about the tools and materials you used for the project. Did you need anything else to make sure the rows were straight? What kind of adhesive did you use? Did you do anything to clean the pennies, or just use as is? Is there any sort of final clear coat on top?
- Plywood: While you could just glue the pennies straight to the wall, we tacked up some plywood. That way we’d be sure the pennies were completely flush with the wall and that we could easily take it down if we ever move out of our apartment. Ryan used luan board (1/8″) because it was cheaper (he said around $15 for the size of our wall) than regular plywood and light enough that he could just tack it to the wall with finish nails. He was afraid that if he used heavier board, he’d have to use bigger nails which would be harder to glue the pennies to.
- Pennies: Our wall used a little over $50 in pennies. Oh, and the bank actually sells them in $25 boxes which is amazing to me.
- Glue: We started out using a glue gun and glue sticks (I probably used about a bag of glue sticks), but when it became Ryan’s turn to glue (about halfway up the wall), he switched to Elmer’s glue which he said worked better. I wish he’d thought of that while I was burning my fingers off with molten hot glue. THEN, when we had to re-glue some of the pennies to the wall (after he nailed up the trim, some had fallen off), he used a clear silicone instead of Elmer’s. He said it worked the absolute best, but it would definitely be more costly.
- Trim molding: We got ours (a very non-fancy variety) from Home Depot. We tossed around staining it, but decided to nail it up as-is. I think we will end up staining it down the road, though. Oh, and people keep talking about the switch plate which we are absolutely going to change. I just couldn’t wait to take the pictures!
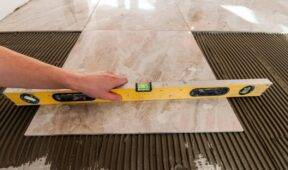
As far as making sure the rows were straight, we got out a plain, old level. We made sure the first row (we started from the bottom) was level and then went from there. At about the 4 foot mark, we (Ryan) realized that the rows (I had done) had gotten a little off and we had to rip several rows out and re-level. So…I’d highly suggest checking the level every 6 inches or foot to make sure you’ve got it right. It was painful to watch all those hours and backache being ripped off. And to be the one who made the mistake. I would have much rather been the “measure twice, cut once” person instead of the “let’s just get this over and done with!” person. We did rinse the pennies off, but only in water.

Some people have asked me if they smelled at all, but neither one of us thought so. Hopefully any visitors we over have will agree. I’d hate to be wrong about that. We didn’t do any clear coat either. We were initially toying with grouting them, but then decided against it. We kinda like seeing the wood in between the pennies.
3) Are you glad you undertook the project? Was it worth the 50 hours and cost of materials? Anything you learned by doing it once, or would do differently next time? We are SUPER happy with the project. It’s so unique. The cost was so minimal that it was totally worth it. The time it took…the verdict is still out. It took us FOR-EVER. I’d say yes (probably because I did the bottom half of the wall which means the memories are more distant), but I’m not sure Ryan would have the same feeling. It’s a little too soon. A little raw. I think the only thing we would do differently is we’d do an insane amount of level checking. And I think Ryan would use the clear silicone adhesive even thought it was more expensive. I’d DEFINITELY forget the glue gun.

Thanks Lizzie and Ryan. And excellent job! See more projects from Lizzie at her blog, The Hip Soiree


