How To: Make a Tree Branch iPod Dock

I sorta have a problem with reading the wish lists and gift guides of my fellow design and DIY bloggers. I can’t help it; I love getting a peak into the real lives or my peers, as well as the opportunity to learn about cool new stuff.
This year, I kept noticing one item pop up in lots of lists: the Enchanted Forest iPhone Dock from Anthropologie. It’s a fun nature-meets-technology way to stand and display your iPod or iPhone. It’s awesome, but at $100, it’s a lot to pay for something that doesn’t have speakers, a clock, or even a way to plug it into the wall. Of course, the fact that it’s 100% wood and doesn’t sport any fancy electronics means something else:
It’s easy to make one at home.
If you’ve got a drill, some sort of saw, and a spare iPod USB cable, you can whip one up in an hour or two for absolutely free! I’m pretty sure this is the world’s best Christmas gift for iPhone owners, especially cause it’s handmade! I’m giving mine to my sweetheart (she’s been banned from ManMade and all its networks until Christmas morning).
Materials and Tools
- Fallen tree limb, about 4″ in diameter, for the base
- Straight tree branch, 1″ in diameter, for the legs
- Smaller stick, 3/8 – 1/2″ in diameter, for the support (look for one with some character, but remains mostly straight)
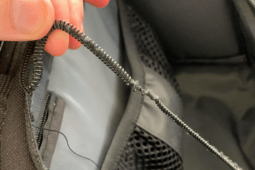
- USB cable for your iPod or other smart phone
- saw – anything that can make crosscuts will do – pull saw, handsaw, hacksaw, miter box, etc
- ruler or measuring tape
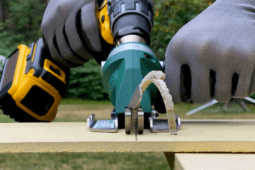
- electric drill
- 13/64″ or 3/16″ drill bit
- small chisel, carving knife, or utility knife (or electric rotary tool)
- sandpaper
- yellow wood glue and glue gun
1. Head outside and fine some nice round branches in the sizes above. It’s best if you can get ones that have been off the tree for a while and are nicely seasoned (dried). You can also find precut wood slices at some craft stores and nurseries. Clean the bark with a stiff brush and wipe clean. Cut a 1″ slice of the 4″ limb that serve as the base.

2. The thickness of the plug end of an iPod cable is just under a 1/4″, 7/32″ tall, and 1 1/32″ long. Locate the center of your wood disc, and transfer these measurements just above. Also, be sure to draw a line through the middle along the length:

3. To cut out this slot, it’s easiest drill a series of holes to remove most of the material, then clean it up with a chisel or blade. Chuck a 13/64″ bit into your drill (or a 3/16″ if you don’t have the weirder sizes), and drill four holes, avoiding the edge lines. Use the line you marked in the center to line up your drill bit.

I’m lucky enough to have a drill press with a tilt-able table, but you can do this with a hand drill easily. Drill the holes at a 10-degree angle towards the center, so your iPod can sit at a slight angle.

4. Use a small chisel or other blade to cut away the rest of the material. Note that the iPod cable has a rounded end, so try to mimic that shape. Slowly remove the material until your cable will slide end through the bottom, but fit snugly. Do your best to maintain that 10-degree slope in the slot. It doesn’t really matter what the bottom looks like, so focus on maintaining a tight shape on the top. Sand the face smooth.

5. Insert the USB cable, and glue it in. I found that filling the recess with hot glue kept it secure, and that if something ever goes bad with the cable, I should be able to reheat the glue and swap it out.

6. It’s necessary to make legs for the stand to sit upon, to make room for the cable to come out through the bottom, and increase the awesome-ness factor. Cut three 1/2″ lengths from the 1″ branch, and test for fit and balance. Use sandpaper to remove material to make everything sit nice and level. Glue on the legs and let dry. (Hot yellow glue is fine here as well)

7. Lastly, we need to make a back piece to support your iPod, and to give the whole thing some more character. Grab your smallest stick, and find a 3-4″ section with some interest: knots, crooked parts, little twigs sticking out. Cut the base section at a 15-20″ angle to allow for the slope of the iPod, and then give it a test fit to determine the best spot, then glue in place.

Final thoughts:
You could finish your stand with some sort of oil or stain, or better yet, paste wax, but I’m thinking it’ll be a-okay the way it is. Keep your eye on it, and if it cracks as it continues to dry, it might need a round of mineral oil, which won’t be greasy and get on your phone.
If I did this again, I’d move the slot a little more towards the center, so the rear support could sit a little further towards the middle. With all the snow on the ground, stick finding was a little tough, so I might look for different materials to begin with, but the ones here work very well.
This project isn’t complicated, it’s just important to be very accurate with your measurements, and work carefully so everything remains tight, balanced, and level.
If you have any questions, feel free to email me at Chris@ManMadeDIY.com and I’ll do my best to help.