DIY Gift Time: How to Make a Simple Necklace from Scrap Wood and Basic Tools
![[Image Credit] Bryson Handmade Olive Wood Necklace for Valentines](https://s3.amazonaws.com/manmadediy-uploads-production/photos/24715/IMG_1251_large.jpg?1423452614)
It's that time of year! And by “that time,” we mean: time to start thinking about getting a head start on a quality Valentine's Day gift. Skip the flowers and chocolate nonsense and get your hands to work on this elegant, modern necklace that is sure to stun your special someone.
If you don't have a lot of tools, you could make this whole project with a coping saw, sandpaper, a pair of pliers, and a drill.
Here's what I used:
- A small piece of exotic hardwood
- Saw: coping saw
- Wipe-on poly finish
- “Antique brass” necklace chain cut to 21″ in length
- 2 jewelry jump rings
- Brass jewelry clasp
- 1/16th drill bit
- Sandpaper Sheets ranging from 80-1600 grit
- Needle nose pliers
![[Image Credit] Bryson created at: 02/08/2015](https://s3.amazonaws.com/manmadediy-uploads-production/photos/24704/IMG_1171-2_large.jpg?1423452349)
I picked up a packet of pen blanks from a wood crafting store. This is some super cool Bethlehem olive wood. I love the color and contrast it has. It reminded me of a blonde tortoise shell. When looking for a piece, you'll want something that has some closely packed swirls and colors since you'll be cutting out a small piece for the jewelry.
![[image credit] Bryson Handmade Olive Wood Necklace for Valentines](https://s3.amazonaws.com/manmadediy-uploads-production/photos/24705/IMG_1179-2_large.jpg?1423452358)
I started by milling a 1/8″ thick piece from the blank. To make sure that I got the perfect piece, I milled the entire piece into several strips. I have a bandsaw, but you could easily use a coping saw for this.
![[image credit] Bryson Handmade Olive Wood Necklace for Valentines](https://s3.amazonaws.com/manmadediy-uploads-production/photos/24706/IMG_1183-2_large.jpg?1423452373)
After looking at all my cuts, I think I'll go with the second one from the left. Look at all that swirling!
![[image credit] Bryson Handmade Olive Wood Necklace for Valentines](https://s3.amazonaws.com/manmadediy-uploads-production/photos/24707/IMG_1192-2_large.jpg?1423452515)
I have a sanding station with an 80 grit paper. This thing can really tear out some wood. So, I'm going to use it to sand my chosen piece down from 1″ to 1/4″. I went with the sander because my bandsaw has a mind of its own and this sander can allow me to sand down to the perfect size and shape.
A piece of sandpaper attached to a flat piece of glass or plexi with spray adhesive would work well here.
![[image credit] Bryson Handmade Olive Wood Necklace for Valentines](https://s3.amazonaws.com/manmadediy-uploads-production/photos/24708/IMG_1193-2_large.jpg?1423452534)
Once it's been sanded to the right width, I used a small pull saw to cut it to length. Coping saw also good on this.
![[image credit] Bryson Handmade Olive Wood Necklace for Valentines](https://s3.amazonaws.com/manmadediy-uploads-production/photos/24709/IMG_1197-2_large.jpg?1423452548)
Minimize drill tear-out by attaching a piece of tape to the back of your jewelry and set it on a block of waste wood to stabilize your piece.
![[image credit] Bryson Handmade Olive Wood Necklace for Valentines](https://s3.amazonaws.com/manmadediy-uploads-production/photos/24710/IMG_1198-2_large.jpg?1423452560)
Now for some meticulous sanding! Start with 80 grit and work your way up to 1600. I taped each piece of sand paper to the table to make it easier to sand.
![[Image Credit] Bryson Handmade Olive Wood Necklace for Valentines](https://s3.amazonaws.com/manmadediy-uploads-production/photos/24712/IMG_1206-2_large.jpg?1423452584)
When the wood is super smooth it's time to coat it with poly. I recommend at least 2 coats. Sand with 1600 grit in between each application.
If you prefer a mirror finish, you can use automotive polishing compound to buff out a really nice shine.
![[Image credit] Bryson Handmade Olive Wood Necklace for Valentines](https://s3.amazonaws.com/manmadediy-uploads-production/photos/24711/IMG_1211_large.jpg?1423452571)
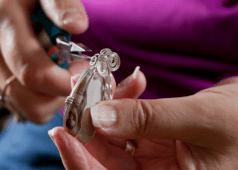
Gather all the jewelry making supplies you have laying around. Or, if you're like me, you have to go out and buy everything because you've never made jewelry. Assemble everything like you'd imagine. Attach the link rings to the holes on the wood piece. Then, attach the chain to the links. At the halfway mark, cut the chain and attach the clasps.
Finally, give your piece a final polish and put it in a jewelry box and you'll be ready to amaze!
![[Image Credit] Bryson Handmade Olive Wood Necklace for Valentines](https://s3.amazonaws.com/manmadediy-uploads-production/photos/24714/IMG_1215_large.jpg?1423452606)
Note: You'll notice a difference in the cover image piece and the final piece. After my wife tried it on she said it was a little too thick. She was right. So I sanded it down from 1/2″ to 1/4″.


