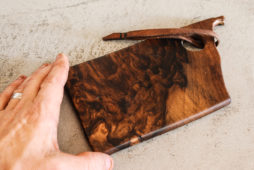
How to: Make a DIY Wooden Salt Cellar for Your Next Dinner Party

We recently procured a salt shaker for our dining table. It looks like an owl. My wife likes it. However, it seems that the sea salt we put in it never actually comes out of the little holes. Taking from the kitchen salt cellars you scoop and pinch from as you cook, I thought I’d create a communal cellar to place on your table that’s perfect for a party of one or a party of many. No more clogged shakers!
Here’s what you’l need:
- Router with a flat cutting bit. I use a 1/2″ bit.
- Router guide bushing kit that fits your bit of choice
- Large piece of wood. I used a large oak beam from a barn.
- A piece of scrap plywood
- Sander or Sandpaper
- Cutting Board sealant. I used watco.
I used a rather large barnwood beam for this project. I honestly didn’t think it through and had to work a little harder to cut everything since my blades weren’t large enough to cut through. I did a lot of rotating and passing over the saw to cut the other side.
 First, I cross cut the beam 8″ long. In total the block measures 8″x6″x4″ after the cut. The next step is to rip cut the block. The side grain of my block is going to be the top (I want to keep the lid looking like barnwood.) The cut, for my block, is about 4″ wide. Always remember to cut way more than you need when you build things like this.

Now you can cut the lid and the base out of your 8″x4″x4″ block. In total, I want the salt box to measure 2″ high. The base is 1.5″ and the lid is 0.5″ so there will be a lot of waste from the original 4″ cut I made. Feel free to use that waste as the base of another box!

Next, it’s time to remove the inside of the base block so you can fill it with salt. I used a router with a template guide and a plywood template. You could also use a chisel or a drill press and forstner bit.

The final cellar will measure 5×4 with a 4×3″ salt-holding cavity, this leaves a 1/2″ lip around the opening. I made a 5.25″x4.25″ template from a scrap piece of plywood. The .25″ is to accommodate for the brass template guide. I cut it with my jigsaw. (The blue tape is where I broke it and put it back together) The extra wood on the block–and the template– is for attaching the template with screws to the block. I then clamped the block to the table.
Set the depth you want to cut (about 3/4″) and make shallow passes around the template. Be prepared for a dusty mess! I decided to keep it shallow so I didn’t have to pour tons of salt in. You can definitely cut deeper if you’d like.

When you’ve finished routing out the cavity, use a chisel to square up the corners.

Cut off the extra piece from the block so the overall width of your cellar measures 5″ wide. Pass the lid through to make sure they are both the same size. Now you’re ready to sand! Be mindful, as you sand, to keep everything level and apply even pressure so everything finished flat and square.

After everything is sanded, seal it all up with some butcher block oil. I went with a pre-made one from Watco instead of using something natural like mineral oil. Since you’ll be putting salt in this, I wanted to make sure the salt and the wood wouldn’t interact and dry out the block over time.

Once everything is dry, add your favorite salt or other spice mix and you’re ready to go!


