How to Make Raised Panel Doors: DIY Guide in 4 Easy Steps

This is the final part of our 3 part series on making raised panel doors. We’ve looked at my $400 raised panel set-up and the anatomy of a raised panel door, so with those in mind, we’ll run through the steps and highlight a few items that will result in exceptional doors. Here are 4 important tips to remember when building the doors.
![credit: David [manmadediy.com] Quality Wood](https://s3.amazonaws.com/manmadediy-uploads-production/photos/24793/IMG_7948_large.jpg?1424064270)
4 Important Tips Before You Start
Use Good Wood
This rule applies to any project but really makes a difference when accuracy counts. Cheap woods like pine and cedar are great to work with but splinter, warp and dent too easily to rely on for durability.
Oak is a rock-solid wood that is a bit hard to work with, but cuts well and is stable enough to resist warping. The problem is that it can be expensive, and the distinctive grain pattern doesn’t paint well. Poplar is another popular wood that is a bit easier to work than oak but still resists splintering. The grain pattern can be a bit splotchy if staining, but it sands well for a nice painted finish.
Overall, I recommend talking to a local hardwood dealer if you want a stained finish on your doors and opting for Poplar if painting is the end goal. (Note: in some of these pictures, you’ll see some pine I used for a simple shop cabinet).

Use Set-Up Blocks
Set-up blocks are a bit hard to get squared away at the start of a project. They can be made from scraps (use hardwood or phenolic (plastic)) or bought commercially at the same source where you buy the bits.
The ability to produce predictable cuts with faster set-up times pays for itself quickly during long projects with difficult tool changes. I use set-up blocks from MLCS which came with my bits.
![credit: David [manmadediy.com] Router Table](https://s3.amazonaws.com/manmadediy-uploads-production/photos/24795/IMG_8052_large.jpg?1424064378)
Make Stable Workspaces
Pushing large pieces of wood through a machine takes some pressure, and a shaky stand is going to vibrate all around during cuts which is dangerous and usually ends up with poor quality results. Make sure that every tool is fully secured to an anchoring surface that can stay put. If that just can’t happen (portable tools and a small shop, I get it!) make multiple smaller passes on cuts to lighten up the pressure on the tools. This means more tool adjustments and passes, but it works.
![credit: David [manmadediy.com] Squared Up](https://s3.amazonaws.com/manmadediy-uploads-production/photos/24797/IMG_2420_large.jpg?1424064540)
Square It Up
Square, straight, stable and sharp. Those are the rules of the shop for every single tool. Although the methods may be different, all tools have a way to true-up the cutting edges to the guides (fences, tables, mounts, etc.). Take the time to square up and tighten down your tools on a regular basis to make sure every cut comes out at the right angle and produces faces that can be matched up tightly. Table and miter saws are generally the most used tools in a shop and deserve some special attention to make sure cuts come out clean. Keeping blades sharp reduces the need to “push” instead of “feed” a piece of wood through the saw. While you’re at it, make sure to use the proper blade (they come in ranges from 30-120 teeth per inch (TPI) for different uses, use a higher TPI blade for smoother cuts at lower feed rates).
With those 4 points in mind, here’s a quick walkthrough on constructing a raised panel cabinet door.
How To Make Raised Panel Doors
Tools & Equipment
- Router – Large multi-speed router with ½” collet.
- Raised Panel Bits – Set of at least a matched rail and stile, and a center panel bit. Other useful bits include a panel bit, drawer lock bit, and door handle bit.
- Table Saw (for ripping stock to width)
- Miter Saw (for cutting stock to length)
- Planer (optional for dimensioning)
- Glue, palm sander, sanding blocks, finish
- Set-up blocks, tape measure, ruler
Step 1: Gather Tools & Materials
Gather all the tools and materials needed for the doors. For each door, there should be 2 rails, 2 stiles, and a center panel. If making the center panel out of smaller parts, be sure to have them squared and dimensioned the same thickness. All pieces of the door should be the same thickness, typically ½” or ¾” materials (unless your panel cutting bit doesn’t have a back cutter, see step 4). Double-check all set-up blocks to be sure they are the right ones for the project.
Step 2: Measure and Cut
Dimension all materials for final thickness, length, and width. First, run all wood through a planer to get a consistent thickness. This step is great if you have access to a planer as it will make the final doors much more consistent. If not, cut all wood to length. The stiles should be the final anticipated height of the doors (be sure to account for overhang), the rails should be the final width of the door, minus the width of each stile and the width of the overlap of the locking joints. The center panel will be the same width as the rails minus 1/8” to account for wood movement. The center panel should have 1/8” -1/16” gap around the panel for movement.![credit: David [manmadediy.com] Cutting](https://s3.amazonaws.com/manmadediy-uploads-production/photos/24798/IMG_7941_large.jpg?1424064635)
Step 3: Router work
Cut the end grain of the rails first. To account for any chipping of material, cut the end grain of the rails and use a backing board for full support. Next, switch bits and cut the rail and stile along the grain. Be sure to cut the rails so that the end grain cuts are on the right side, it’s easy to switch those faces. This should result in a nice tight-fitting frame with a channel for the center panel.
Step 4: Center Panel
This is a large bit with a substantial amount of cutting face. It’s best to take this cut in multiple smaller passes. Also, be sure to adjust the speed of the router to match the bit, take a look at part 1 for more on that. The center panel cutter I used had a back cutting blade as well, this results in a flush back panel. If you don’t have a panel with a back cutter, the center stock will not be as thick as the rails and stiles to account for this, generally without the back cutter, the center panel is ¼” less thick than the rest of the door.
![credit: David [manmadediy.com] Gluing up a panel](https://s3.amazonaws.com/manmadediy-uploads-production/photos/24799/IMG_1003_large.jpg?1424064748)
Step 5: Final Assembly and Glue-Up
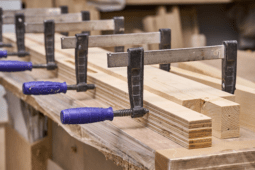
For this step, be sure to dry-fit all pieces of the door to make sure it all matches up. It’s fun to get all the pieces together and see a door appear. Check for square, level joints and final dimensions. If everything looks good, go ahead and glue up the doors. This is an important note: don’t glue up the panel, it’s designed to “float” in the door to account for seasonal wood movement. When clamping the joints, don’t use excessive pressure or the doors may buckle so check for flat and level after cinching them down. Be sure to wipe down any glue squeeze-out with a damp rag.
Step 6: Finish Touches
After the doors are glued up take a look at all joints and sand them up as needed with a sanding sponge and finish sander to get smooth. Run the doors through the router for any side finishing. Measure and drill for the hinges, and test fit then remove and set aside. If you want to install front hardware, check out our guide on how to install cabinet handles. Finish as you wish and you’re done!
![credit: David [manmadediy.com] Raised Panel Doors With Hinges](https://s3.amazonaws.com/manmadediy-uploads-production/photos/24800/IMG_7968_large.jpg?1424064848)


