How to: Start a Minimalist Bullet Journal and Get Better at Everything

Search “bullet journal” in Instagram or Pinterest and you’ll see a cornucopia of tricked-out notebooks. The Esteemed Society of Crafters on the Internet has truly created a thing of beauty. But if you’re one of the “Ain’t Nobody Got Time for That” (ANGTFT) set, don’t be fooled by the washi tape, calligraphy, and rococo calendar ornaments: a minimalist bullet journal is, hands down, the most efficient and robust planning tool in your productivity kit.
Though I use digital tools for all kinds of stuff from note taking to full-on children’s book illustration, I’m the worst at a keeping a digital calendar. I’d heard the term “bullet journal” somewhere in the Internet ether, but it wasn’t until I started trying to custom design my own planners that I came across the technique in detail.
Here are some of my favorite aspects of bullet journals:
- All they require is a blank notebook. This can be as inexpensive or fancy as you like.
- They’re incredibly fast to set up and lightning-quick to use.
- They’re infinitely customizable: I use them to capture and harness dates for the next year, quarter, month, and produce a detailed daily log. I also use them to plan specific projects by mapping them out according to their successive component steps. (In the back of my bullet journal I even mapped out how much time I have left with my daughter until she graduates, à la this sobering Wait But Why post.)
- The simple bullet system has spread into my general notebooks and helped produce a vastly more organized collection of useful information.
Since bullet journaling has spawned its own subculture, there are many techniques out there to pick and choose from, but I’d like to share with you the basics that I use.
The main components:
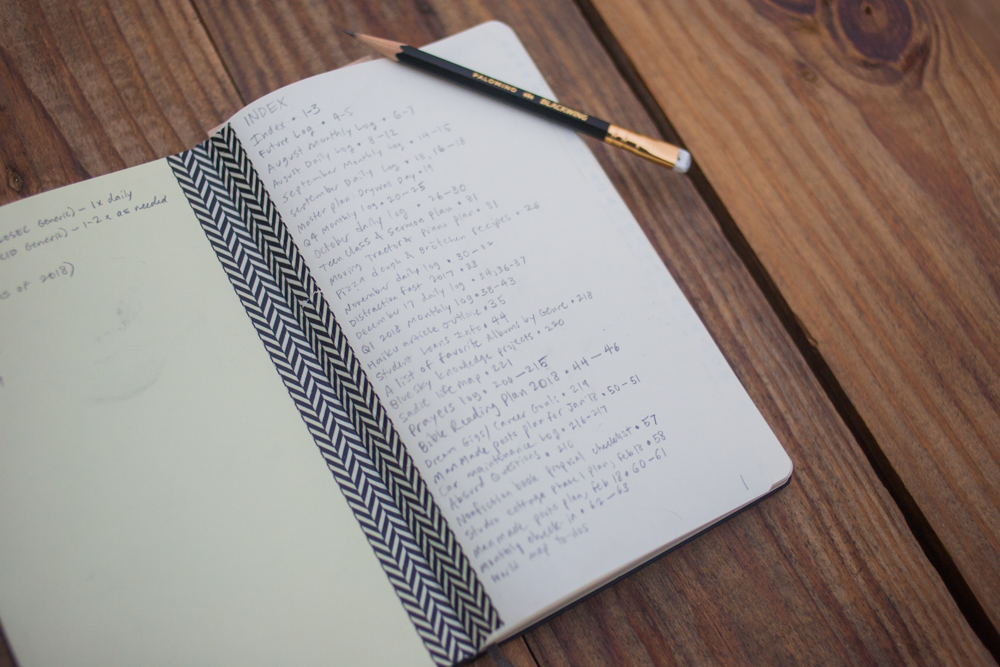
I. Index and Numbered Pages
Your index is the table of contents that you add to as you fill the numbered pages of the journal. (A quick skim down the list with your index finger will suffice to find the item and page you’re looking for.)
II. The Logs
These are the basic zones of your bullet journal, serving as a chronological net to help you catch those fickle events and to-dos that have thus far eluded you. Standard bullet journal operating procedure suggests the following:
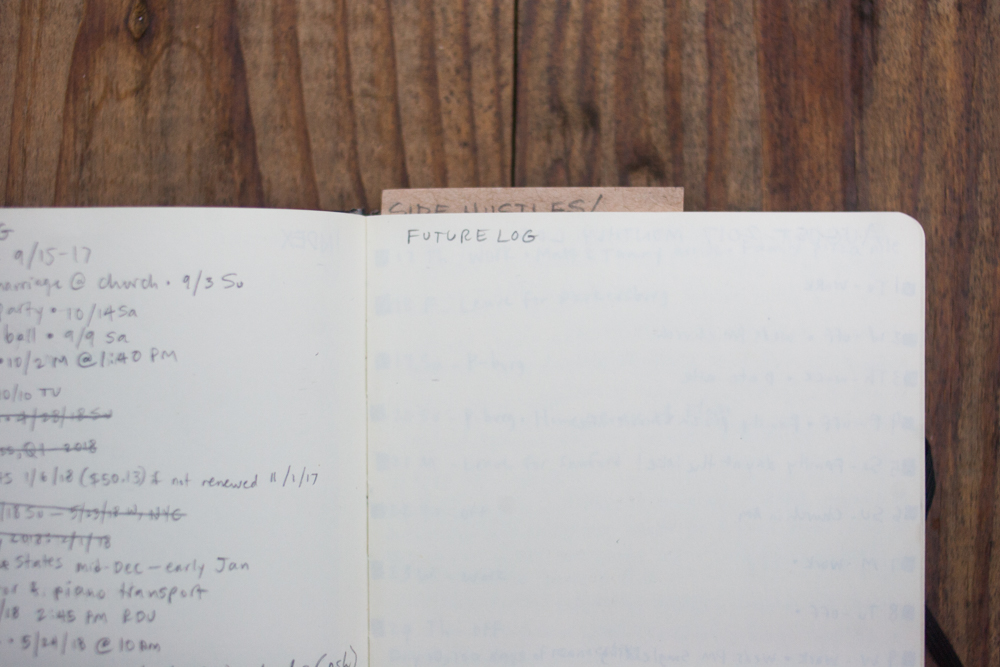
- Future Log — This is the catch-all net for stuff that’s happening a while from now. Personal example: my wife has to renew her driver’s license in May, but I haven’t created the May calendar yet since it’s only February. So I slapped it into the Future Log and will transfer it when I write up the May calendar.
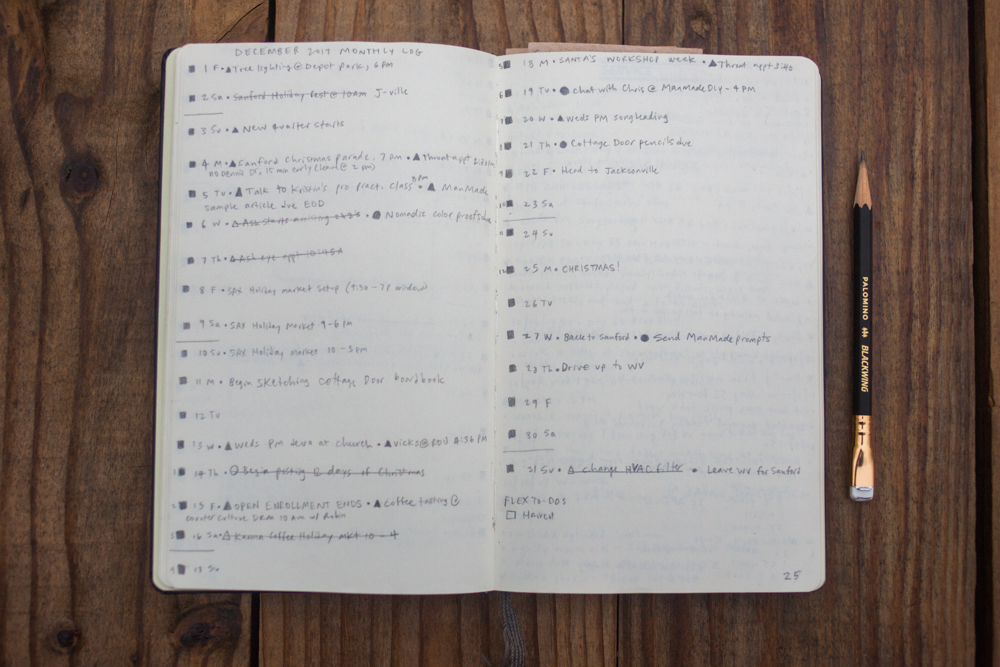
- Monthly Log — This is your monthly at-a-glance calendar. Some Bullet Journalers will draw a traditional box calendar, but I’m all ANGTFT, so I list the days down a two-page spread, leaving enough space for roughly three lines of writing per day. I also like to set up three Monthly Logs at a time so I can look at each quarter at-a-glance; e.g. Q1 includes the monthly logs for January, February, and March, each getting its own 2-page spread.
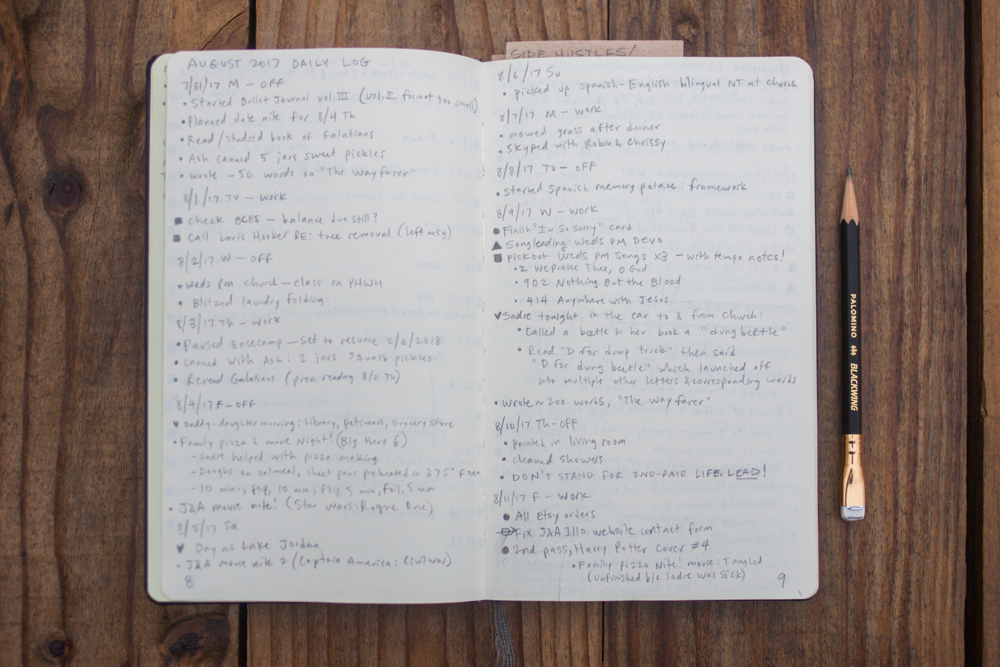
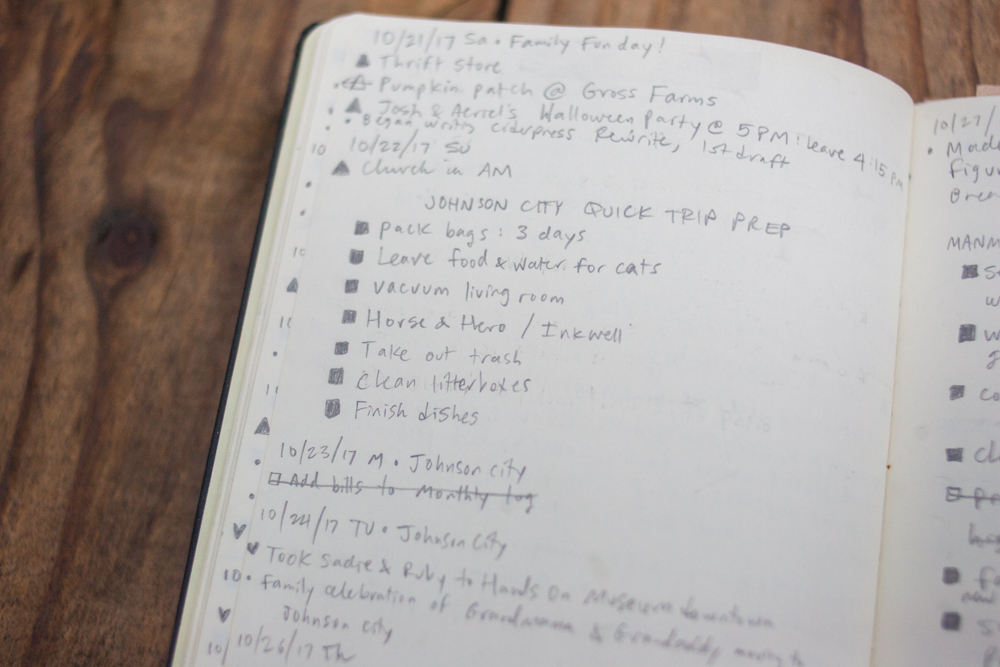
- Daily Log — On a page you’ve designated as the beginning of your daily log, write the date and make a bulleted list for the day. The next day, add the date underneath and make that day’s bulleted list. I make list the night before using events and to-dos gathered up from my Future and Monthly Logs. Here’s the cool thing: during the day, I also make short notes about stuff that went down—a cool memory with my wife and daughter, something I accomplished, a movie I watched, a great quote I heard. I keep these entries as short and concise as possible.
III. The Notations
The note taking system is the most distinct aspects of bullet journals, and also the most widely divergent. I’ve been using this system for nearly a year and I originally cobbled it together from various suggestions on the Internet. See what works for you and scrap what doesn’t!
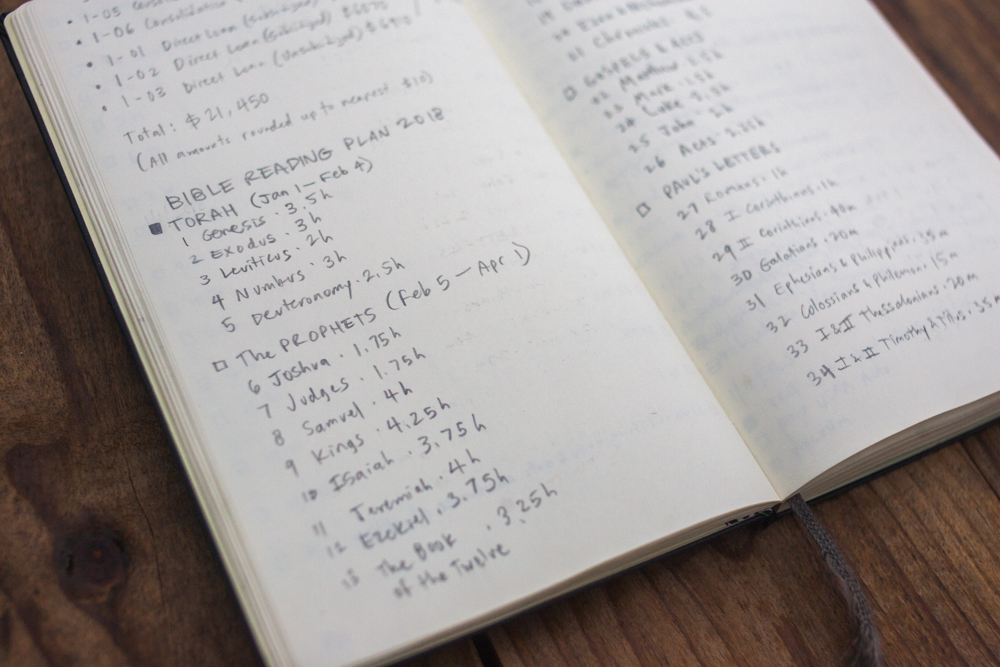
The two main elements I use are bullets and bubbles: bullets are fixed points, bubbles get filled. It makes for lightning fast at-a-glance reading and doesn’t get me confused.


1. Bullets
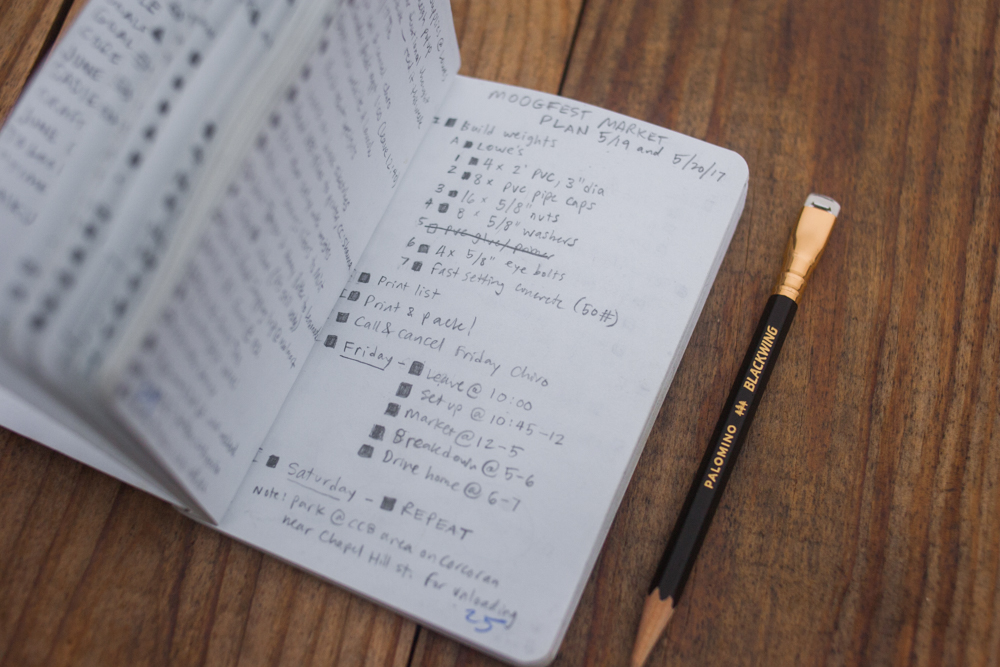
Bullets are for log items that don’t change. I use bullets almost exclusively in my daily log for stuff that happened: “Day 5 mindfulness meditation,” “Man Made DIY Fries article finished,” “Watched Indiana Jones and the Last Crusade for the 1,073rd time.” I also like to add quotes like the ones in the example photo above.
2. Bubbles
There are three types of bubbles I use:
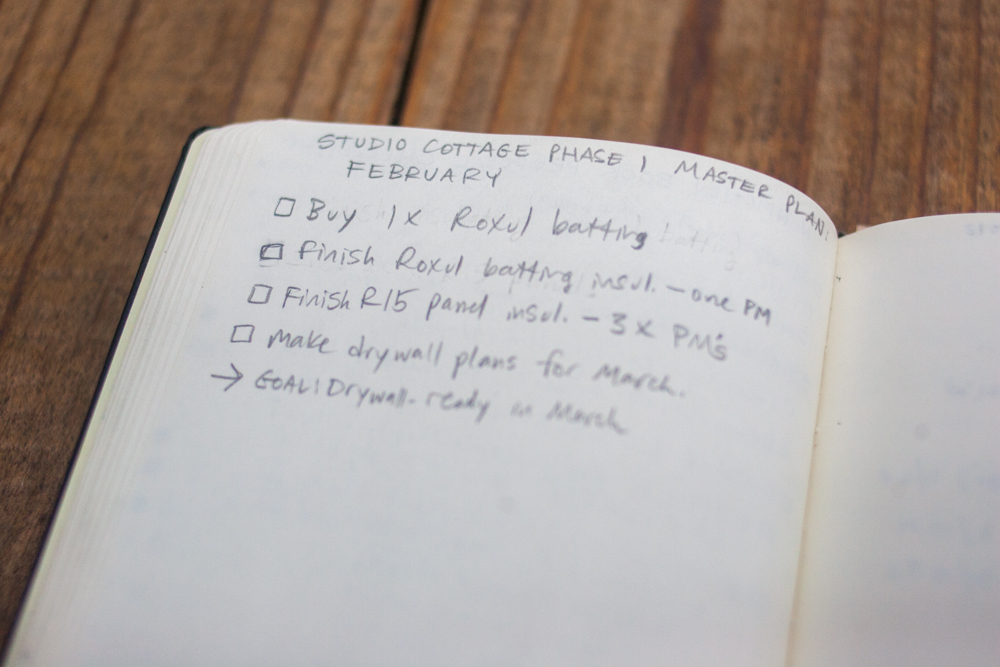
- Squares: standard to-do (e.g. “Change HVAC filter.”)
- Circles: work to-do (e.g. “Complete spread 4 of board book rough draft”.)
- Triangles: events (e.g. “Dentist appointment at 4pm”.)
Note: squares and circles look similar at-a-glance, but triangles stick out big time. So when I lightning-fast scan my pages, I can quickly see if there are any events listed among the to-dos, which helps me simplify my planning.
There are three ways I fill in bubbles:
- Blacked-out bubble: completed.
- Arrow bubble strikethrough: the item in question got shifted to another date. Normally it’s a right arrow to get moved to a later date, but sometimes it’s a left arrow if the item got punted back to the Future Log.
- Total line strikethrough: the item in question got completely canceled. I prefer the complete strikethrough because it’s still simple and clean, but I don’t have to look at the bubble to differentiate it from active items.
Complete with my daughter’s pencil practice.
Other bits:

- You will almost exclusively see bullet journalers writing in pen, but I use pencil exclusively. Why? Simply put: I plan on the fly all day, so I make a lot of mistakes. With pencils I can erase completely, which allows me to keep a very clean notebook that’s easily viewed at a glance. Plus, woodcase pencils are awesome.
- I always put the day of the week after my dates: Su, M, Tu, W, Th, F, Sa. It quickly helps me mentally orient my tasks and events into my weekly routine.
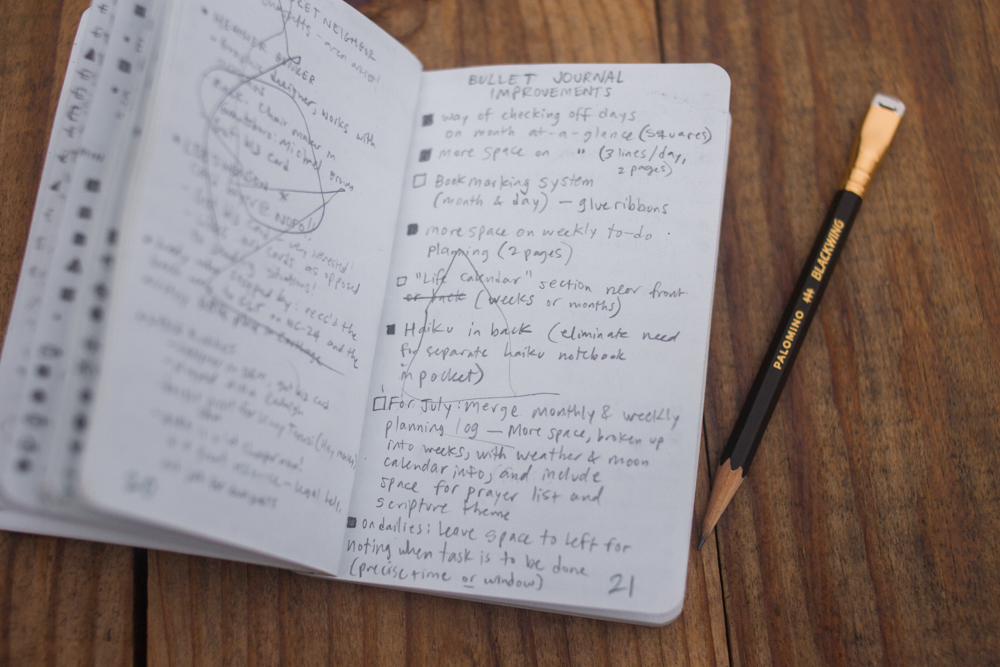
- Throw in as many lists in the middle of your journal as you need—it’s there to help you plan, after all.
So, for a quick recap, here’s a simple tutorial on how to set up a minimalist bullet journal:
- Procure blank notebook. (Lined, unlined—whatever your preference.)
- Number the pages.
- Index on first 2 pages.
- Future Log on next 2 pages. (Add “Future Log” to index.)
- Monthly Log on next pages. (Add “Monthly Log” to index.)
- Begin Daily Log entries on next blank page after monthly log.
For further reading, check out Ryder Carroll, the original bullet journal creator. (His notations are very different from the ones I’ve adopted, so if you hate my system, give his a whirl!)


