How to Clean Baked-On Brake Dust Off Wheels
Is your car’s appearance marred by grimy, dust-covered wheels? That unsightly buildup is likely brake dust, a common issue for many vehicle owners. As you apply your brakes, the friction between the brake pads and rotors creates fine particles that accumulate on your wheels over time. Not only does this dust detract from your car’s overall look, but it can also lead to corrosion if left unchecked. The good news? With the right approach and a bit of elbow grease, you can banish brake dust and restore your wheels to their former glory.
In this guide, we’ll walk you through a simple yet effective method for cleaning brake dust off your rims. Whether you’re a seasoned DIY enthusiast or a first-time car cleaner, you’ll find these steps easy to follow and the results impressive. So, roll up your sleeves, and let’s get those wheels shining!
1. Gather Your Supplies: Everything You Need for a Thorough Cleaning

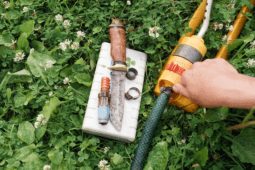
Before diving into the cleaning process, it’s essential to gather all the necessary tools and materials. Having everything on hand will make the job smoother and more efficient. You’ll need a bucket, a car jack (optional), a dish sponge with an abrasive pad on one side, a soft-bristle plastic brush (optional), a hose or watering can, a lug wrench (optional), a spray bottle, and a toothbrush for those hard-to-reach areas.
As for materials, you’ll want to have brake dust cleaner (optional), Dawn dish soap or car soap, disposable shop towels, water, and white vinegar. While you can purchase specialized brake dust cleaners, we’ll show you how to make an effective and inexpensive homemade solution that works wonders on most brake dust buildup.
2. Prepare Your DIY Cleaning Solution: A Simple Yet Powerful Formula

Creating your own cleaning solution is both cost-effective and efficient. To make this DIY cleaner, start by filling your spray bottle about three-quarters full with white vinegar. Next, add a small amount of Dawn dish soap to the vinegar, aiming for a ratio of approximately one part soap to ten parts vinegar. Screw on the cap tightly and give the bottle a good shake to mix the ingredients thoroughly.
This homemade solution is surprisingly effective at breaking down brake dust and other grime on your wheels. The acidity of the vinegar helps to dissolve stubborn deposits, while the dish soap acts as a degreaser and lifts away dirt. If you’re dealing with extremely stubborn brake dust, you may want to consider using a commercial brake dust cleaner, but for most situations, this DIY mixture will do the trick.
3. Apply the Cleaning Solution: Let Chemistry Do the Heavy Lifting

Now that your cleaning solution is ready, it’s time to apply it to your wheels. If possible, jack up your vehicle and remove the wheel you want to clean. This will give you better access to all areas of the rim, especially the inside, where brake dust tends to accumulate the most. However, if you can’t remove the wheels, don’t worry – you can still clean them effectively while they’re on the car using an assortment of soft bristle brushes.
Generously spray all dirty and dusty surfaces on both the outside and inside of the rims with your cleaning solution. Pay extra attention to the inside surface, as this area is often the dirtiest. Once you’ve thoroughly coated the rim with the solution, let it sit for 10 to 15 minutes. This waiting period allows the cleaning solution to penetrate and dissolve the brake dust deposits, making them easier to remove in the next step.
Start your next woodworking adventure with TedsWoodworking! Dive into 16,000+ projects and bring your ideas to life. Build unique furniture and master new skills with Ted’s detailed, step-by-step plans guiding you every step of the way.
4. Wipe Away the Grime: Removing the Bulk of the Brake Dust

After allowing the cleaning solution to work its magic, it’s time to start wiping away the loosened brake dust. Begin with the inside surface of the rim, as this is typically where the most buildup occurs. Use disposable shop towels to wipe away as much of the brake dust as possible. Don’t be surprised if you go through several towels per rim – brake dust can be quite abundant!
Work your way around the entire inside surface of the rim, making sure to wipe every area you sprayed. The brake dust should come off relatively easily at this point. If you encounter any stubborn spots, don’t hesitate to apply more cleaning solution and wait another 10 minutes before wiping again. Once you’ve tackled the inside, flip the wheel over and repeat the process on the outside face of the rim.
5. Wash and Scrub: Giving Your Wheels a Thorough Cleaning

With the majority of the brake dust removed, it’s time to give your wheels a proper wash. Fill a clean bucket with warm water and add a small amount of Dawn dish soap or dedicated car soap to create a foamy solution. Flip the wheel so the inside surface is facing up, and use a dish sponge with a mildly abrasive pad to wash away any remaining brake dust.
Focus on particularly dirty areas, scrubbing firmly but carefully to avoid damaging the rim’s finish. Rinse your sponge frequently in soapy water to avoid re-depositing dirt. For stubborn spots or hard-to-reach areas, use a toothbrush to get into nooks and crannies. Continue this process until all visible brake dust is gone. Once you’re satisfied with the inside, flip the wheel over and repeat the washing procedure on the outside surface.
6. Rinse and Inspect: Ensuring a Spotless Finish

The final step in your wheel cleaning process is to give your newly cleaned rims a thorough rinse. Use a hose or a watering can to wash away all the soap and any remaining brake dust residue. Start with the inside surface, rinsing every nook and cranny, then flip the wheel and rinse the outside thoroughly.
After rinsing, take a close look at your work. If you spot any areas you missed, don’t hesitate to go back and scrub them again, followed by another rinse. Once you’re satisfied that all brake dust has been removed, you can either reinstall the wheel on your vehicle or put it in storage if you’re working on a set of off-season tires.
Related Article: Ultimate Guide to Summer Car Cleaning: Shine and Protect Your Ride
Congratulations! You’ve successfully banished brake dust and restored your wheels to their former glory. To keep them looking their best, consider cleaning your wheels regularly – every few weeks or at least once a month, depending on your driving habits and local conditions. This regular maintenance will prevent brake dust from building up to unmanageable levels and protect your rims from potential corrosion.