Pour Concrete Right with These 11 Essential Tips for Success
Concrete is a versatile and durable material used in various construction projects, from building foundations to decorative patios. Whether you are a seasoned contractor or a DIY enthusiast tackling your first project working with concrete can be challenging. Understanding the nuances of mixing, pouring, and finishing concrete is essential to achieving professional results. This comprehensive guide offers 11 invaluable tips and tricks to help you navigate the complexities of working with concrete.
Ready to take on life with unshakable confidence? Whether you’re aiming to excel in your career, improve your relationships, or conquer DIY projects, NLP Hero’s Confidence Course is your key to success. Click here to start transforming your confidence and be better at everything you do!
From selecting the right mix to mastering finishing techniques, these insights will empower you to execute your concrete projects with precision and confidence. By following these expert recommendations, you can ensure that your concrete structures are not only structurally sound but also aesthetically pleasing. Dive into these detailed tips to enhance your skills and make your next concrete project a resounding success.
1. Choose the Right Concrete Mix
Selecting the appropriate concrete mix is crucial for the success of your project. There are various types of concrete mixes designed for different applications. For instance, standard mixes are suitable for general construction work, while high-strength mixes are ideal for structural elements that need to withstand significant loads.

For decorative projects, you may consider using specialty mixes that include additives for color or texture. Understanding the specific requirements of your project will help you choose a mix with the right balance of strength, workability, and durability.
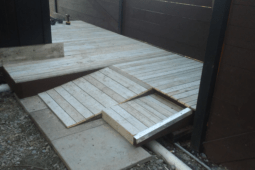
2. Prepare the Work Area
Proper preparation of the work area is essential for achieving a smooth and lasting concrete surface. Begin by clearing the site of any debris, vegetation, or existing structures. Use stakes and string to outline the project area, ensuring it is level and well-defined. For larger projects, consider using formwork to contain the concrete and maintain its shape until it sets.

Compacting the soil or gravel base beneath the concrete will prevent settling and cracking over time. Taking the time to prepare the site thoroughly can significantly impact the quality and longevity of the finished product.
3. Use Quality Tools and Equipment
Investing in high-quality tools and equipment can significantly improve the ease and efficiency of your concrete project. Essential tools include a wheelbarrow, mixing tools, shovels, and finishing trowels. For larger projects, renting or purchasing a concrete mixer can save time and ensure a more consistent mix.

Using professional-grade tools not only enhances the quality of your work but also reduces the physical strain and time required to complete the project. Proper maintenance and cleaning of your tools after each use will extend their lifespan and ensure they perform optimally.
4. Measure and Mix Concrete Accurately
Accurate measurement and mixing of concrete are critical to achieving the desired strength and consistency. Follow the manufacturer’s guidelines for the correct proportions of cement, sand, gravel, and water. Mixing too much water can weaken the concrete, while too little can make it difficult to work with.

Use a bucket or measuring container to ensure precise measurements, and mix the concrete thoroughly until it reaches a uniform consistency. For best results, mix small batches at a time to prevent the concrete from setting before you have a chance to use it.
5. Work Efficiently to Prevent Premature Setting
Concrete has a limited working time before it begins to set, so it’s essential to work efficiently. Once mixed, transport the concrete to the work area promptly and pour it into the prepared forms. Use a shovel or rake to spread the concrete evenly and eliminate any air pockets.

For larger projects, consider enlisting the help of additional workers to ensure the concrete is placed and finished before it starts to set. Planning your workflow and having all the necessary tools and materials on hand can help you work more efficiently and avoid costly delays.
6. Use Proper Reinforcement
Reinforcing concrete with steel bars (rebar) or wire mesh can significantly enhance its strength and durability. Reinforcement is especially important for structural elements such as foundations, slabs, and beams that will bear heavy loads. Position the rebar or mesh within the concrete forms before pouring, ensuring it is evenly distributed and adequately supported.

The reinforcement should be placed at the correct depth to provide maximum strength. By incorporating proper reinforcement, you can prevent cracking and structural failure, ensuring your concrete project stands the test of time.
7. Pour Concrete in Layers
Pouring concrete in layers, also known as “lifts,” can help achieve a more uniform and stable structure. For thick slabs or large projects, divide the concrete into manageable sections and pour each layer separately. Use a tamper or vibrator to compact the concrete and remove any air pockets between layers.

This technique ensures that each layer bonds effectively with the previous one, reducing the risk of weak spots or voids. Pouring in layers also allows you to work more methodically and maintain better control over the concrete placement.
8. Level and Smooth the Surface
Achieving a level and smooth surface is essential for both the functionality and appearance of your concrete project. Use a screed board or straightedge to level the freshly poured concrete, moving it back and forth across the surface to remove excess material and fill any low spots.

Follow up with a bull float to smooth the surface and bring the fine aggregates and cement paste to the top. For a polished finish, use a steel trowel to create a dense, smooth surface. Taking the time to level and smooth the concrete properly will result in a more professional-looking finish.
9. Control the Curing Process
Proper curing is crucial for the strength and durability of concrete. Curing involves maintaining adequate moisture and temperature conditions to allow the concrete to harden gradually. After finishing the surface, cover the concrete with a curing compound, plastic sheeting, or damp burlap to retain moisture.

Avoid exposing the concrete to extreme temperatures or direct sunlight during the curing period. The curing process typically takes several days to a week, depending on the mix and environmental conditions. By controlling the curing process, you can maximize the strength and longevity of your concrete.
10. Address Cracks Promptly
Cracks are a common issue in concrete, but addressing them promptly can prevent further damage and extend the life of your project. Small hairline cracks can often be repaired with a concrete patching compound or sealant. For larger cracks, consider using an epoxy injection or concrete resurfacer to restore the integrity of the structure.

Identifying the root cause of the cracks, such as improper curing or insufficient reinforcement, can help you prevent future issues. Regular inspection and maintenance of your concrete surfaces will help you catch and repair cracks before they become a significant problem.
11. Use Expansion Joints
Expansion joints are essential for accommodating the natural movement of concrete due to temperature changes and settling. These joints are typically placed at regular intervals in large concrete slabs, allowing the concrete to expand and contract without cracking. Use a jointing tool or saw to create the joints while the concrete is still fresh, ensuring they are evenly spaced and properly aligned.

Filling the joints with a flexible sealant can further protect the concrete from moisture and debris. By incorporating expansion joints, you can prolong the life of your concrete and maintain its structural integrity.
Related Articles
Working with concrete may seem daunting, but with the right knowledge and techniques, you can achieve impressive results. Whether you’re building a new patio, repairing a driveway, or constructing a foundation, these 11 tips and tricks will help you navigate the process with confidence. By choosing the right mix, preparing the work area, and using proper reinforcement, you can create durable and aesthetically pleasing concrete structures. Remember to work efficiently, control the curing process, and address any issues promptly to ensure the longevity of your project. With careful planning and attention to detail, you can master the art of working with concrete.
Ready to start your next project? Join our DIY community to receive tool tips, how-to guides, and exclusive creative insights. Subscribe to the ManMadeDIY newsletter now! Click here to unlock a world of hands-on inspiration.