Building Bifold Garage Doors From Scratch
Bifold garage doors are a great way to add curb appeal to your home while creating a functional space if you won’t be parking your vehicles inside the garage. If you’re familiar with hanging a door, building door frames, and working with wood in general, this project can be completed in a day or two without any previous experience. In fact, one of our employees took on this project on their own. It was their first time hanging bifold garage doors and we believe the results from this unique design speak for themselves.
Prepping For Bifold Garage Door Installation
The original garage door was in dire need of a replacement. The door was dented and needed to be manually opened and closed. The wood trim around the door was also showing its age and was no longer providing a good seal again the elements. Here’s what we were dealing with right from the start.
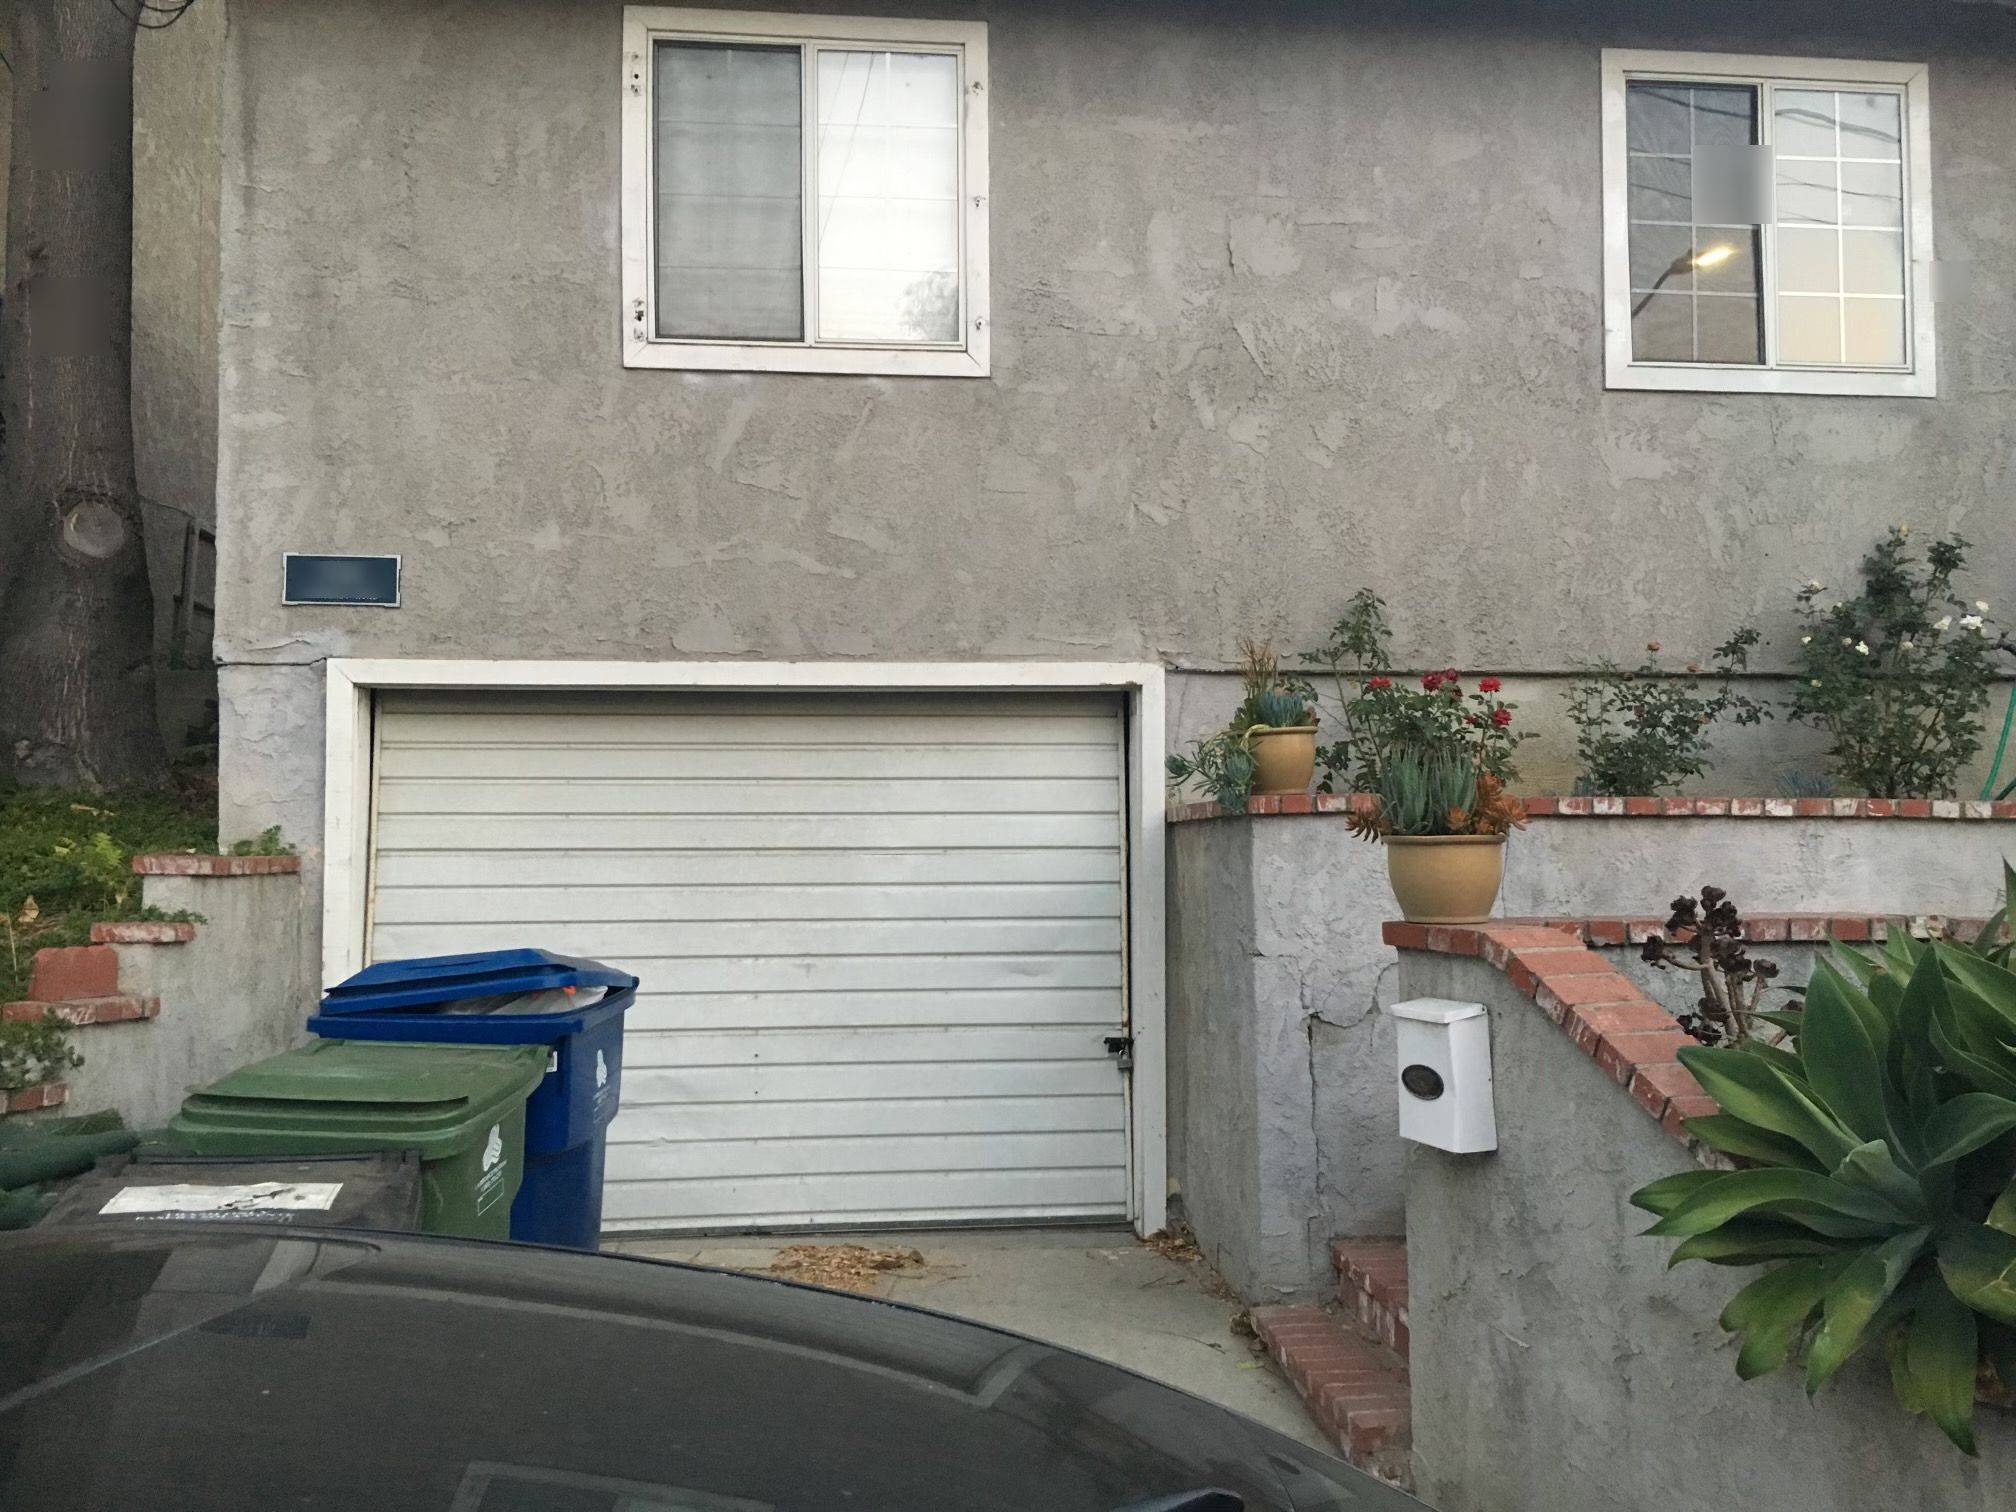
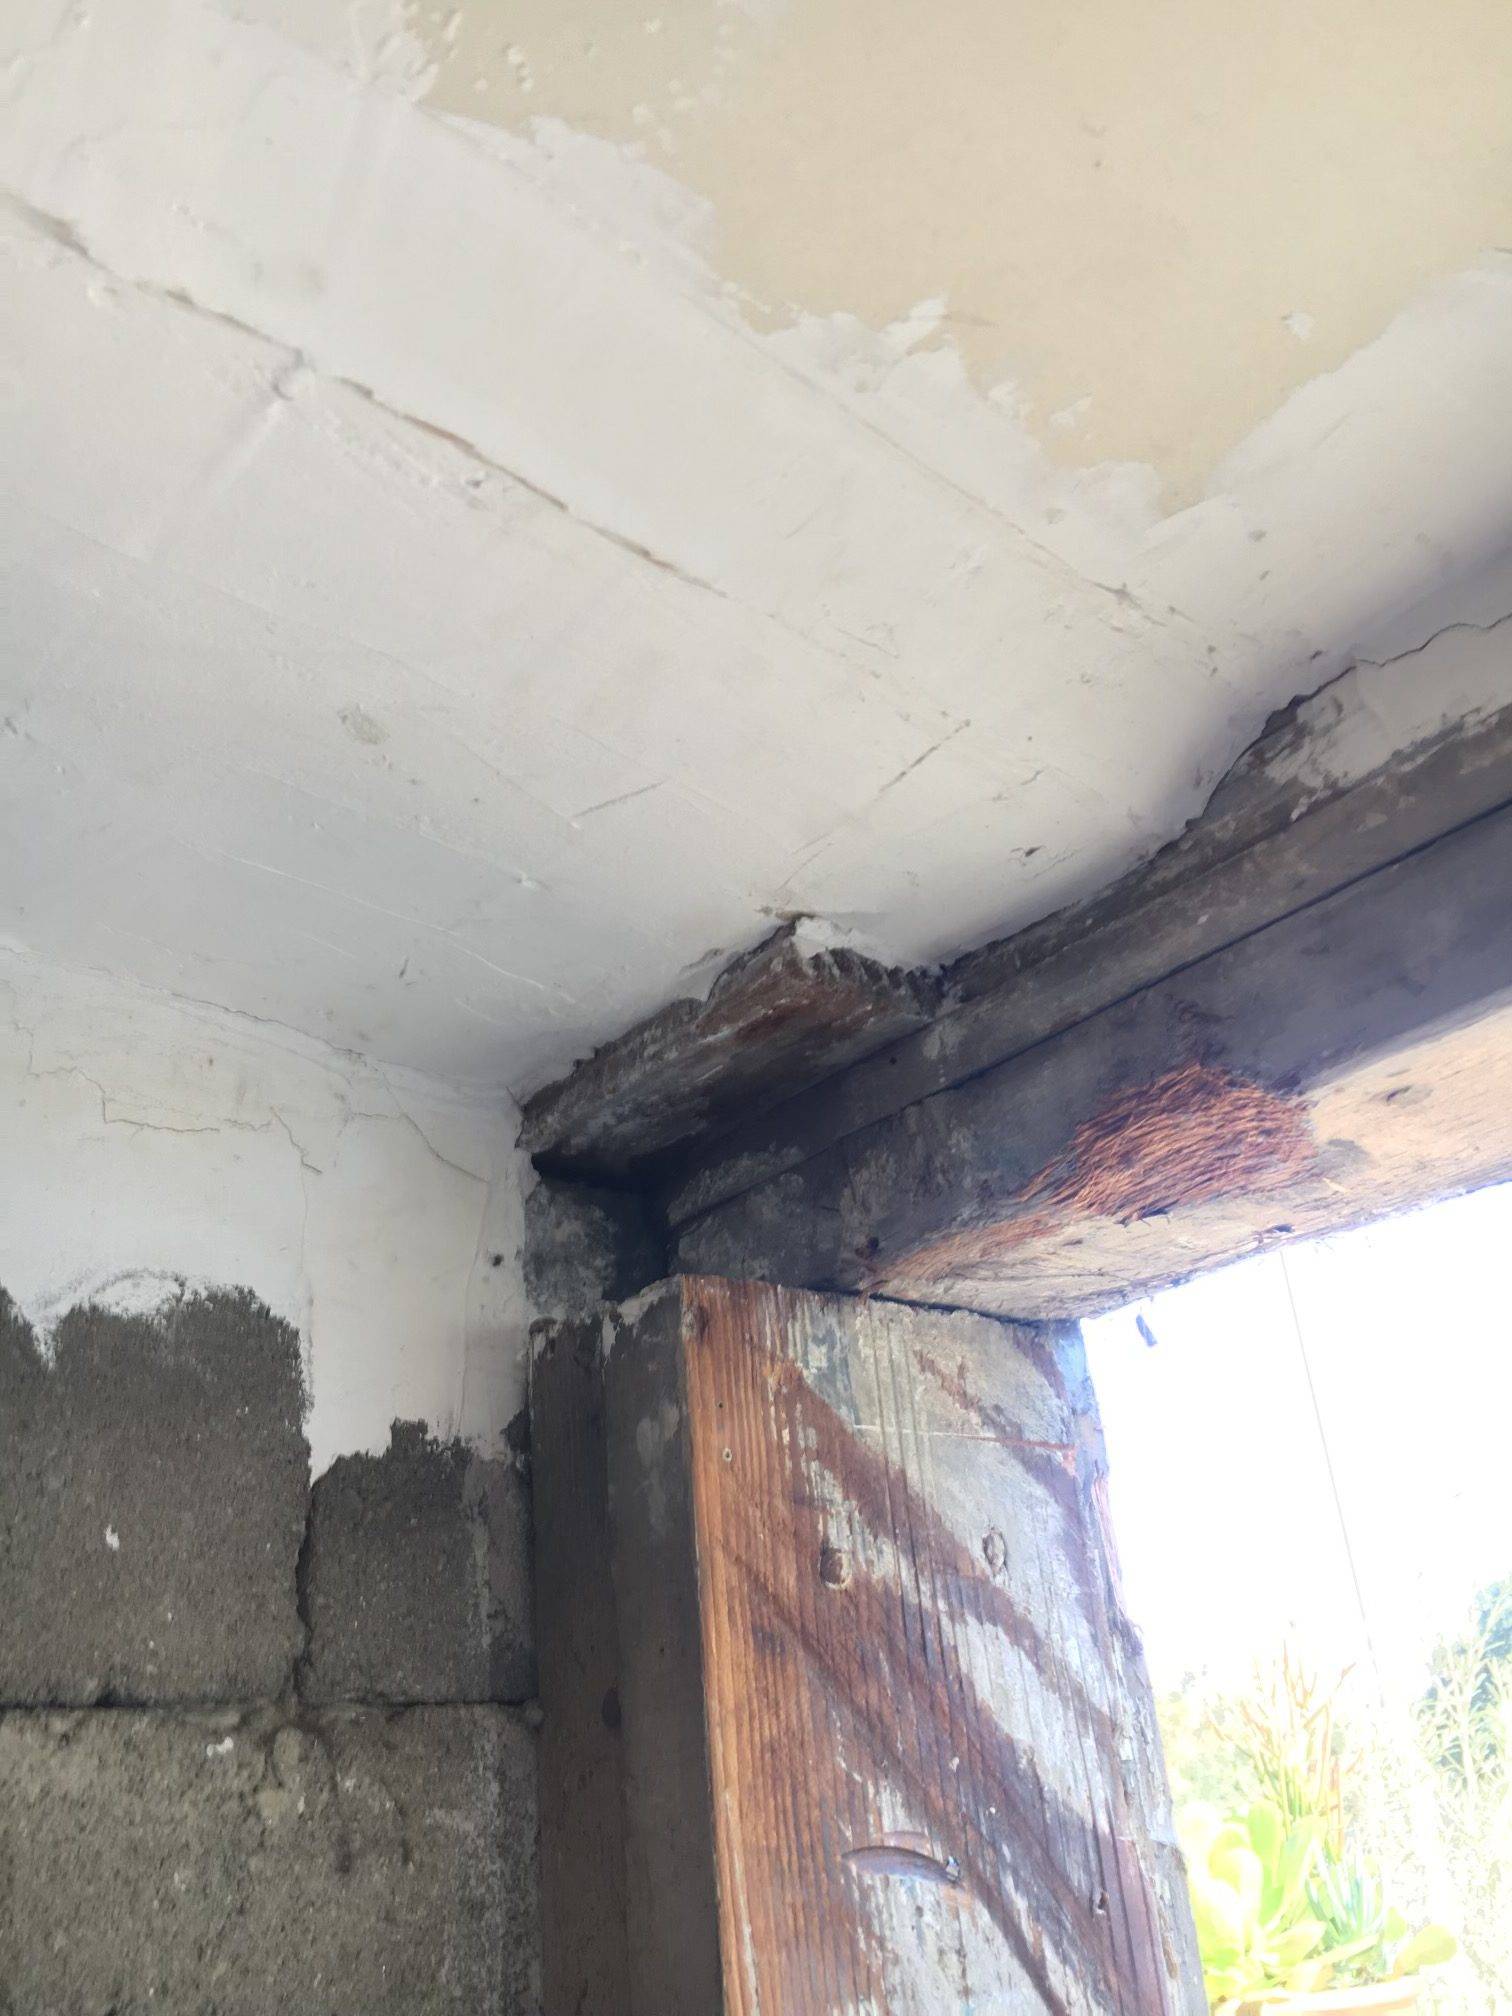
Working with an existing garage door posed a few issues with our build. After removing the garage door we noticed the wood surrounding the structure was not structurally sound. Wood was rotting along the top and sides and needed to be removed (where possible), reinforced, and patched.
The home was built in the 1950s and had been subjected to termite damage on the left post.
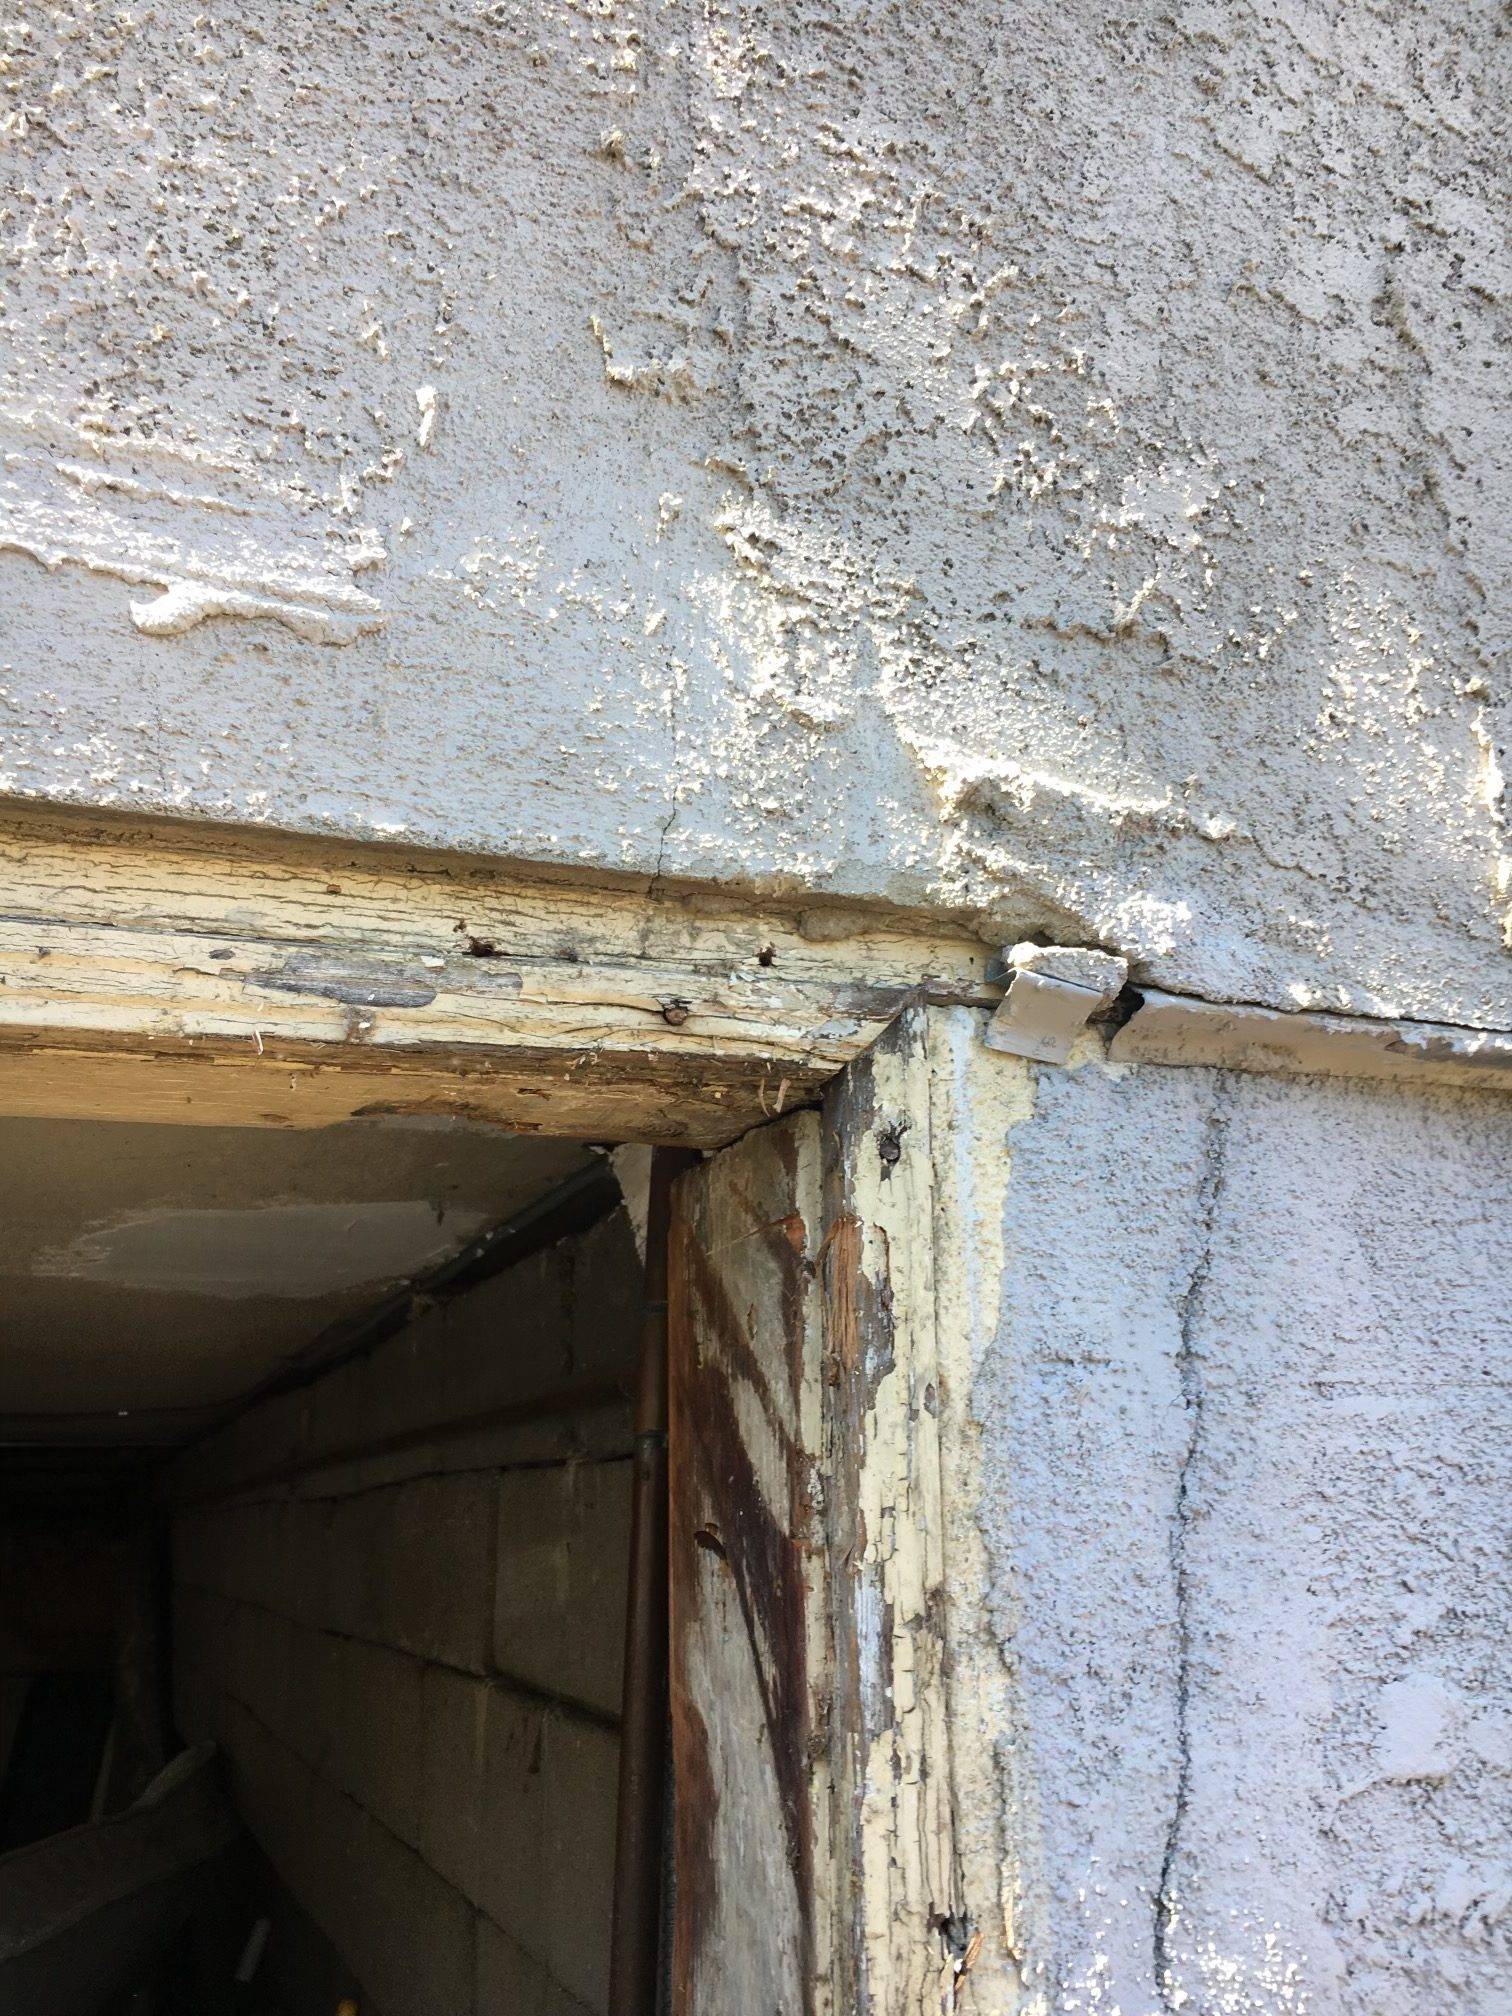
We had a feeling there was going to be damage to the garage door frame and we were prepared to fix any issues that presented themselves to us. We also knew some of the wood was surrounded by stucco and that we didn’t want to attempt a full and potentially costly full replacement.
Removing the entire structure would have involved potentially damaging the structural integrity of the home. To avoid structural issues, we instead chose to reframe the existing wood and replace the termite-infested left post. We used several 4×4’s to hold the frame in place as we removed and replaced the left post. We then patched the rotting wood and then re-framed the 1×4 framing with 2×4’s.
Because we were installing custom-built bifold garage doors, we were able to fix the framing issues before measuring our door frames to size.
When framing new wood into an existing structure, a construction adhesive should be used to ensure there is no future separation of the two pieces of wood. Feel free to generously apply the adhesive along the sides and middle of the wood where it will make contact with the existing structure.
Next, we measured the remaining space and created our plan for fitting the bifold garage doors. In our plan, we decided to place a standing hinged door on the far right side and 2 bifolding doors on the left side of the garage door opening.
Building Bifold Garage Doors
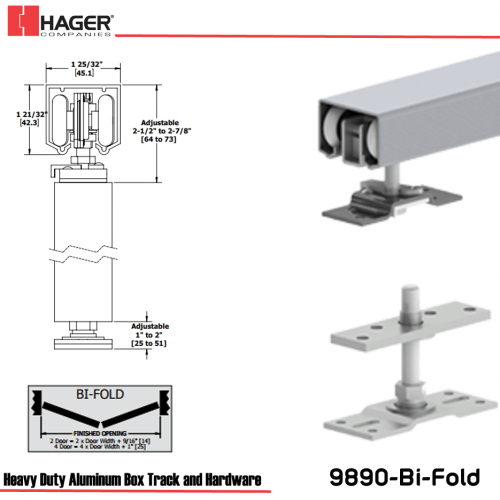
We purchased metal slides and pivot hinges online to save time and a trip to our favorite DIY store. We suggest choosing metal slides and pivot hinges that support more weight than needed, especially if your doors will be braving the elements which can place them under extra stress and added weight when wet.
The Bifold garage door hinges can be purchased for around $125. Here’s an example of what you’ll want to look for when building out this project.
To hang our doors we built three equally sized door frames out of wood and attached them with a nail gun. We then re-inforced each frame with metal corner anchors. The anchors help structurally while providing a measure of anti-sag protection. The door on the far right was attached with standard door hinges and hardware.
The doors on the far left and right were framed to accommodate windows which we purchased at a local Salvation Army for $5. When roughing in components for our builds, upcycling is often a go-to solution for saving money while being environmentally conscious.
Once the frames were fully built we set them on hinges and on a concrete anchor for the far left pivot. We provided 1/2-inch spacing between each door to ensure the doors would move under expansion and shrinking. Our build took place in California, where additional spacing isn’t a big concern during the colder winter months. A slightly lessened gap and weather-stripping can be added if you live in a climate that requires a firm seal.
Keep in mind, the bifold door is not airtight. If your garage is a central point of gathering during cold weather, you can attempt to create a better seal with additional weather-stripping. Our goal was to create a space free of leaves, dirt, and pests. Outside debris control can be accomplished by adding weather stripping to the inside bottom portion of the door.
The anchors for the bifold needed a pivot point on the far left side that was placed directly into the cement floor of the garage. To accomplish this goal we used a cement-specific drill bit and cement glue that helps ensure stability since the bifold door is used regularly. We believe in overkill when it comes to our builds to ensure the longevity of the finished product.
After the frames were in place we added the redwood paneling that was chosen for the project. By adding the paneling after the fact, you can ensure your initial frame is working as desired and make adjustments before moving onto this step.
Our redwood was coated with water sealing natural stain on the redwood. The home is located in Southern California so our seal was a good choice. If you live in an area with less forgiving weather, you may want to consider a polyurethane or varnish that can help seal out snow, rain, and other detrimental weather conditions.
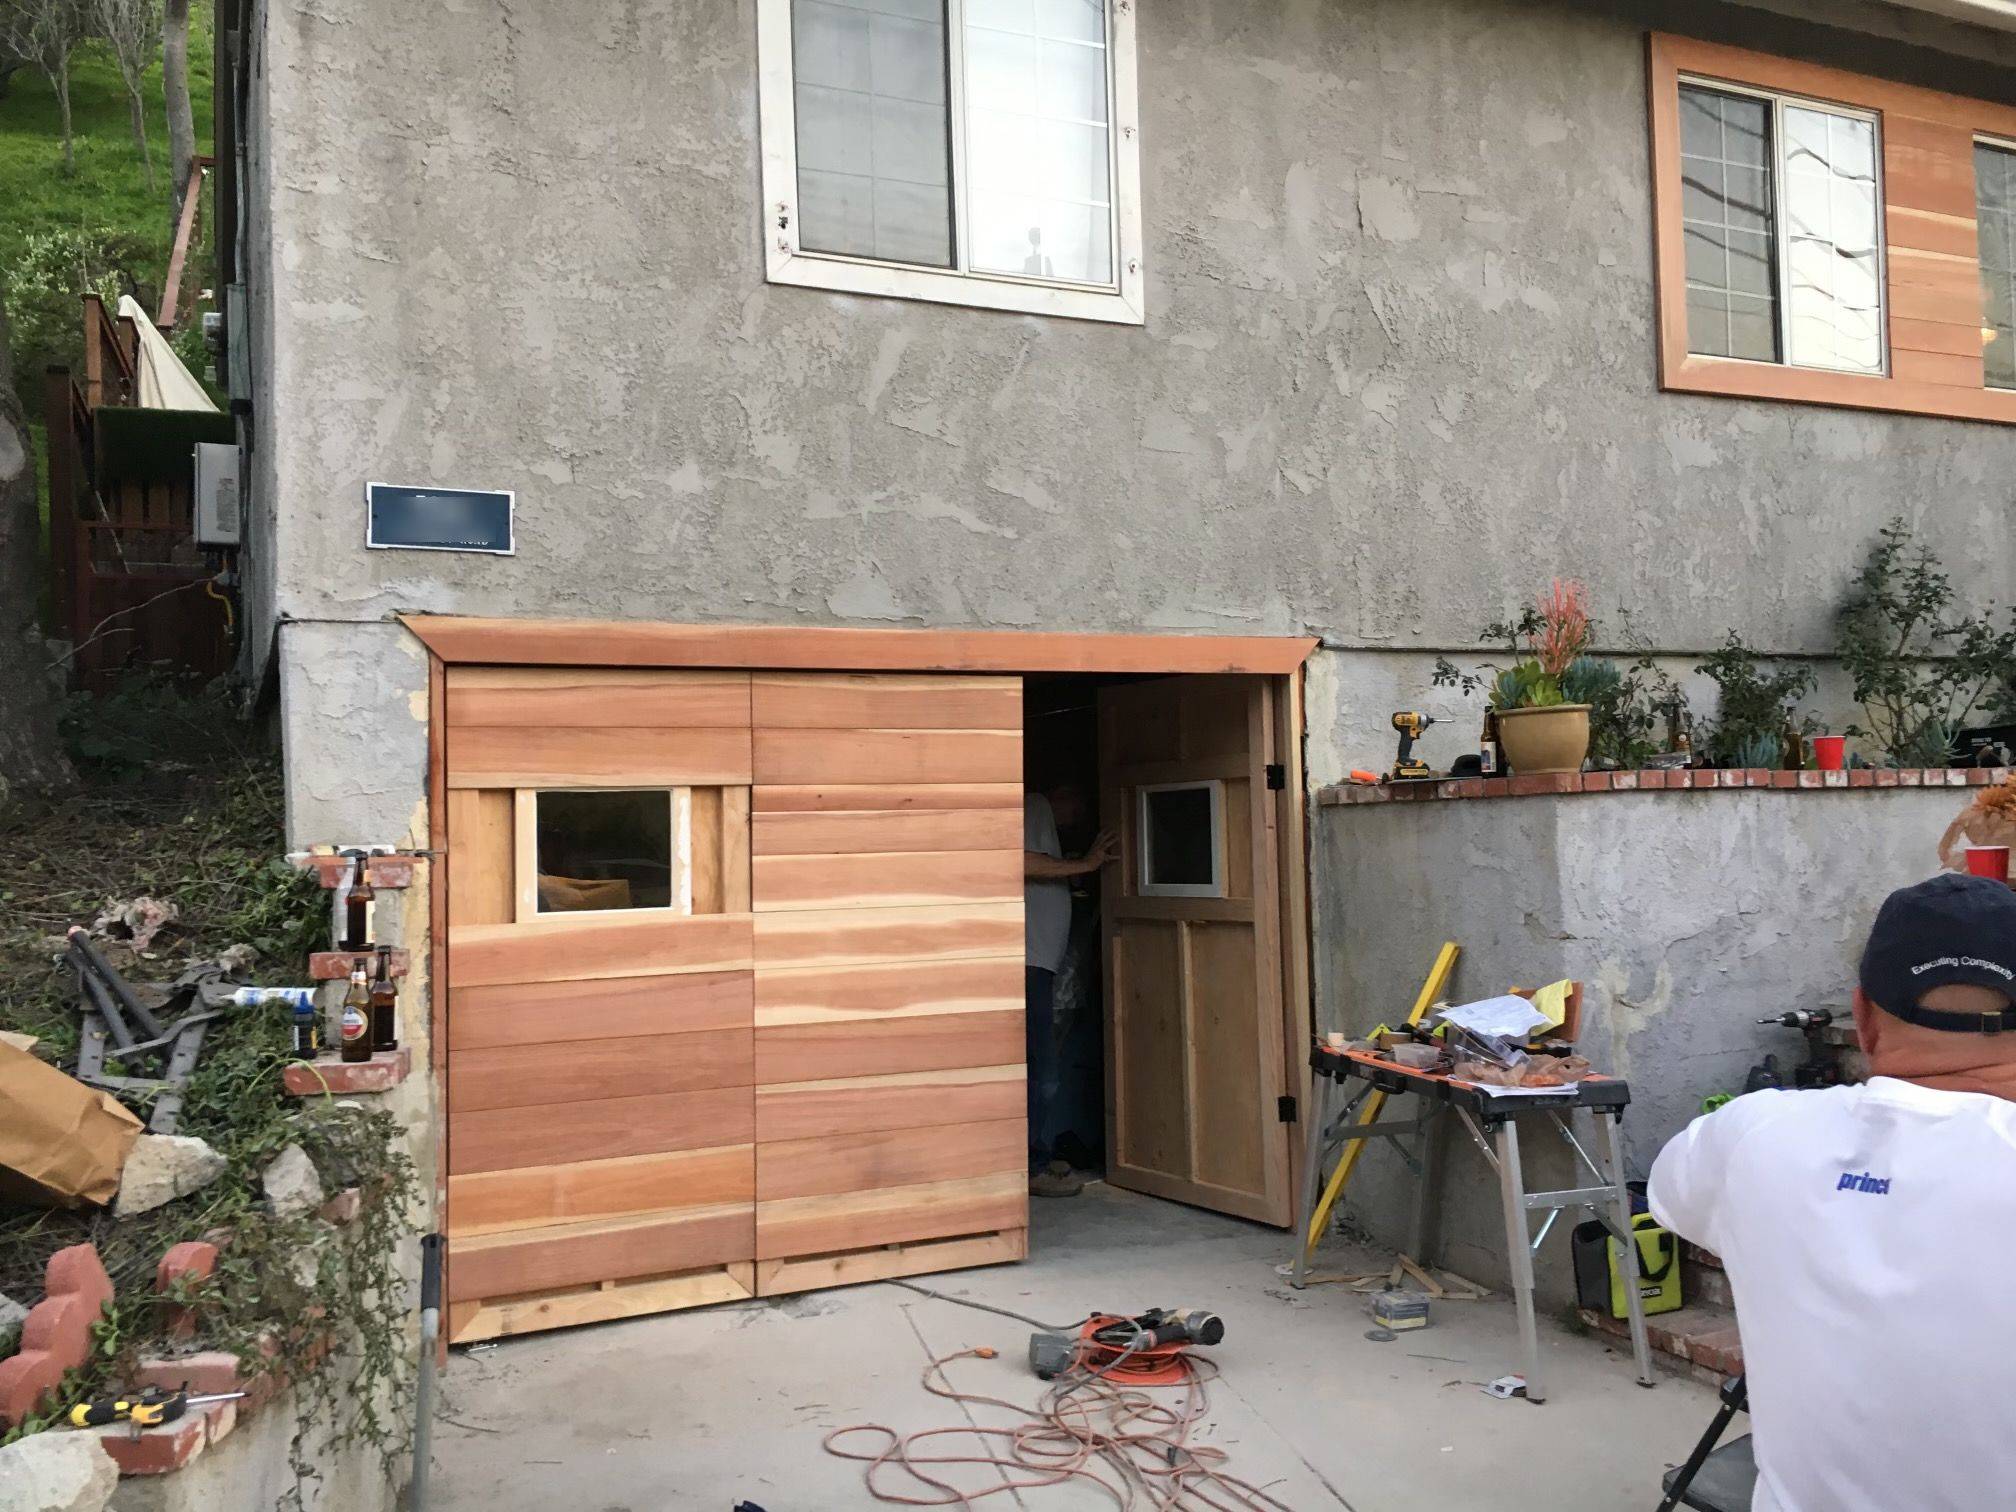
After installing the redwood paneling we applied a final round of sanding and caulking around the roughed-in framing. Extra caulking was used around the wood frame and stucco and to seal in the windows. We then applied our redwood trim, starting with the top piece and then finishing off with our side pieces.
At this point, your product should look similar to the bifold garage doors shown below.
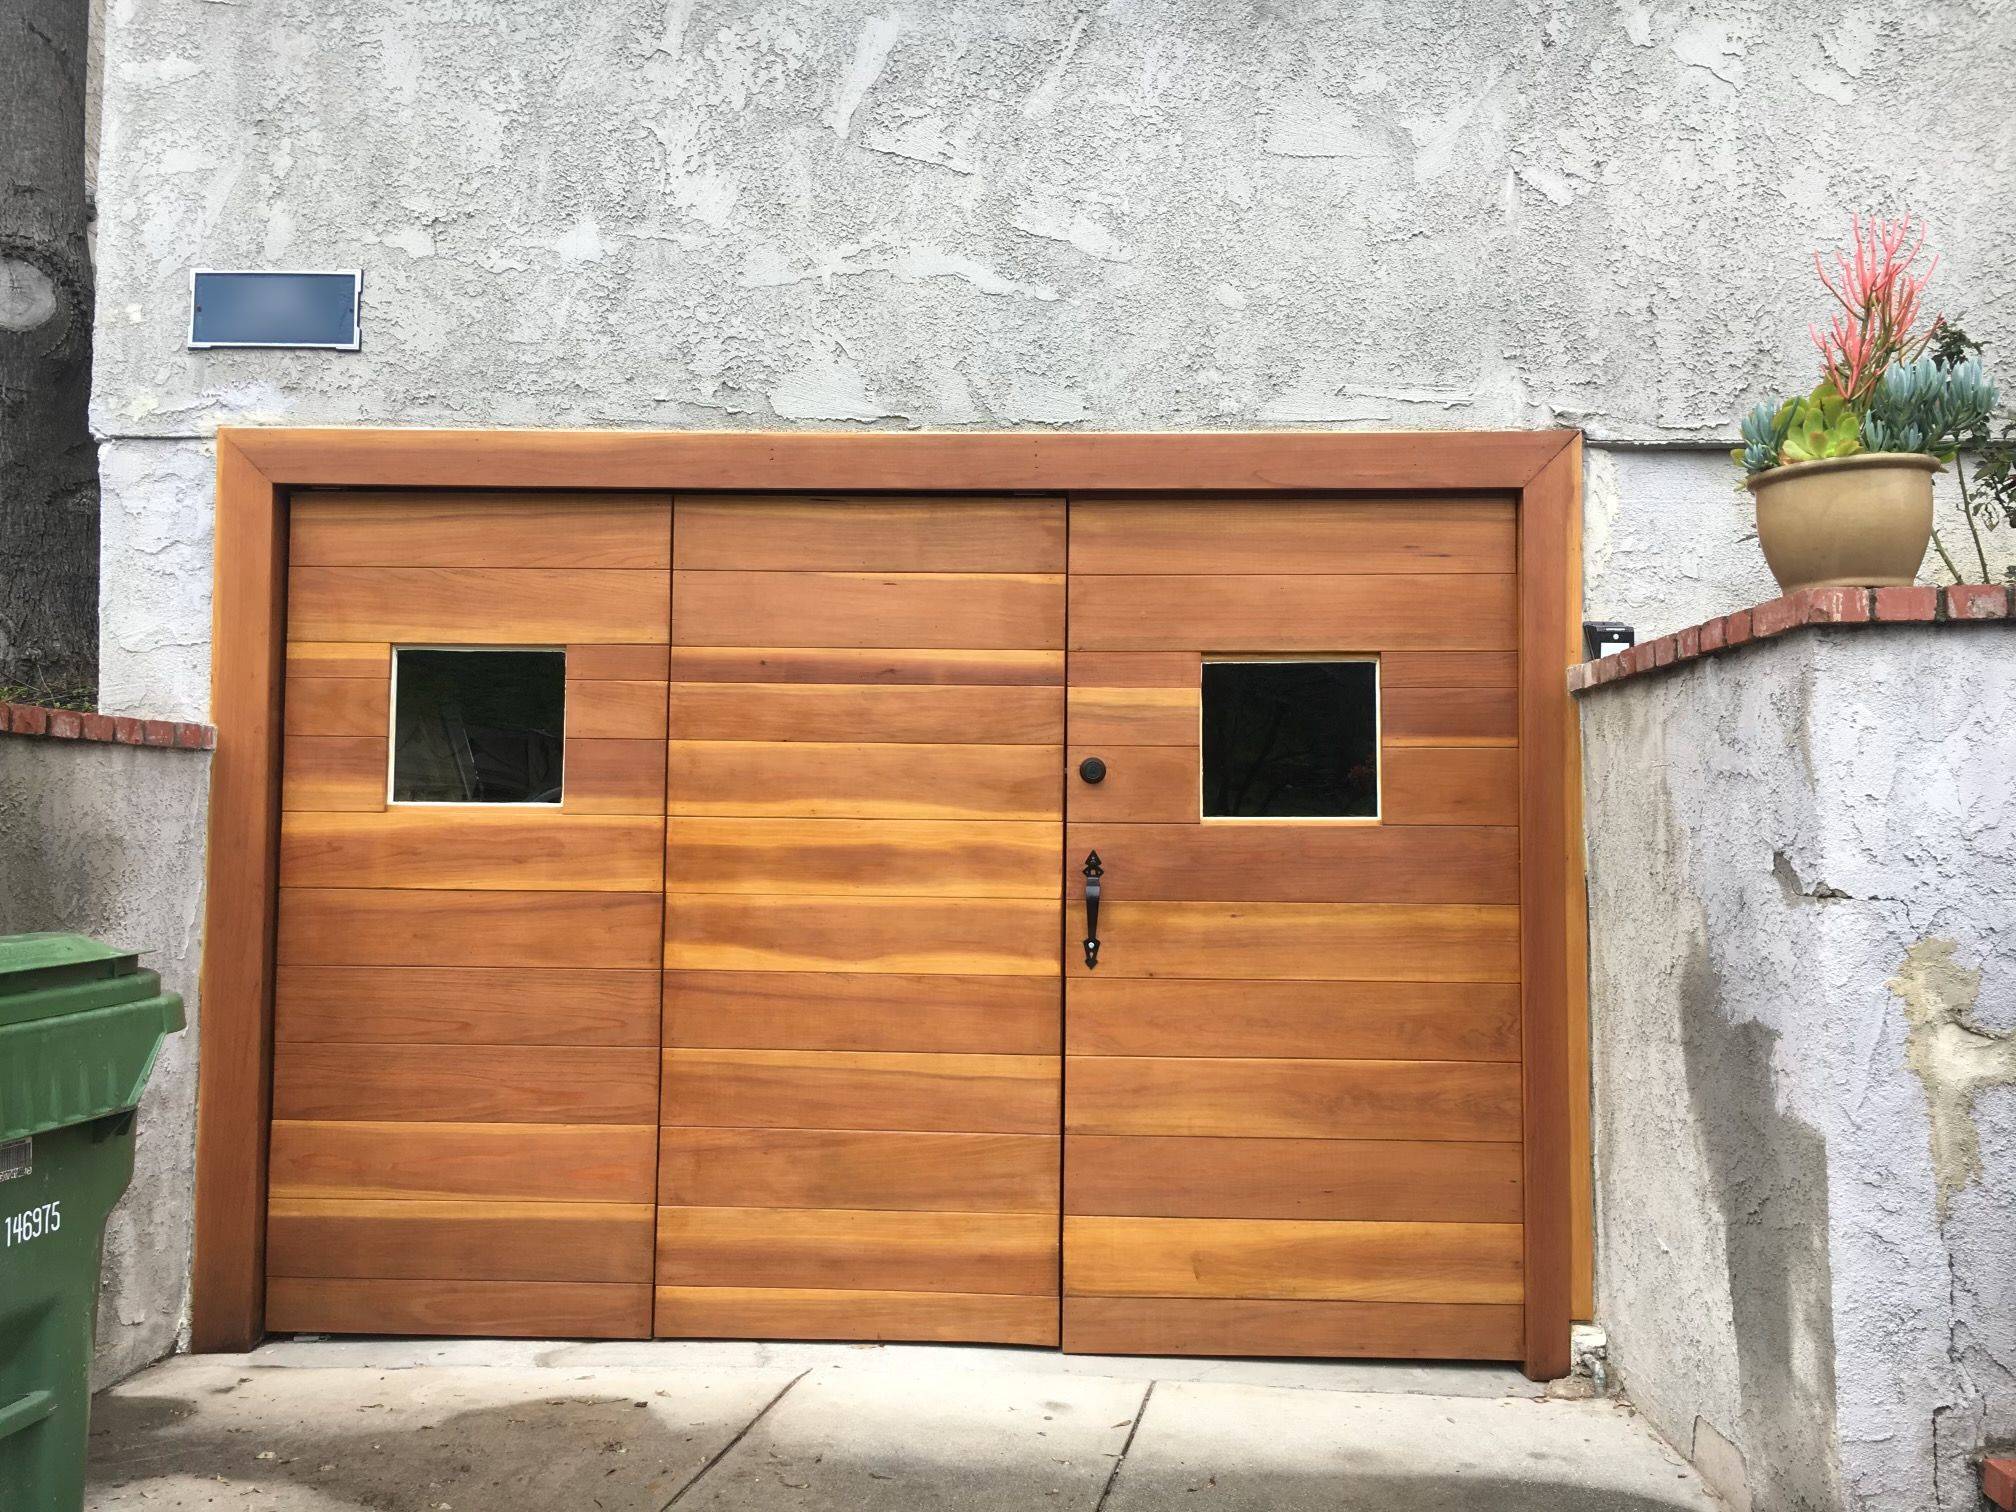
We completed the garage door portion of our project by adding door hardware and sweeps. Our hardware included a deadbolt on the main door for added security along with a simple but elegant black handle which provides for a stark contrast to the natural wood look.
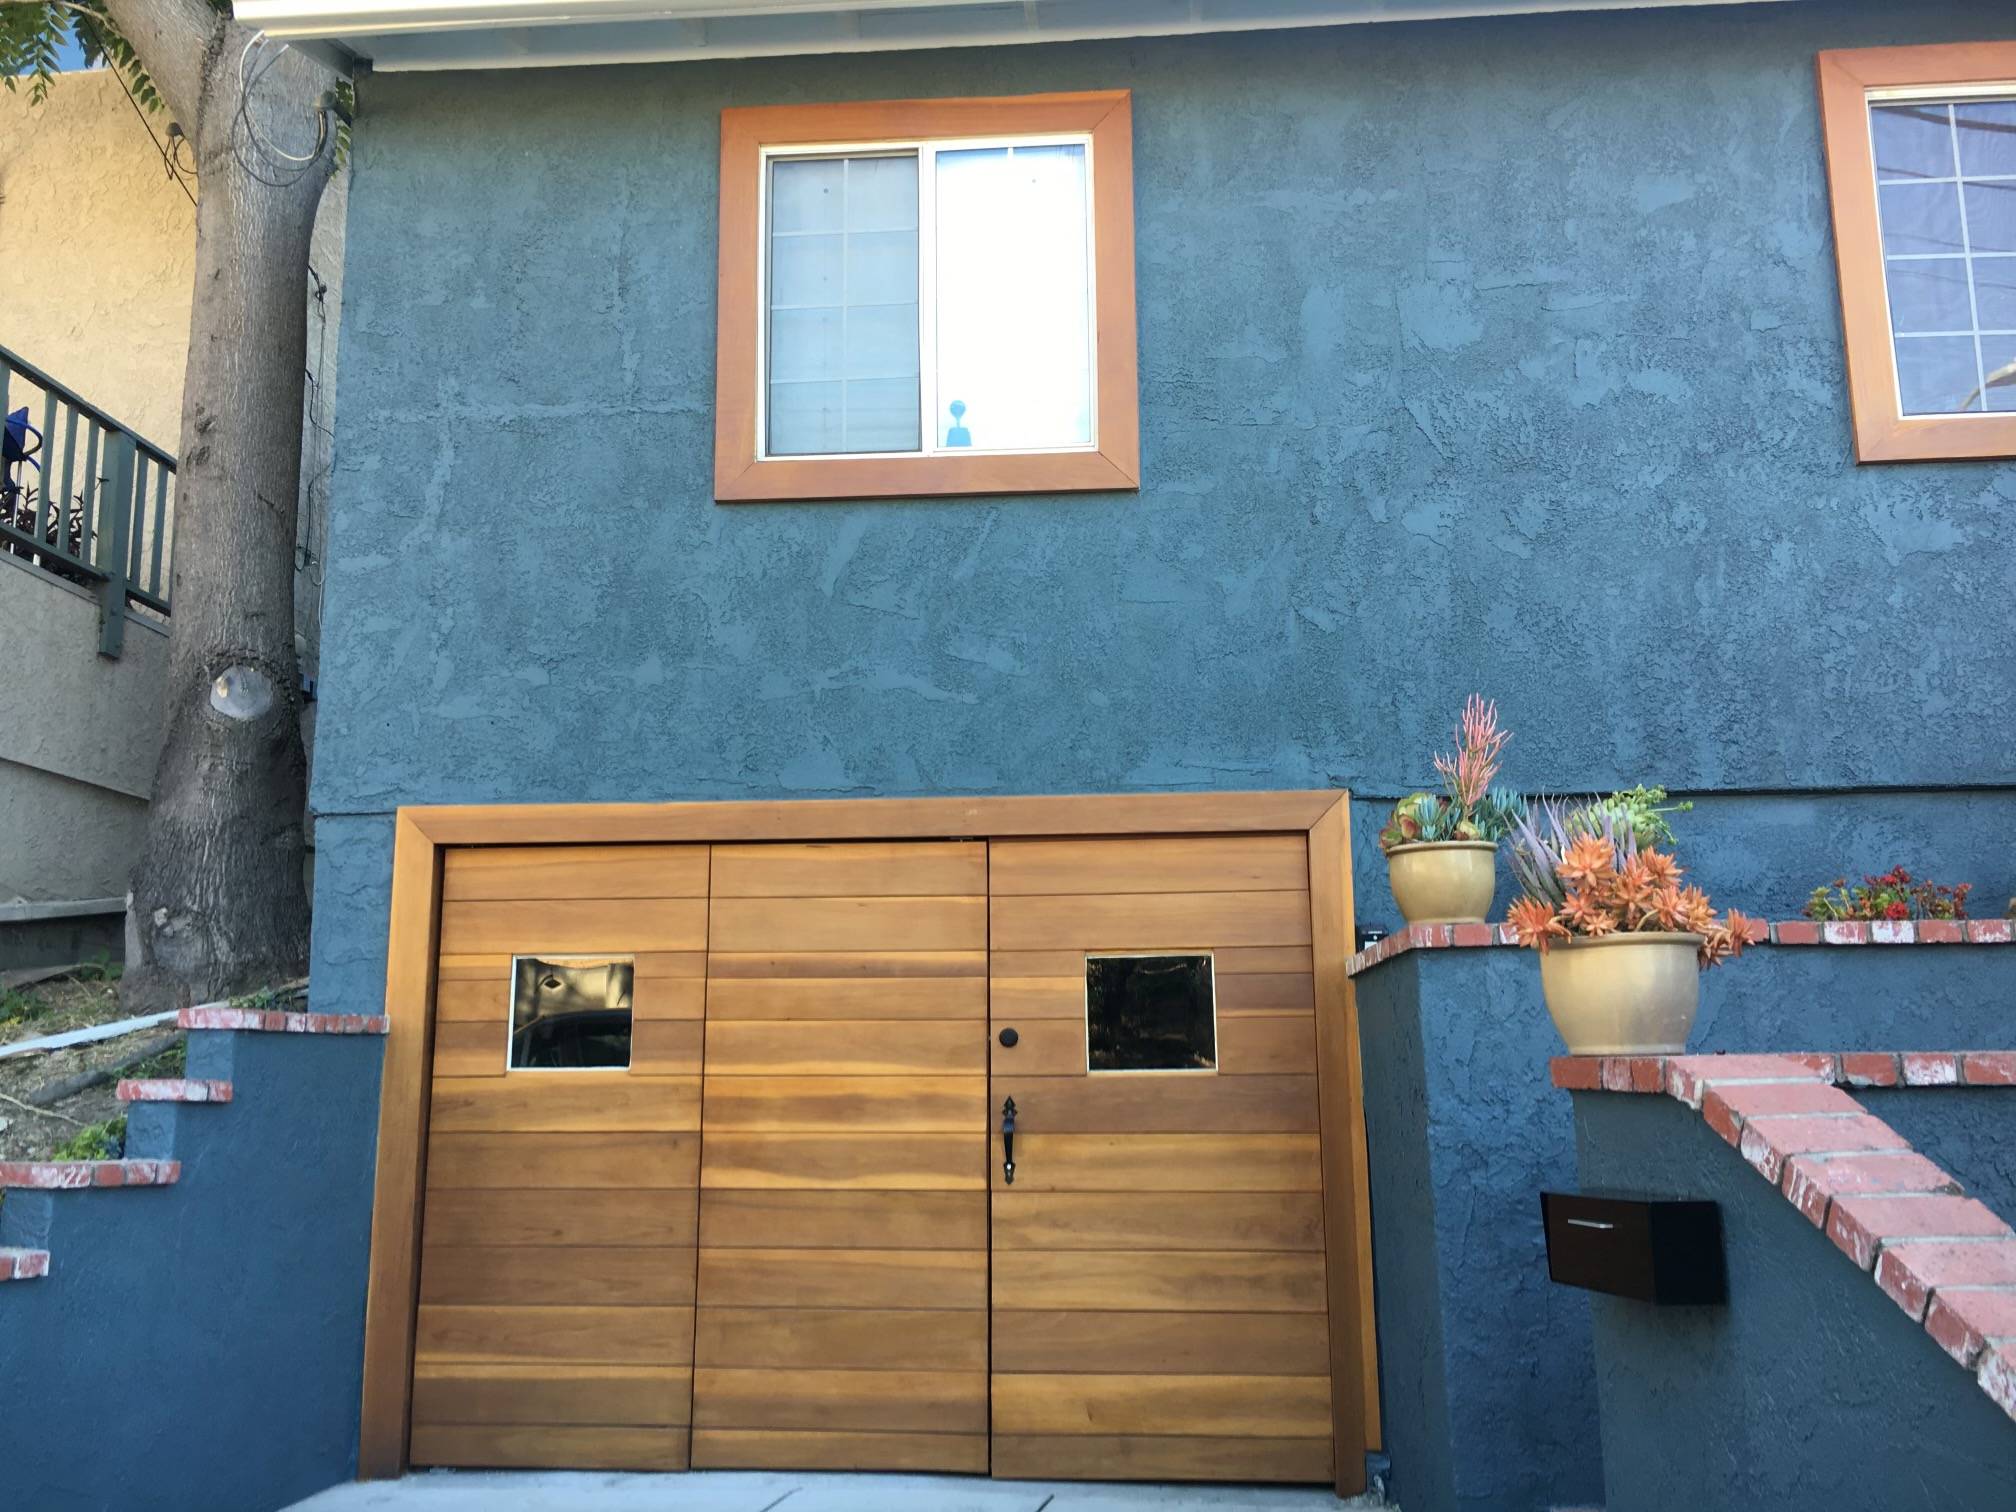
With a focus on curb appeal, you’ll notice that we also created matching redwood frames for the home’s windows and complemented the redwood with a dark blue coat of paint that was applied to the home’s exterior stucco walls.
If your garage door is detached from your home, the doors can stand on their own. In our case, we tied the design of the door into the home’s windows and a large patio area that provides a seamless look across the house’s exterior.
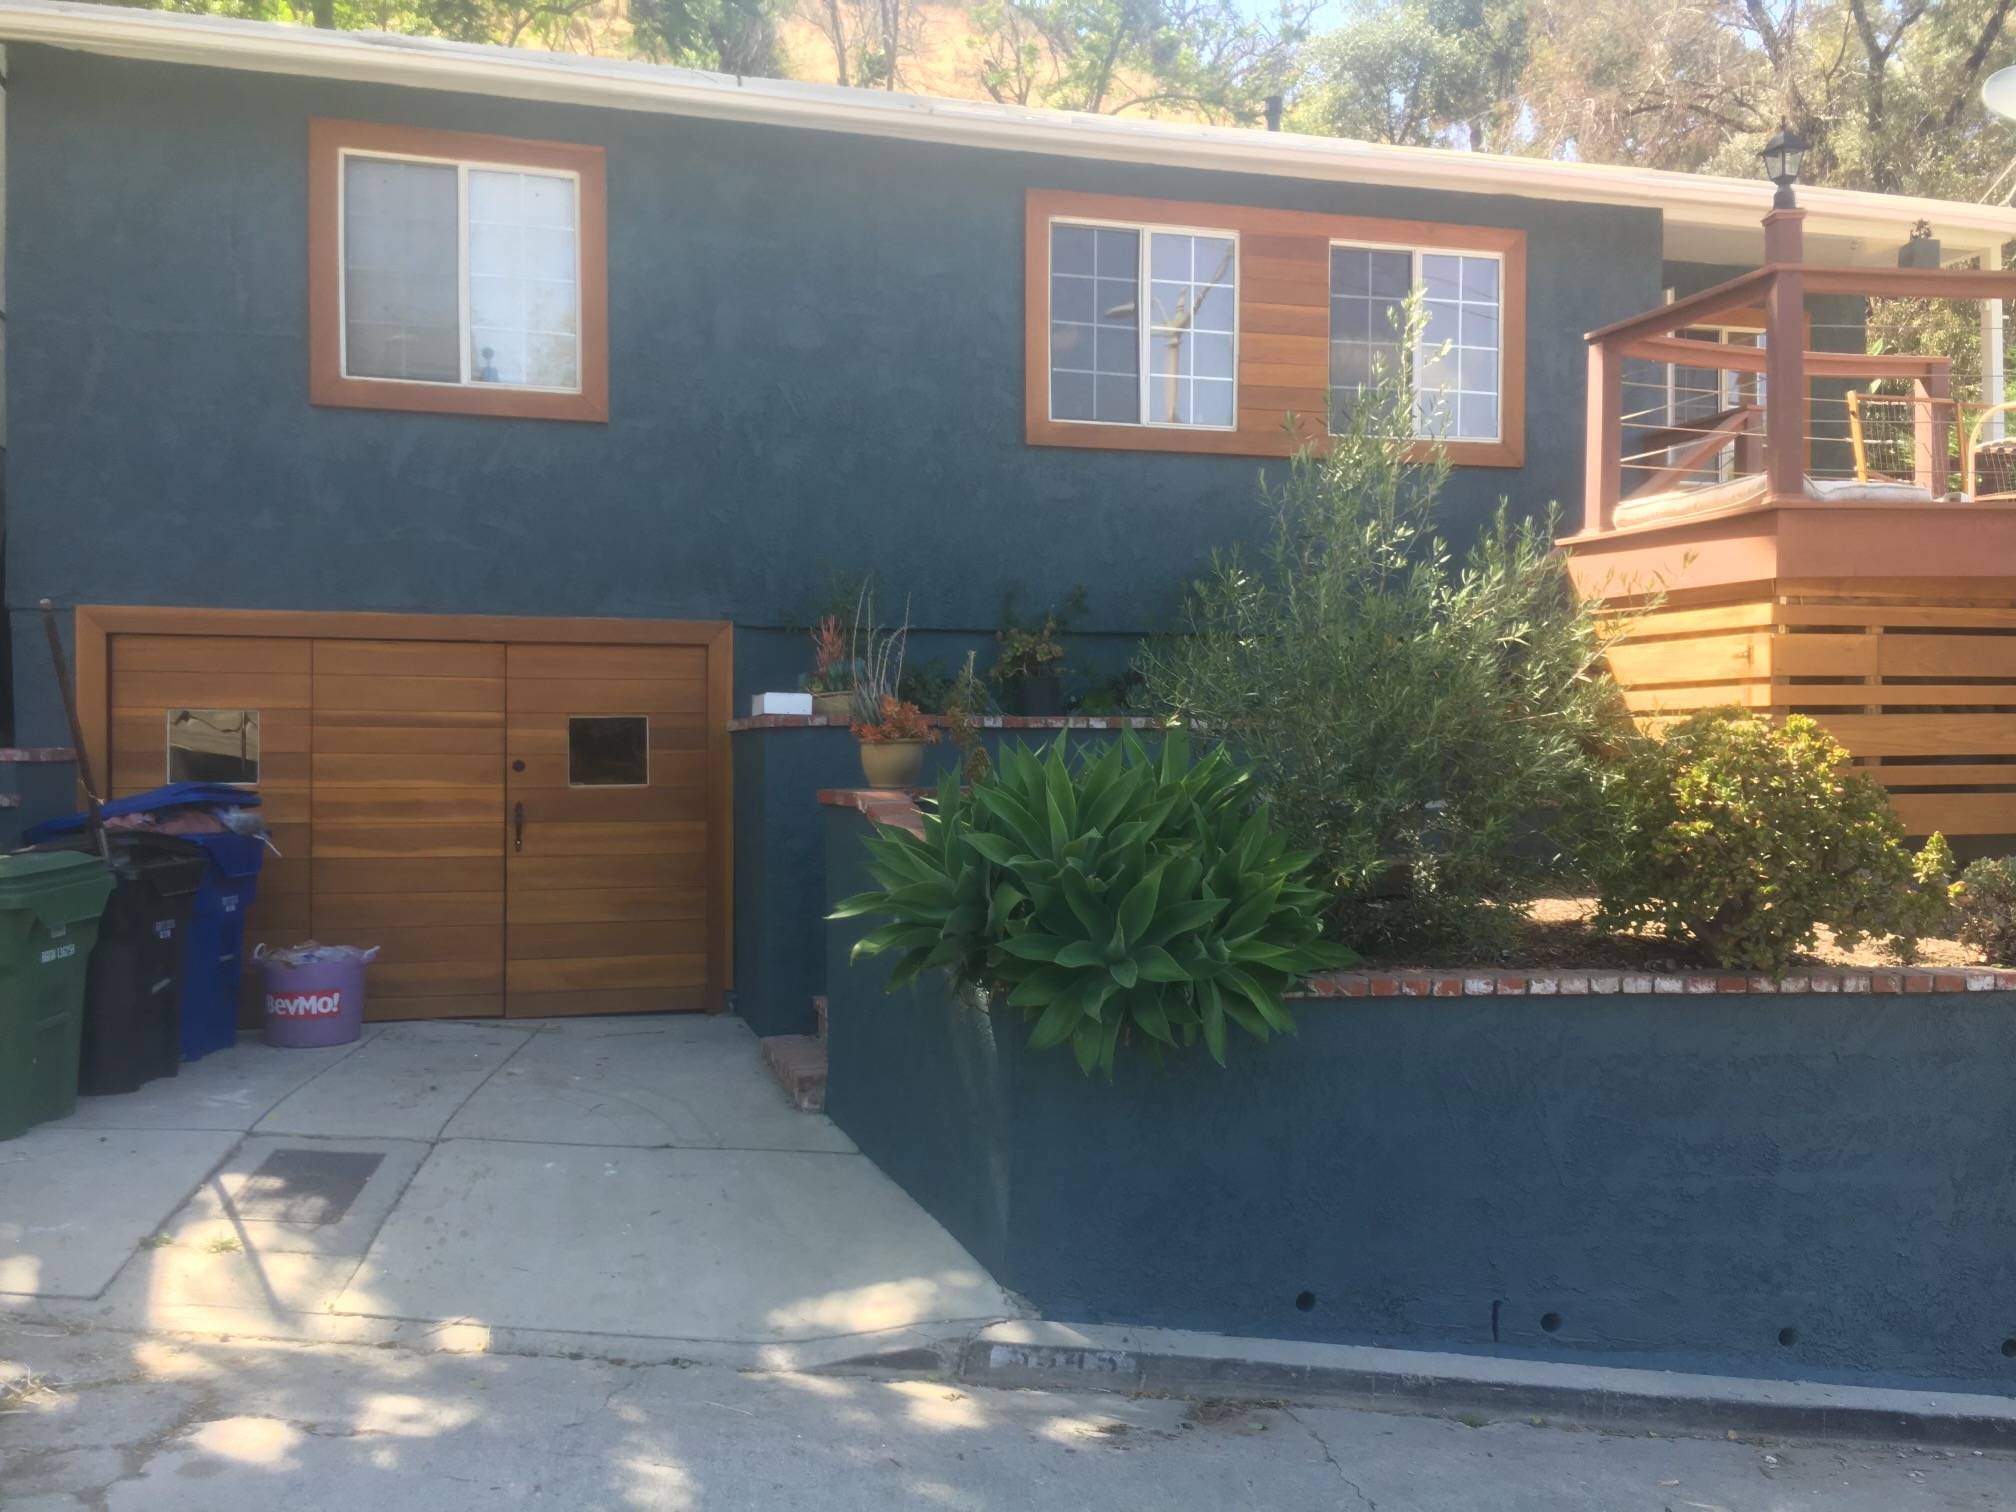
At ManMadeDIY we often focus on the minutiae of do-it-yourself projects. We chose to share this project because it highlights a very different aspect of DIY builds. Our builder loves to take on projects in their spare time but they’re not professional contractors, woodworkers, etc.
Whether you’re hanging bifold garage doors, building a new patio, or taking on various other projects, the right amount of planning and execution can make all the difference. As the saying goes, measure twice, cut once.
Materials Needed For This Bifold Garage Door DIY Project
- 4×4 treated wood posts (if fixing structural integrity)
- 2×4’s for door and threshold framing
- 1×6 redwood panels
- Metal slides
- Pivot hinges
- Cement anchor
- Cement drill bit
- Caulking
- Construction Adhesive
- Nail gun
- Nails
- Finishing nails
- Water sealing natural stain
- Locks and Hardware
Bifold Garage doors add a stylish look that delivers a lot of curb appeal to a home. As you can see, it doesn’t take a lot of materials, which makes it a perfect weekend project once you’ve secured the needed supplies.

