How to Create a DIY Cat Scratching Post for Your Feline
Creating a DIY cat scratching post can be an incredibly rewarding experience – not only for you as a creator but also for your feline friend who will adore their new plaything. Cats have a natural instinct to scratch, and providing them with a dedicated scratching post can save your furniture and carpets from those sharp claws. In this article, we’ll guide you through the steps to create a durable and attractive DIY cat scratching post that will last for years.
Ready to take on life with unshakable confidence? Whether you’re aiming to excel in your career, improve your relationships, or conquer DIY projects, NLP Hero’s Confidence Course is your key to success. Click here to start transforming your confidence and be better at everything you do!
Understanding the Benefits of a DIY Cat Scratching Post for Your Feline Friend
Cats need to scratch for several reasons, including marking their territory, sharpening their claws, and stretching their muscles. A DIY cat scratching post meets all these needs while allowing you to customize the design to fit your home’s decor. Unlike store-bought scratching posts, a DIY option enables you to choose durable materials that can withstand your cat’s vigorous scratching. Additionally, making your own scratching post can be a fun and creative project that offers personal satisfaction and a sense of accomplishment.

When you create your own cat scratching post, you can tailor it to your cat’s preferences. Some cats prefer vertical scratching posts, while others like horizontal or angled ones. By observing your cat’s scratching habits, you can design a post that will become their favorite scratching spot. Plus, involving your cat in the process by letting them explore the materials and test the post as you build it can make the project even more enjoyable.
Gathering the Necessary Materials and Tools for Your DIY Cat Scratching Post
Before you begin building your DIY cat scratching post, it’s essential to gather all the necessary materials and tools. The basic supplies typically include a sturdy base, a post, a bunch of sisal rope, and some form of adhesive. A wooden base is ideal because it provides a stable foundation, while a wooden or PVC pipe can serve as the post. Sisal rope is the preferred material for wrapping the post because it is durable and provides a satisfying texture for cats to scratch.

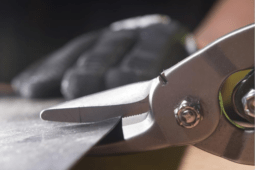
In addition to the primary materials, you’ll need tools such as a saw, drill, screws, and a staple gun. It’s also helpful to have sandpaper on hand to smooth any rough edges on the wood. If you want to add extra features like platforms or toys, make sure to gather those materials as well. Having everything ready before you start will make the building process more efficient and enjoyable.
Step-by-Step Instructions for Building a Long-Lasting Cat Scratching Post

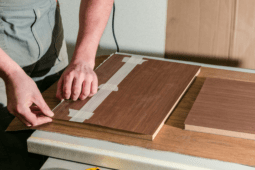
- To begin creating your DIY cat scratching post, cut the wooden base and post to the desired sizes.
- Sand the edges of the wood to ensure there are no splinters that could harm your cat.
- Next, attach the post to the center of the base using screws and a drill. (Make sure the post is securely fastened and stable.)
- Once the post is attached, it’s time to wrap it with sisal rope.
- Apply a small amount of adhesive to the bottom of the post and begin wrapping the rope tightly around it, securing it with staples or more adhesive as you go.
- Continue wrapping the rope until the entire post is covered, making sure there are no gaps.
- If you run out of rope, simply secure the end and start with a new piece, overlapping slightly to maintain a continuous surface.
Adding Personal Touches and Enhancements to Your DIY Cat Scratching Post
One of the advantages of making your own cat scratching post is the ability to customize it with personal touches and enhancements. You can add platforms, perches, or even small hammocks to create a multi-functional play area for your cat. Covering the base and any additional surfaces with carpet or fabric can provide extra comfort and appeal for your feline friend.

Consider incorporating catnip into the post to attract your cat and encourage them to use it. You can sprinkle dried catnip on the wrapped sisal rope or sew catnip-filled pouches into the fabric coverings. Adding hanging toys or bells can also make the scratching post more enticing and provide additional stimulation for your cat.
Ensuring Your DIY Cat Scratching Post is Safe and Durable for Years to Come
Safety and durability are crucial factors when creating a DIY cat scratching post. Regularly inspect the post for any loose or damaged parts and make necessary repairs to ensure it remains safe for your cat to use. Using high-quality materials and taking the time to build a sturdy structure will help the post withstand years of scratching.

It’s also important to place the scratching post in a suitable location. Cats are more likely to use the post if it is placed in an area where they spend a lot of time or near their favorite resting spots. Avoid placing the post in high-traffic areas where it might get knocked over or in spots that are difficult for your cat to access.
Related Articles
Creating a DIY cat scratching post is a fulfilling project that benefits both you and your cat. Not only do you get to enjoy the process of building something with your own hands, but your cat will also appreciate having a dedicated place to scratch and play.
Remember to regularly check the post for wear and tear and make any necessary repairs to keep it in good condition. With a little effort and creativity, you can provide your cat with a durable and enjoyable scratching post that will last for years, saving your furniture and keeping your feline friend happy and healthy.

![How To Clean Patio Pavers [Without a Pressure Washer!]](https://www.manmadediy.com/wp-content/uploads/sites/52/2024/06/broom-15377-238x170.png)