6 Easy DIY Projects Using Minimal Tools and Materials
Are you looking for practical and easy DIY projects that don’t require a workshop full of tools? Here are six straightforward projects that use materials you likely already have at home. These projects are perfect for anyone who enjoys hands-on tasks and wants to create useful items that come in handy during everyday life.
1. Wooden Phone Stand
Keep your phone upright and easily accessible with this simple wooden phone stand.

Materials:
- Scrap wood pieces (e.g., an old wooden plank)
- Sandpaper
- Wood glue
Instructions:
- Cut the Wood: Cut two pieces of wood. One piece should be about 6 inches long and 2 inches wide, and the other about 2 inches long and 2 inches wide.
- Sand the Edges: Smooth the edges of the wood pieces with sandpaper.
- Create a Slot: On the larger piece, cut a slot that is about half an inch wide and deep enough to hold a phone.
- Glue the Pieces Together: Attach the smaller piece perpendicularly to the back of the larger piece to act as a support.
- Let it Dry: Allow the glue to dry completely before using the stand.
2. Magnetic Tool Holder
Keep your tools organized and within reach with this magnetic tool holder.
Materials:
- A wooden strip (e.g., from an old pallet)
- Strong magnets
- Wood glue or screws
Instructions:
- Prepare the Wood: Cut the wooden strip to the desired length and sand any rough edges.
- Attach the Magnets: Evenly space the magnets along the strip and secure them with wood glue or screws.
- Mount the Holder: Attach the strip to a wall or workbench using screws.
- Test It Out: Use the holder to organize and store metal tools.
3. Paracord Keychain
A durable and stylish way to keep your keys organized.

Materials:
- Paracord (about 3 feet)
- Keyring
- Scissors
- Lighter (optional for sealing the ends)
Instructions:
- Attach the Paracord: Fold the paracord in half and loop it through the keyring.
- Start the Braid: Create a series of knots (e.g., cobra weave) until you reach the desired length.
- Seal the Ends: Cut off any excess paracord and use a lighter to melt the ends to prevent fraying.
4. Tennis Ball Holder
A fun and quirky way to store keys, mail, or other small items.

Materials:
- Old tennis ball
- Utility knife
- Screw or adhesive hook
Instructions:
- Cut the Slit: Using a utility knife, carefully cut a slit into the tennis ball to create a mouth-like opening.
- Attach the Holder: Screw the tennis ball onto a wall or door, or use an adhesive hook to hang it.
- Use It: Use the “mouth” of the tennis ball to hold keys, mail, or other small items.
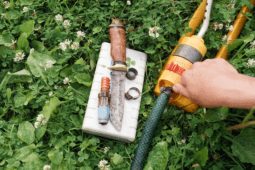
5. Bottle Opener from Scrap Metal
Turn an old piece of scrap metal into a functional bottle opener.

Materials:
- A sturdy piece of scrap metal (e.g., an old flat wrench)
- A nail or screw
- A hammer
Instructions:
- Mark the Spot: Identify where you want to create the notch for opening bottles.
- Create the Notch: Use the nail and hammer to create a small indentation at the marked spot.
- Shape the Opener: Continue hammering to shape the indentation into a notch that can catch bottle caps.
- Smooth Edges: Sand down any rough edges to make it safe to use.
- Make a Handle: Make a creative handle. (Optional)
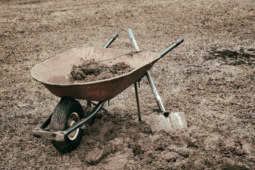
6. DIY Sports Gear Storage Rack
Keep your sports gear organized and easily accessible.
Materials:
- Wooden pallet or several wooden planks
- Screws or nails
- Drill or hammer
- Bungee cords or hooks
- Sandpaper
Instructions:
- Prepare the Pallet: If using a pallet, sand it down to remove any rough edges. If using planks, cut and assemble them into a pallet-like structure with spaces between the slats.
- Mount the Pallet: Securely mount the pallet to a wall in your garage, basement, or mudroom using screws or nails.
- Add Hooks and Bungee Cords: Attach hooks or stretch bungee cords across the slats to create sections for holding different types of sports equipment.
- Organize Gear: Use the hooks to hang items like helmets, gloves, and bags. The bungee cords can hold balls, bats, and other larger items.
Related Articles
- 6 Clever Small Woodworking Projects That You Should Try
- Unlock Your Creativity With Scroll Saw Projects
- 13 Beginner-Friendly Outdoor Woodworking Projects
These DIY projects are perfect for those who enjoy creating practical and functional items without needing extensive tools or materials. Try these out and add a touch of handmade craftsmanship to your life!
Ready to start your next project? Join our DIY community to receive tool tips, how-to guides, and exclusive creative insights. Subscribe to the ManMadeDIY newsletter now! Click here to unlock a world of hands-on inspiration.