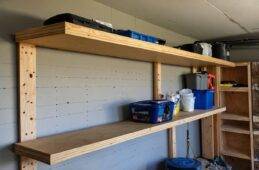
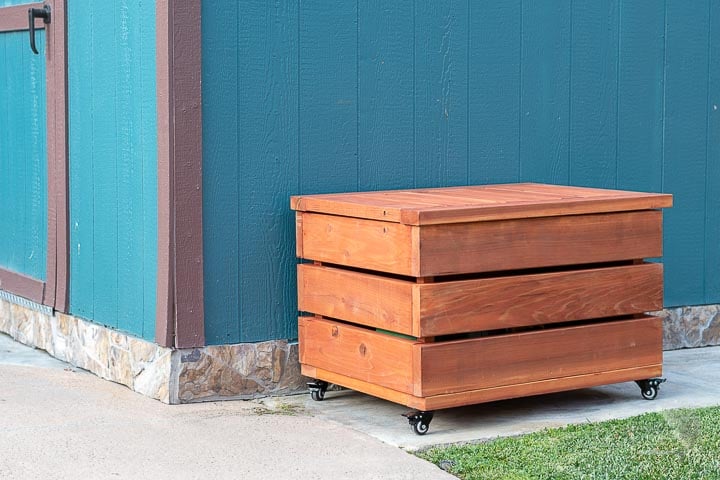
How to Create Your Own DIY Outdoor Storage Box
When it comes to keeping your outdoor space neat and organized, a DIY outdoor storage box can be a game-changer. Not only does it provide ample storage for all your gardening tools, cushions, and outdoor toys, but it also adds a touch of style and functionality to your backyard. Whether you’re a seasoned DIY enthusiast or a beginner looking for a fun project, building your own storage box can be a rewarding experience. In this article, we will guide you through the process, offering tips and tricks to ensure your project is both successful and enjoyable.
Ready to take on life with unshakable confidence? Whether you’re aiming to excel in your career, improve your relationships, or conquer DIY projects, NLP Hero’s Confidence Course is your key to success. Click here to start transforming your confidence and be better at everything you do!
Selecting the Right Materials for Your DIY Outdoor Storage Box
Choosing the right materials is crucial for building a durable and aesthetically pleasing storage box. The most popular choices include treated wood, cedar, and composite materials. Treated wood is a cost-effective option that can withstand the elements, while cedar offers natural resistance to decay and insects. Composite materials, although more expensive, are incredibly durable and require minimal maintenance.
When selecting your materials, consider the climate in your area and the intended use of the storage box. If you live in a region with heavy rainfall or extreme temperatures, opting for more weather-resistant materials will ensure the longevity of your project. Additionally, think about the overall design and how the materials will complement your outdoor space. A well-chosen material can enhance the visual appeal of your DIY outdoor storage box, making it a standout feature in your garden or patio.
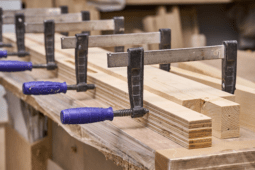
Essential Tools and Supplies You Will Need
Before you dive into building your DIY outdoor storage box, it’s important to gather all the necessary tools and supplies. This will save you time and prevent any interruptions during the construction process. Some essential tools you’ll need include a saw, drill, measuring tape, and a level. Additionally, you’ll need screws, nails, hinges, and a waterproof sealant to protect your storage box from the elements.

Having a comprehensive list of supplies and tools ensures that you are well-prepared for each step of the project. It also allows you to work more efficiently, as you won’t need to stop and search for missing items. Make sure to double-check your list before starting to avoid any last-minute trips to the hardware store. By being well-prepared, you’ll be able to focus on the construction and enjoy the process of bringing your DIY outdoor storage box to life.
Step-by-Step Instructions for Building Your DIY Outdoor Storage Box
Building your DIY outdoor storage box can be a straightforward process if you follow a clear set of instructions.

- Start by cutting your chosen materials to the required dimensions.
- Construct the base first, ensuring it is level and sturdy.
- Next, build the sides and attach them to the base using screws or nails. (Make sure to reinforce the corners for added stability.)
- Once the main structure is complete, install the lid using hinges. (This will allow easy access to the storage space while protecting the contents.)
- Adding a latch or lock can provide extra security.
- Finally, apply a waterproof sealant to protect your storage box from moisture and extend its lifespan.
Following these steps carefully will result in a functional and attractive DIY outdoor storage box that you can be proud of.
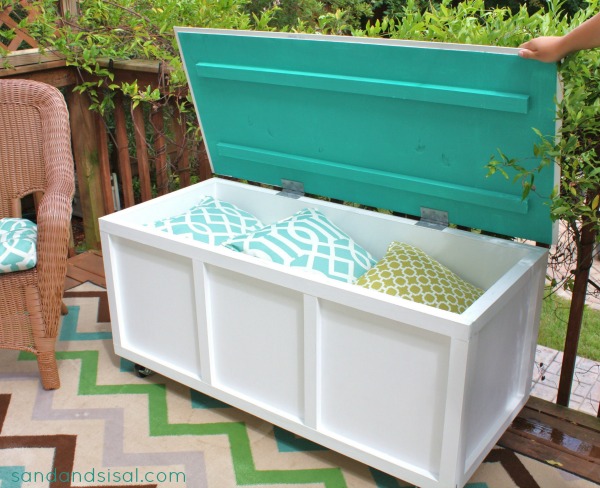
Personalizing Your DIY Outdoor Storage Box
One of the best parts of building a DIY outdoor storage box is the opportunity to personalize it. Adding unique touches can make your storage box stand out and reflect your personal style. Consider painting or staining the wood to match your outdoor decor. You can also add decorative hardware, such as handles or hinges, to give it a customized look.
Think about incorporating additional features like a cushioned top to transform your storage box into a functional bench. This not only maximizes space but also provides extra seating for your outdoor gatherings. By personalizing your DIY outdoor storage box, you can create a piece that is both practical and visually appealing, enhancing the overall aesthetic of your outdoor area.
Tips for Maintaining and Caring for Your DIY Outdoor Storage Box
Proper maintenance is key to ensuring the longevity of your DIY outdoor storage box. Regularly check for any signs of wear or damage, such as loose screws or hinges. Tighten and replace any hardware as needed to keep the structure secure. Cleaning your storage box periodically will also help maintain its appearance and prevent any buildup of dirt or debris.

Applying a fresh coat of waterproof sealant every few years can protect the wood from moisture and UV damage. If you notice any cracks or splits in the wood, address them promptly to prevent further deterioration. By taking these simple steps, you can ensure that your DIY outdoor storage box remains in excellent condition and continues to serve its purpose for years to come.
Related Articles
- 13 Beginner-Friendly Outdoor Woodworking Projects
- Understanding Wood Movement – Expansion and Contraction
- Creative DIY Wood Projects That Will Challenge Your Skills
As you enjoy the convenience and beauty of your new storage box, take pride in the effort and creativity you put into it. Your DIY outdoor storage box not only enhances the organization of your outdoor space but also adds a personal touch that store-bought options simply can’t match. So, sit back, relax, and relish in the satisfaction of a job well done.
Ready to start your next project? Join our DIY community to receive tool tips, how-to guides, and exclusive creative insights. Subscribe to the ManMadeDIY newsletter now! Click here to unlock a world of hands-on inspiration.