How To Build A Deck Gate With Easy To Source Materials
Learning how to build a deck gate is a valuable lesson that can keep your children and pets safe while adding a finished look that will elevate your deck appearance. While we love building many products from scratch, a recent Amazon find, along with some custom woodwork, saved us time and left us with a finished product that we absolutely love.
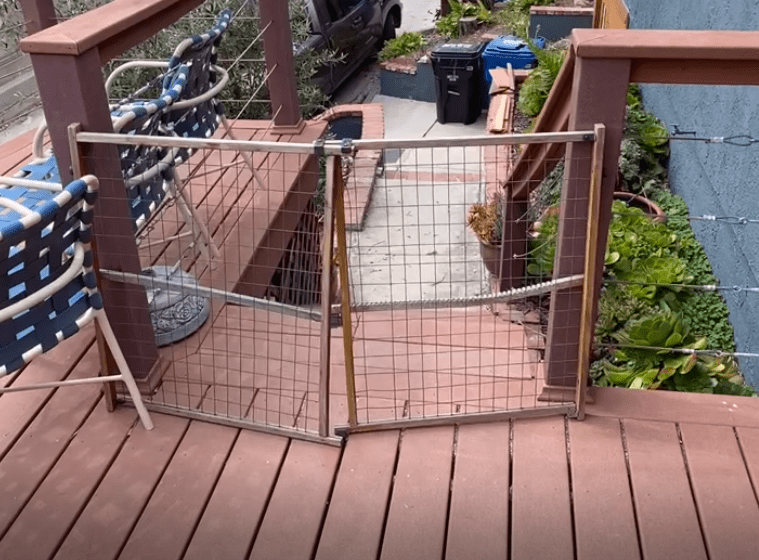
We started with a blank slate which was “complimented” by a baby gate that was quickly being destroyed by our big furry housemate. As you can see, the baby gate wasn’t attached to the deck, creating the potential for injury.
Build A Deck Gate: Safety Guidelines
Before we jump into the actual build, there are a few safety guidelines you need to follow when constructing your gate. First, International Building Code calls for a bottom gap that is no taller than four inches. This gap height protects your children and pets by ensuring they don’t become wedged under the gate.
When installing a deck gate, the height of the gate and the handrails attached to the area must be at least 42 inches.
Finally, the gate should swing onto the deck and not towards the stairs. This ensures that the gate doesn’t accidentally swing open, leaving your children or pet to tumble down the stairway.
With those safety guidelines in place, let’s jump into the process from start to finish.
How To Build A Deck Gate
This project was started by purchasing a metal frame from Amazon. The frame is fully adjustable, allowing for a proper fit for 36″ to 60″ in width.
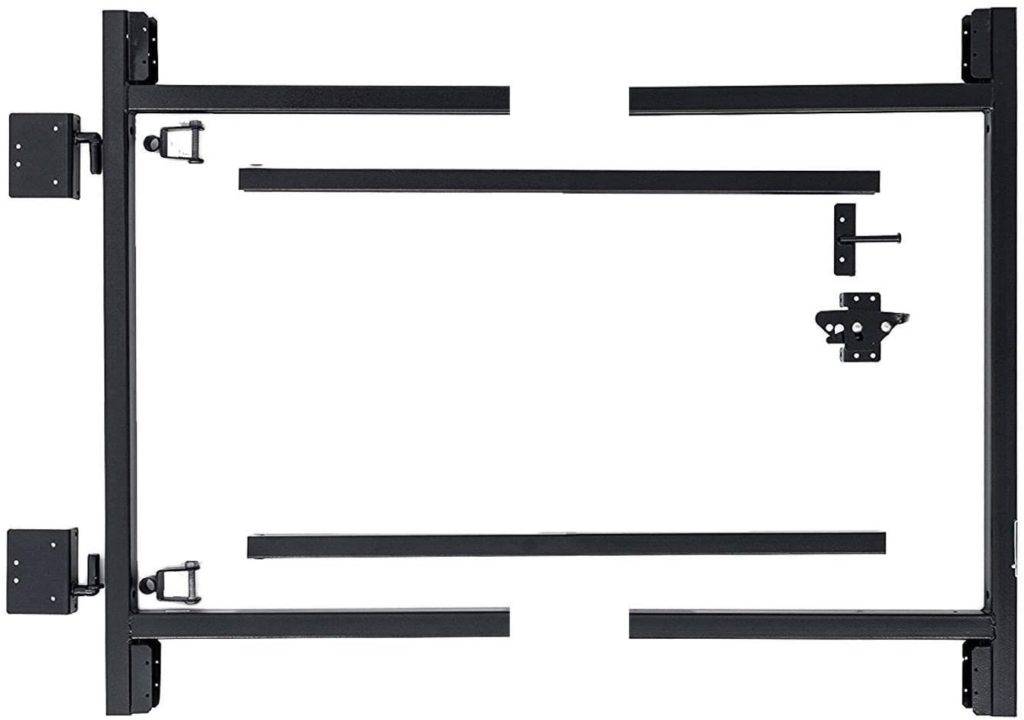
You’ll notice that the gate frame for this project comes equipped with the needed hinges and other hardware required to finish the project. If you’re building your own frame, we highly recommended choosing high-quality, heavy-duty hinges to ensure less sagging and other potential issues.
Start by having an assistant hold up the frame with the hinges against the connecting point for the frame. You can also use a block of wood if completing the project on your own.
In our case, the hinges were attached to our Trex decking using the included hardware and a Ryobi drill. If you’re building the initial frame on your own or require additional hardware, we suggest purchasing three-inch deck screws which are plated and/or coated to increase corrosion resistance. If you desire extra protection silicone bronze and stainless steel screws can also be chosen.
Next, start by attaching a piece of 2×4 to the top and bottom portions of the gate. Because the hardware is adjustable, you will need to measure your 2×4 pieces to fit your desired width.
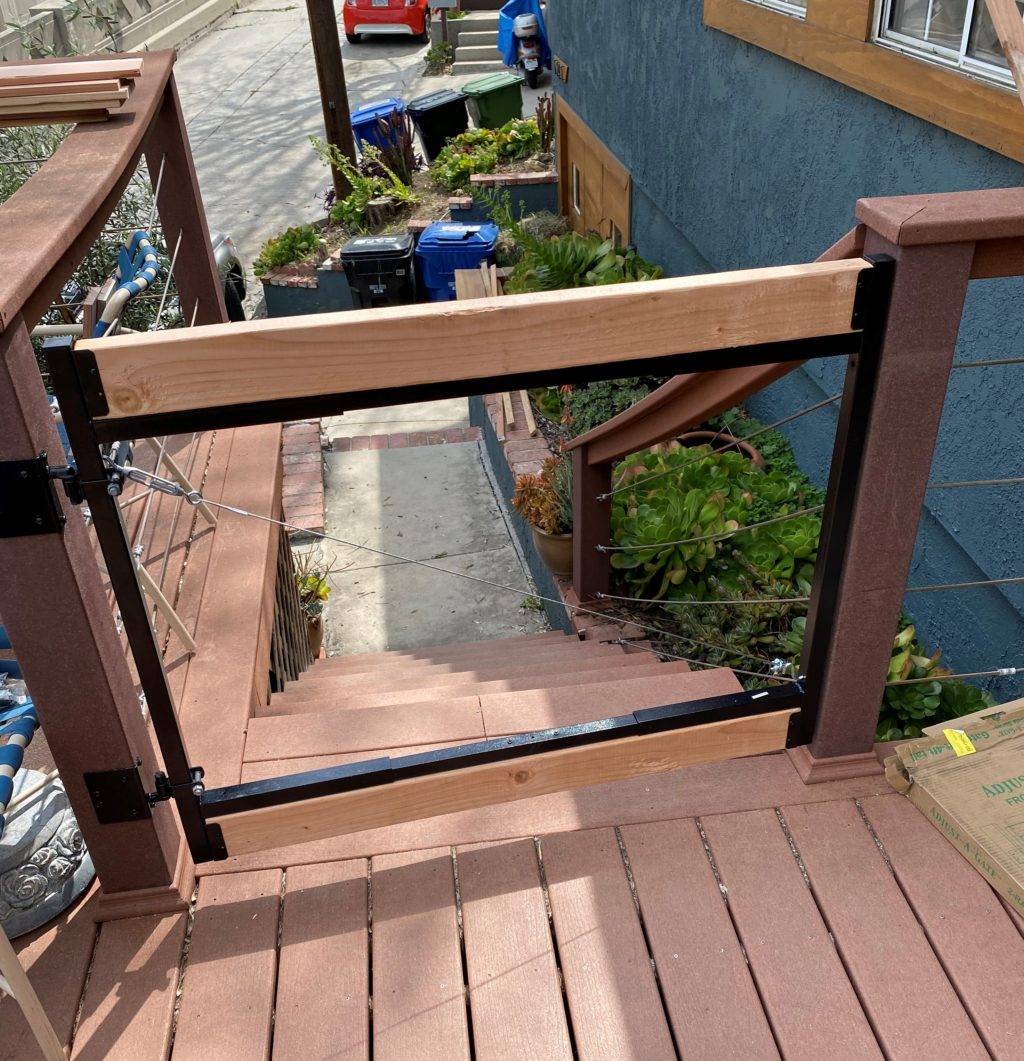
After finishing the simple hanging of the metal frame, we added vertical 2×2 posts to the opposite side of the metal frame. This allows for cross boards to be attached and secured. The vertical posts were cut to length and toed into place, allowing them to provide a hanging point for the horizontal redwood we chose for this project.
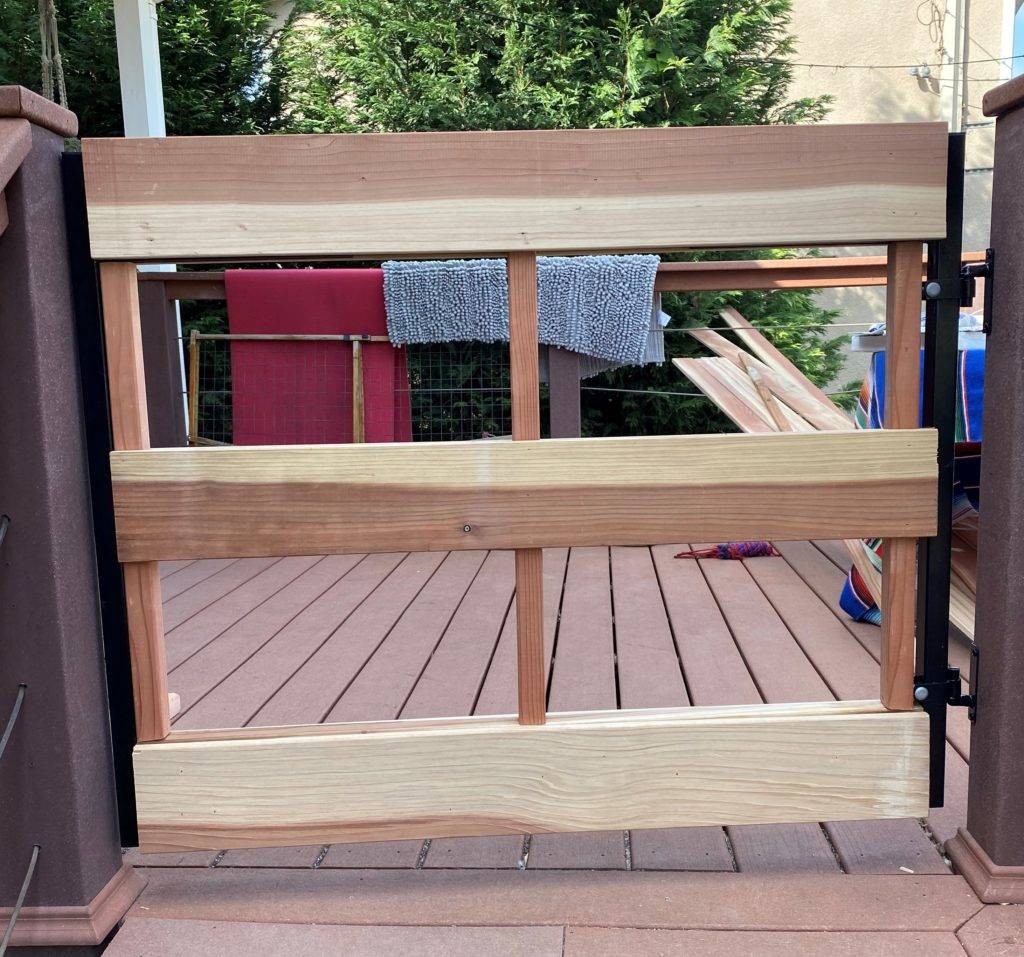
The purchased frame shipped with a cross metal wire for added stability. We removed that anti-sag wire since the extra 2×2 wood supports more than made up for any potential stability issues.
Next, we cut and sanded our 1×6 and 1×4 pieces of redwood. We then used a Ryobi nail gun to attach each board directly to the vertical and horizontal wood frame we had previously constructed. To accomplish the final look we were going for, we attached 1×6 redwood boards to the top, middle, and bottom of the gate, we then attached 1×4 pieces between each of those boards. This design allowed for a unique look with even spacing between each board.
The top board is a 2×2 which means the top of a 1×6 board which was sanded and caulked for a watertight finish.
The boards were each attached using our handy Ryobi nail gun which provides for quick and effective nailing. This is a regularly used product for many of your projects at ManMadDIY.
After attaching the wood another round of sanding was completed to ensure a consistent look across all of the boards. We then cleaned off any sand residue that remained. When cleaning sand resident you can use a damp cloth and then wait for the product to dry or you can purchase tack cloth which allows for the quick removal of all sand particles. When given the option, we recommend the tack cloth.
Finally, we applied Behr Waterproofing Wood Finish Natural No. 400. Keep in mind, this project was completed in Southern California. If you live in an area with heavy rainfall, snow, and other adverse weather conditions, you may want to consider a polyurethane or lacquer coating for added weatherproofing.
Here’s the final product from our deck gate build.
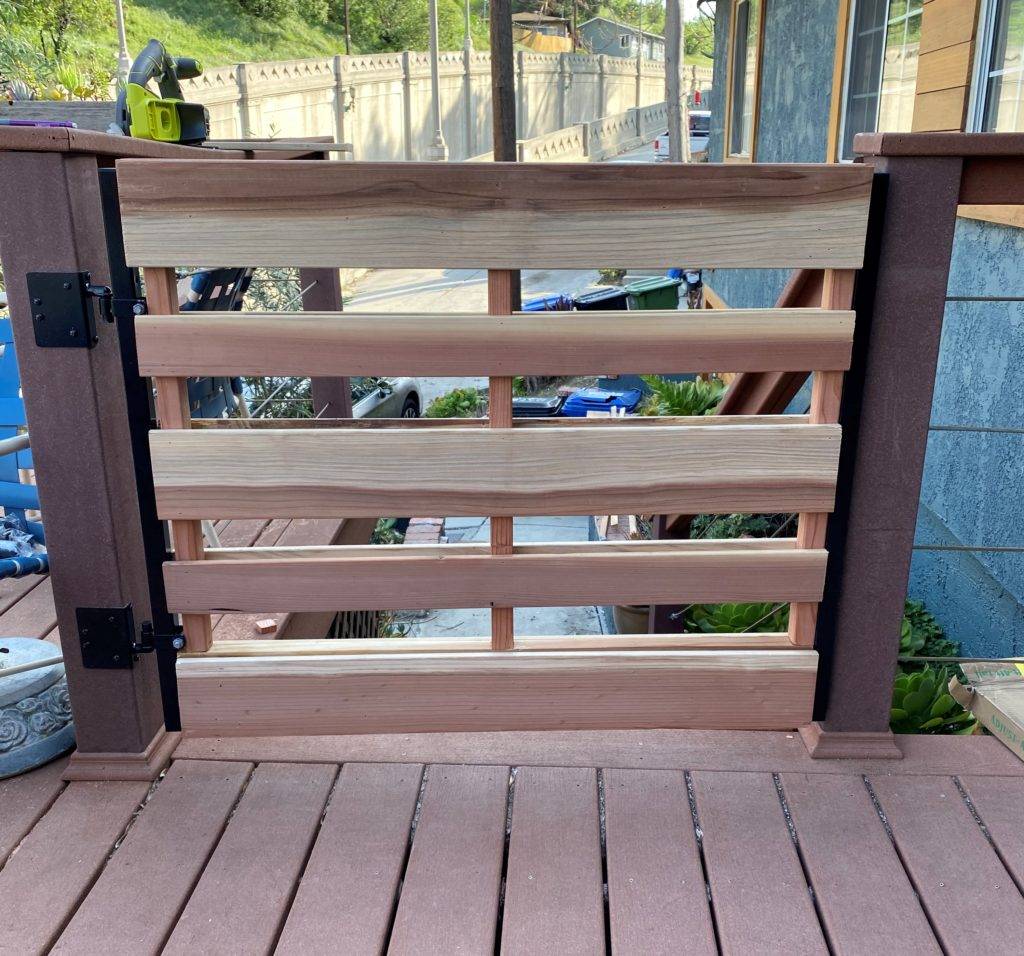
While you can build your own frame from wood or metal, our goal with this project was to show you how to build a deck gate in a simple but effective manner. After months of use, the metal frame we purchased has held up to regular use and the finished product has created a safer, code-friendly finished product.
Deck Gate Materials Needed:
- Metal gate frame
- Behr Waterproofing Wood Finish Natural No. 400
- Ryobi Drill
- Ryobi Nail Gun
- Ryobi saw
- 1×4, 1×6, and 2×2 Redwood
- Nails
- Measuring Tape
We hope you’ve enjoyed our guide on how to build a deck gate as much as we’ve enjoyed keeping our pets safe and secure with this simple yet eye-catching project.


