How to Cut Hardie Board – Tips and Techniques
When delving into the world of home renovation and construction, it’s essential to familiarize oneself with materials like Hardie board, a popular choice for exterior siding due to its durability and resistance to the elements. Understanding how to cut Hardie boards properly is a critical skill for both professionals and DIY enthusiasts alike, ensuring a flawless installation that stands the test of time.
This fiber cement board offers the perfect blend of aesthetics and functionality, making it a go-to option for those looking to enhance their home’s exterior. However, working with Hardie board requires specific techniques to ensure clean, precise cuts without damaging the material or compromising its integrity.
Understanding the Basics of Hardie Board
Before embarking on your project, it’s crucial to grasp the basics of Hardie board and why it’s favored among various siding materials. Its composition, combining cement, sand, and cellulose fibers, contributes to its robustness, making it a formidable barrier against weather and pests. Learning how to cut Hardie boards effectively means understanding the material’s unique properties and the tools best suited for the job.
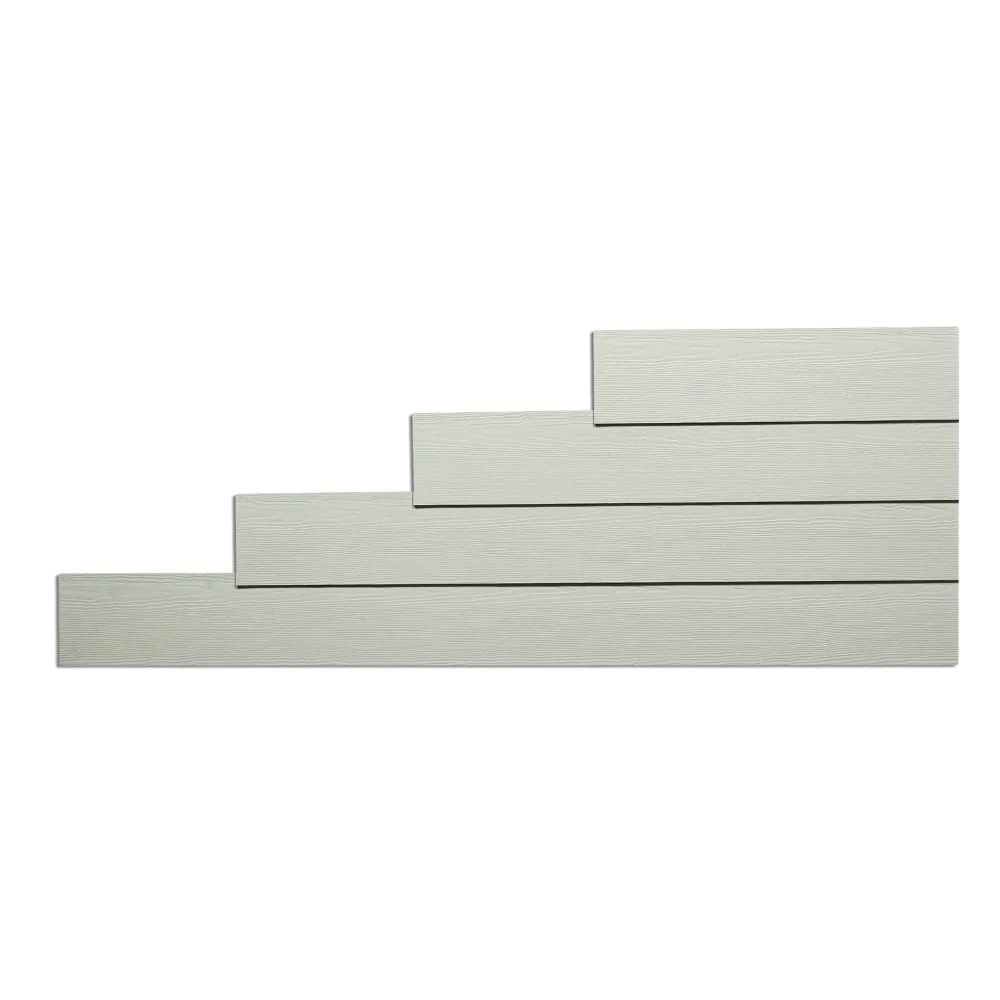
Whether you’re aiming for straight lines or intricate shapes, mastering the cutting process will not only make your work easier but also result in a more professional-looking finish. Engaging with this material offers a rewarding challenge, inviting both seasoned builders and eager novices to elevate their construction and renovation projects.
Preparing Your Workspace
Before we get into how to cut Hardie board, it’s crucial to get your workspace prepped, ensuring it’s both safe and efficient for the task at hand. First things first, dust management is key. Hardie board cutting can generate a significant amount of silica dust, which is harmful when inhaled.
To tackle this, set up your cutting area outdoors if possible, where ventilation is naturally better. If working indoors is your only option, make sure the room is well ventilated, perhaps even consider using a dust extraction system or a fan to direct the dust outside. Covering nearby surfaces with plastic sheeting can also help in making cleanup easier and quicker.

Safety gear is non-negotiable. Before you make the first cut, gear up with a high-quality dust mask or respirator, safety goggles to protect your eyes from flying particles, and durable gloves to safeguard your hands from sharp edges.
Having all your tools and safety equipment within easy reach not only streamlines the process but also minimizes the risk of accidents. Remember, taking a moment to ensure you’re cutting Hardie board in a well-prepared and secure environment can make all the difference in both the efficiency of your work and your personal safety.
Choosing the Right Equipment for Cutting Hardie Board
Understanding how to cut Hardie board begins with selecting the appropriate tools for the job. It’s crucial to remember that the durability and toughness of Hardie Board, while being one of its greatest assets, also make it a challenging material to work with. Therefore, equipping yourself with the right equipment is the first step towards a successful project.
A circular saw fitted with a carbide-tipped blade is often the go-to choice for many professionals. This setup provides the power and precision needed to make clean, straight cuts through the hard material. It’s important, however, to ensure the blade is specifically designed for cutting fiber cement to prevent unnecessary wear on your tools and achieve the best results.
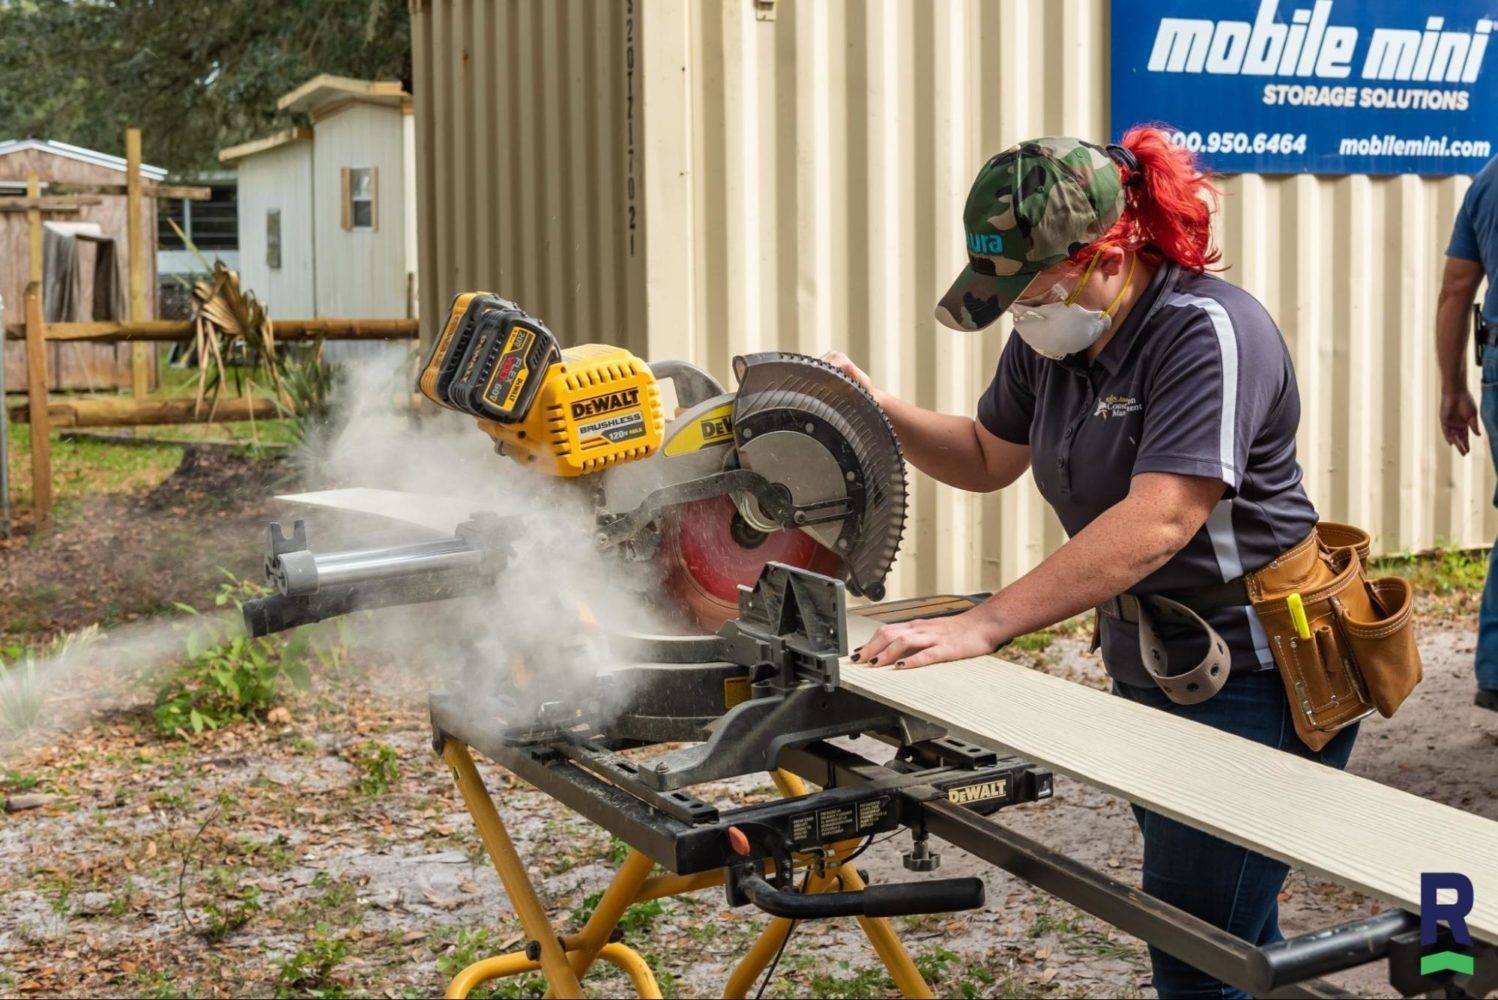
In addition to a circular saw, some prefer the control and finesse offered by a jigsaw for more intricate cuts. When learning how to cut Hardie Board, understanding that a jigsaw equipped with a carbide-grit blade can be ideal for cutting curves or making cutouts for fixtures is key. Regardless of the method chosen, safety should never be overlooked.
Always wear protective eyewear and a dust mask to safeguard against the fine dust particles generated during the cutting process. By choosing the right tools and taking the necessary safety precautions, navigating how to cut Hardie Board can be a smooth and efficient process.
Measuring and Marking
Before diving into the actual task of how to cut Hardie Board, an essential step involves precise measuring and marking to ensure your cuts are exactly where you need them to be. This stage is crucial because, with materials like Hardie Board, errors can lead to wastage and additional costs.
The first thing you’ll want to do is take your tape measure and carefully measure the area where the Hardie Board will be installed. Remember, “measure twice, cut once” is more than just an adage in this scenario—it’s your best practice. After you have your measurements, use a straight edge or a carpenter’s square along with a pencil to mark your Hardie Board. These marks will serve as your guide, ensuring that each cut is precise and accurate.

When marking your Hardie Board for cutting, it’s important to consider the type of cut you’ll be making. Whether it’s a straight cut or a more intricate shape, planning your approach can make the process smoother. For straight cuts, a chalk line can be very helpful to create a clear, straight path to follow.
If you’re planning on making more detailed cuts, sketching out the design with your pencil can help visualize the final outcome. Ensuring your marks are visible and precise will help immensely when it comes time to cut the Hardie Board. Remember, patience during this planning phase can save you time and materials in the long run, making your project more efficient and your results more professional.
Cutting Techniques
When expanding your knowledge of the world of DIY and renovation, mastering how to cut Hardie board is a skill that can elevate your project to professional standards. This fiber cement siding material, known for its durability and resistance to the elements, requires specific techniques for a smooth, clean cut.
The key lies in choosing the right tools and adopting best practices that ensure precision without compromising the board’s integrity. Whether you’re using a circular saw fitted with a poly-crystalline diamond (PCD) tooth blade, a snapper shear drill attachment, or opting for the dust-reducing method of scoring and snapping, understanding the nuances of each approach can make a significant difference in the final outcome.
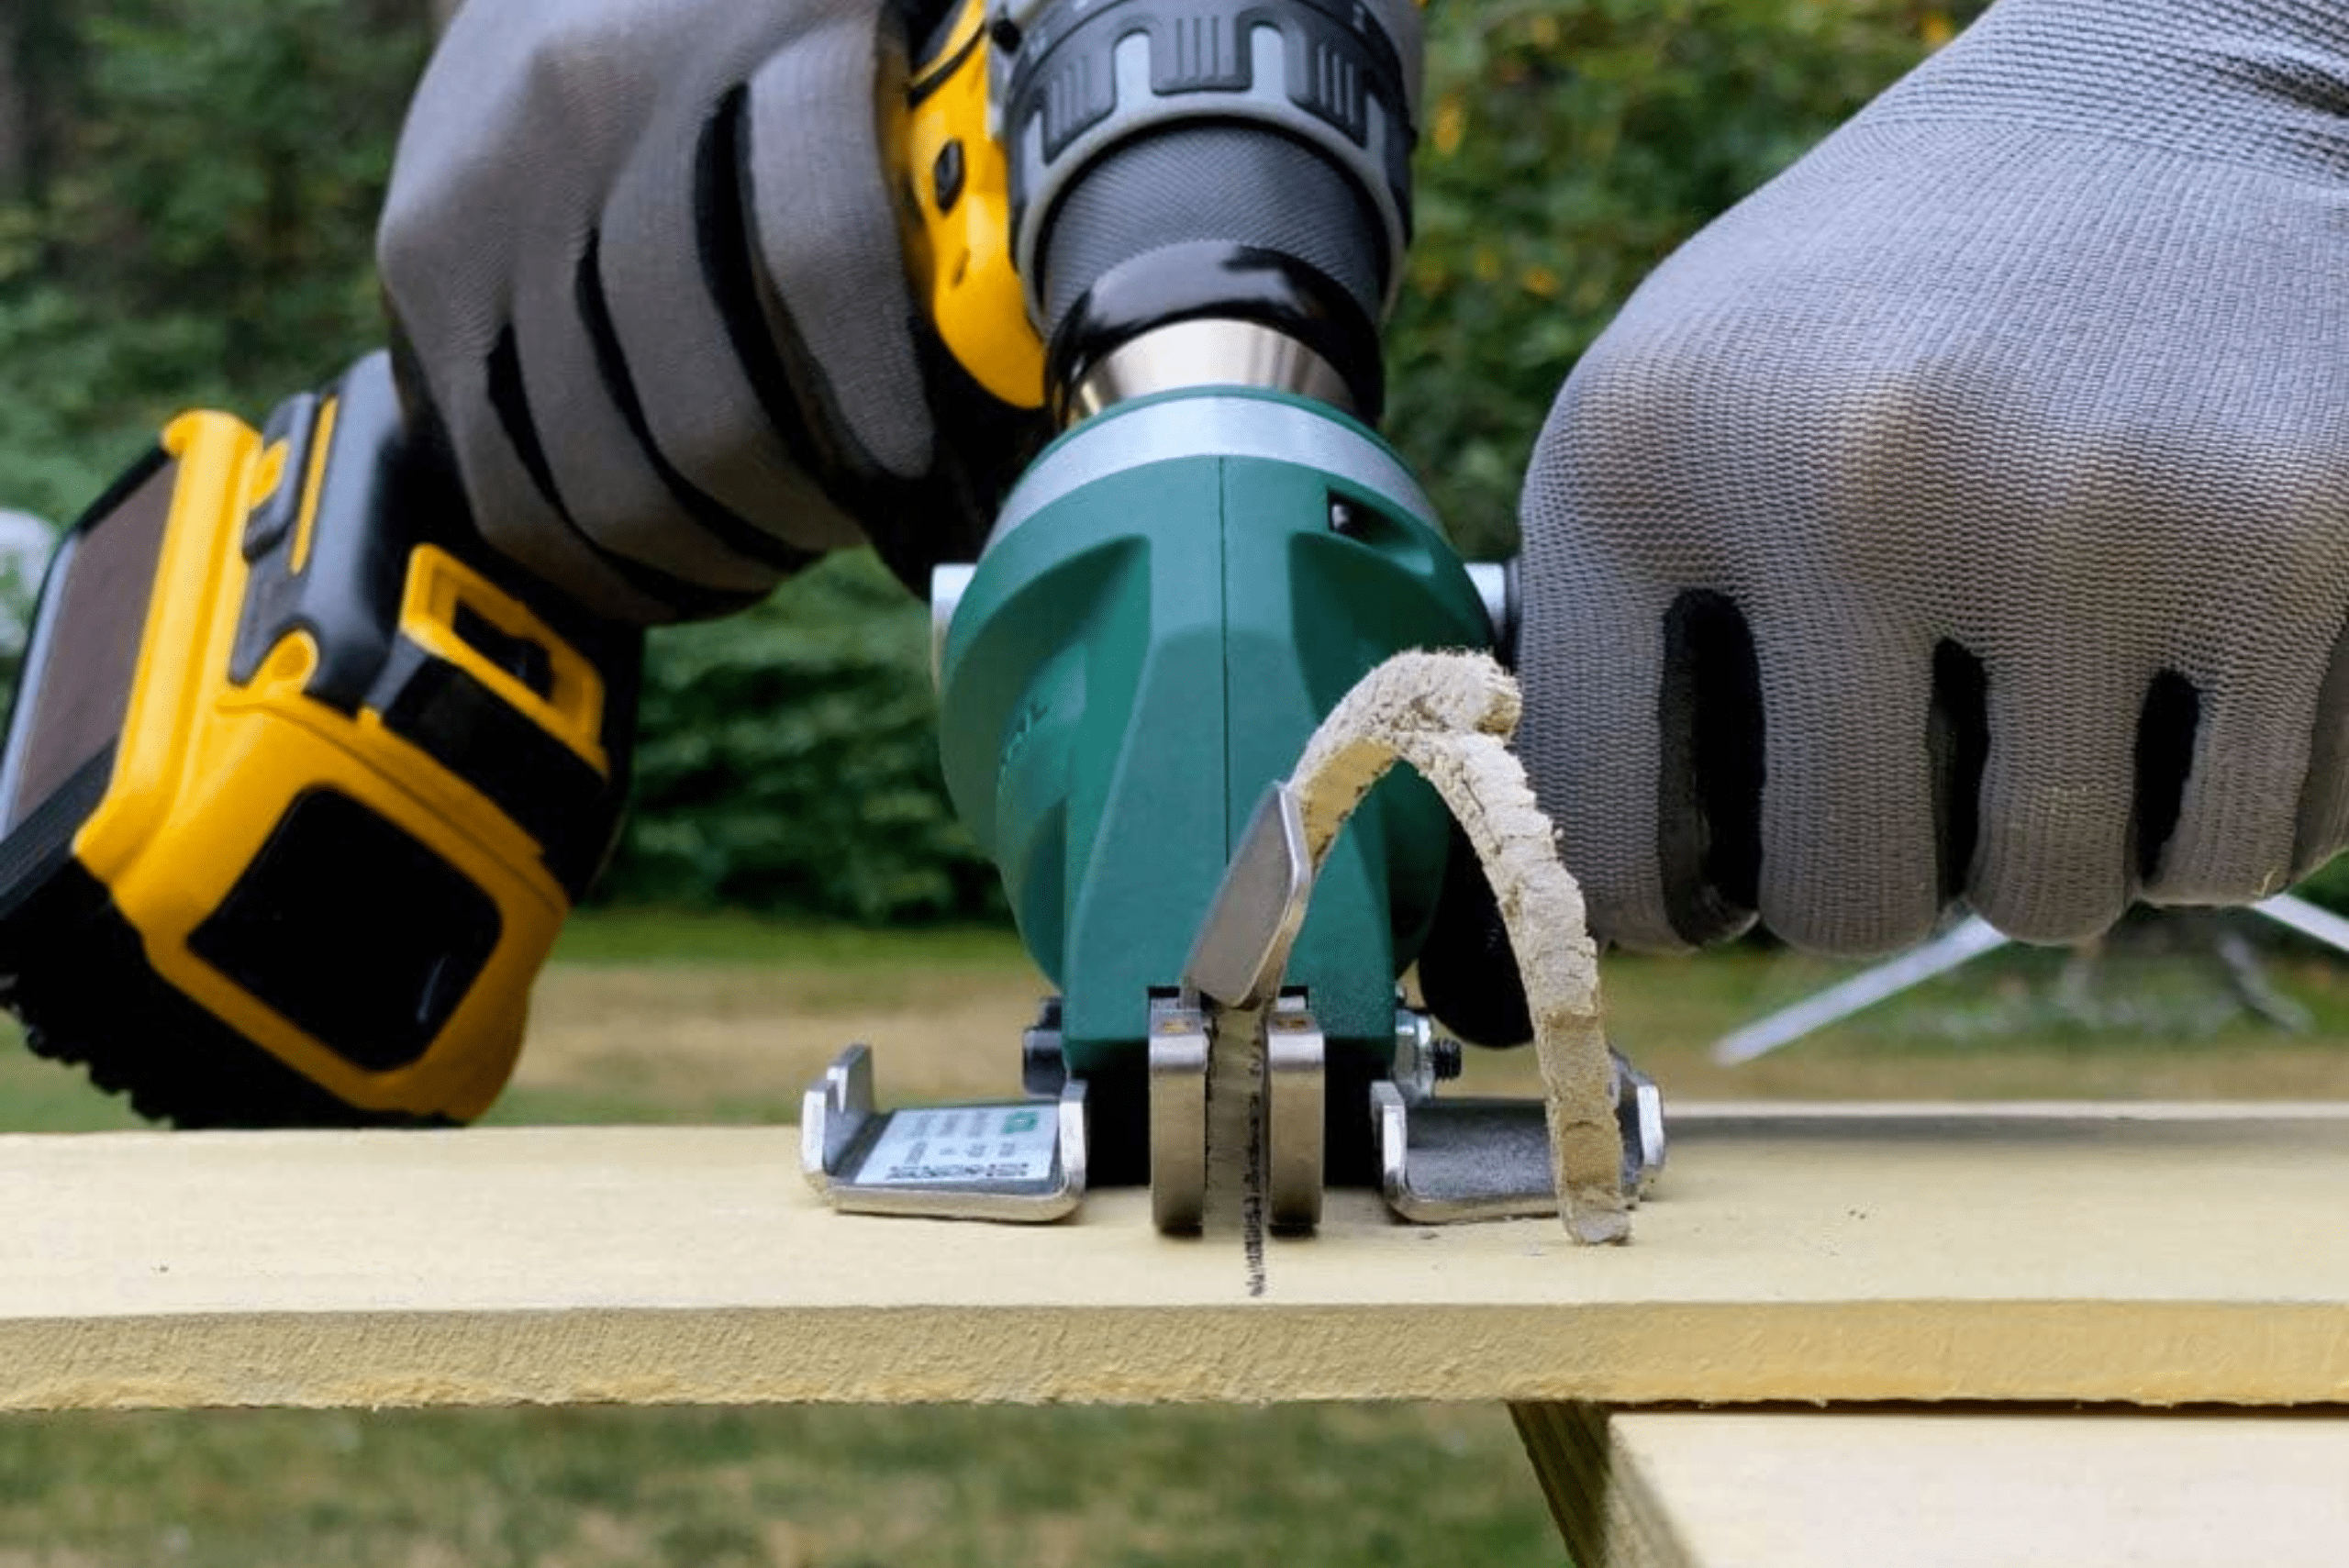
When approaching your Hardie board-cutting project, it’s crucial to maintain consistency throughout your cuts to have similar results that will yield the best aesthetics for your home. Nothing is worse than having cuts that are done poorly, so take your time to practice on scraps before you attempt the finalized cuts for your siding project.
Applying steady pressure and maintaining control over your cutting tool ensures that the board is cut precisely along the marked line. By adhering to these best practices, you’re not only safeguarding your health but also ensuring that each piece of Hardie board fits perfectly in place, contributing to the aesthetic and structural integrity of your project.
Handling and Installation Tips
Once you’ve mastered how to cut Hardie board effectively, ensuring that your installation process goes smoothly is just as crucial. Handling the freshly cut boards with care is key, as the edges can sometimes be sharp or crumbly. It’s advisable to gently smooth out any rough edges with a fine-grit sandpaper to prevent any snagging or injuries during the installation.
When lifting and moving Hardie board, always keep the board close to your body to minimize the risk of strain or damage to the board. It’s also wise to have a buddy assist with the larger pieces, making the process safer and more efficient.
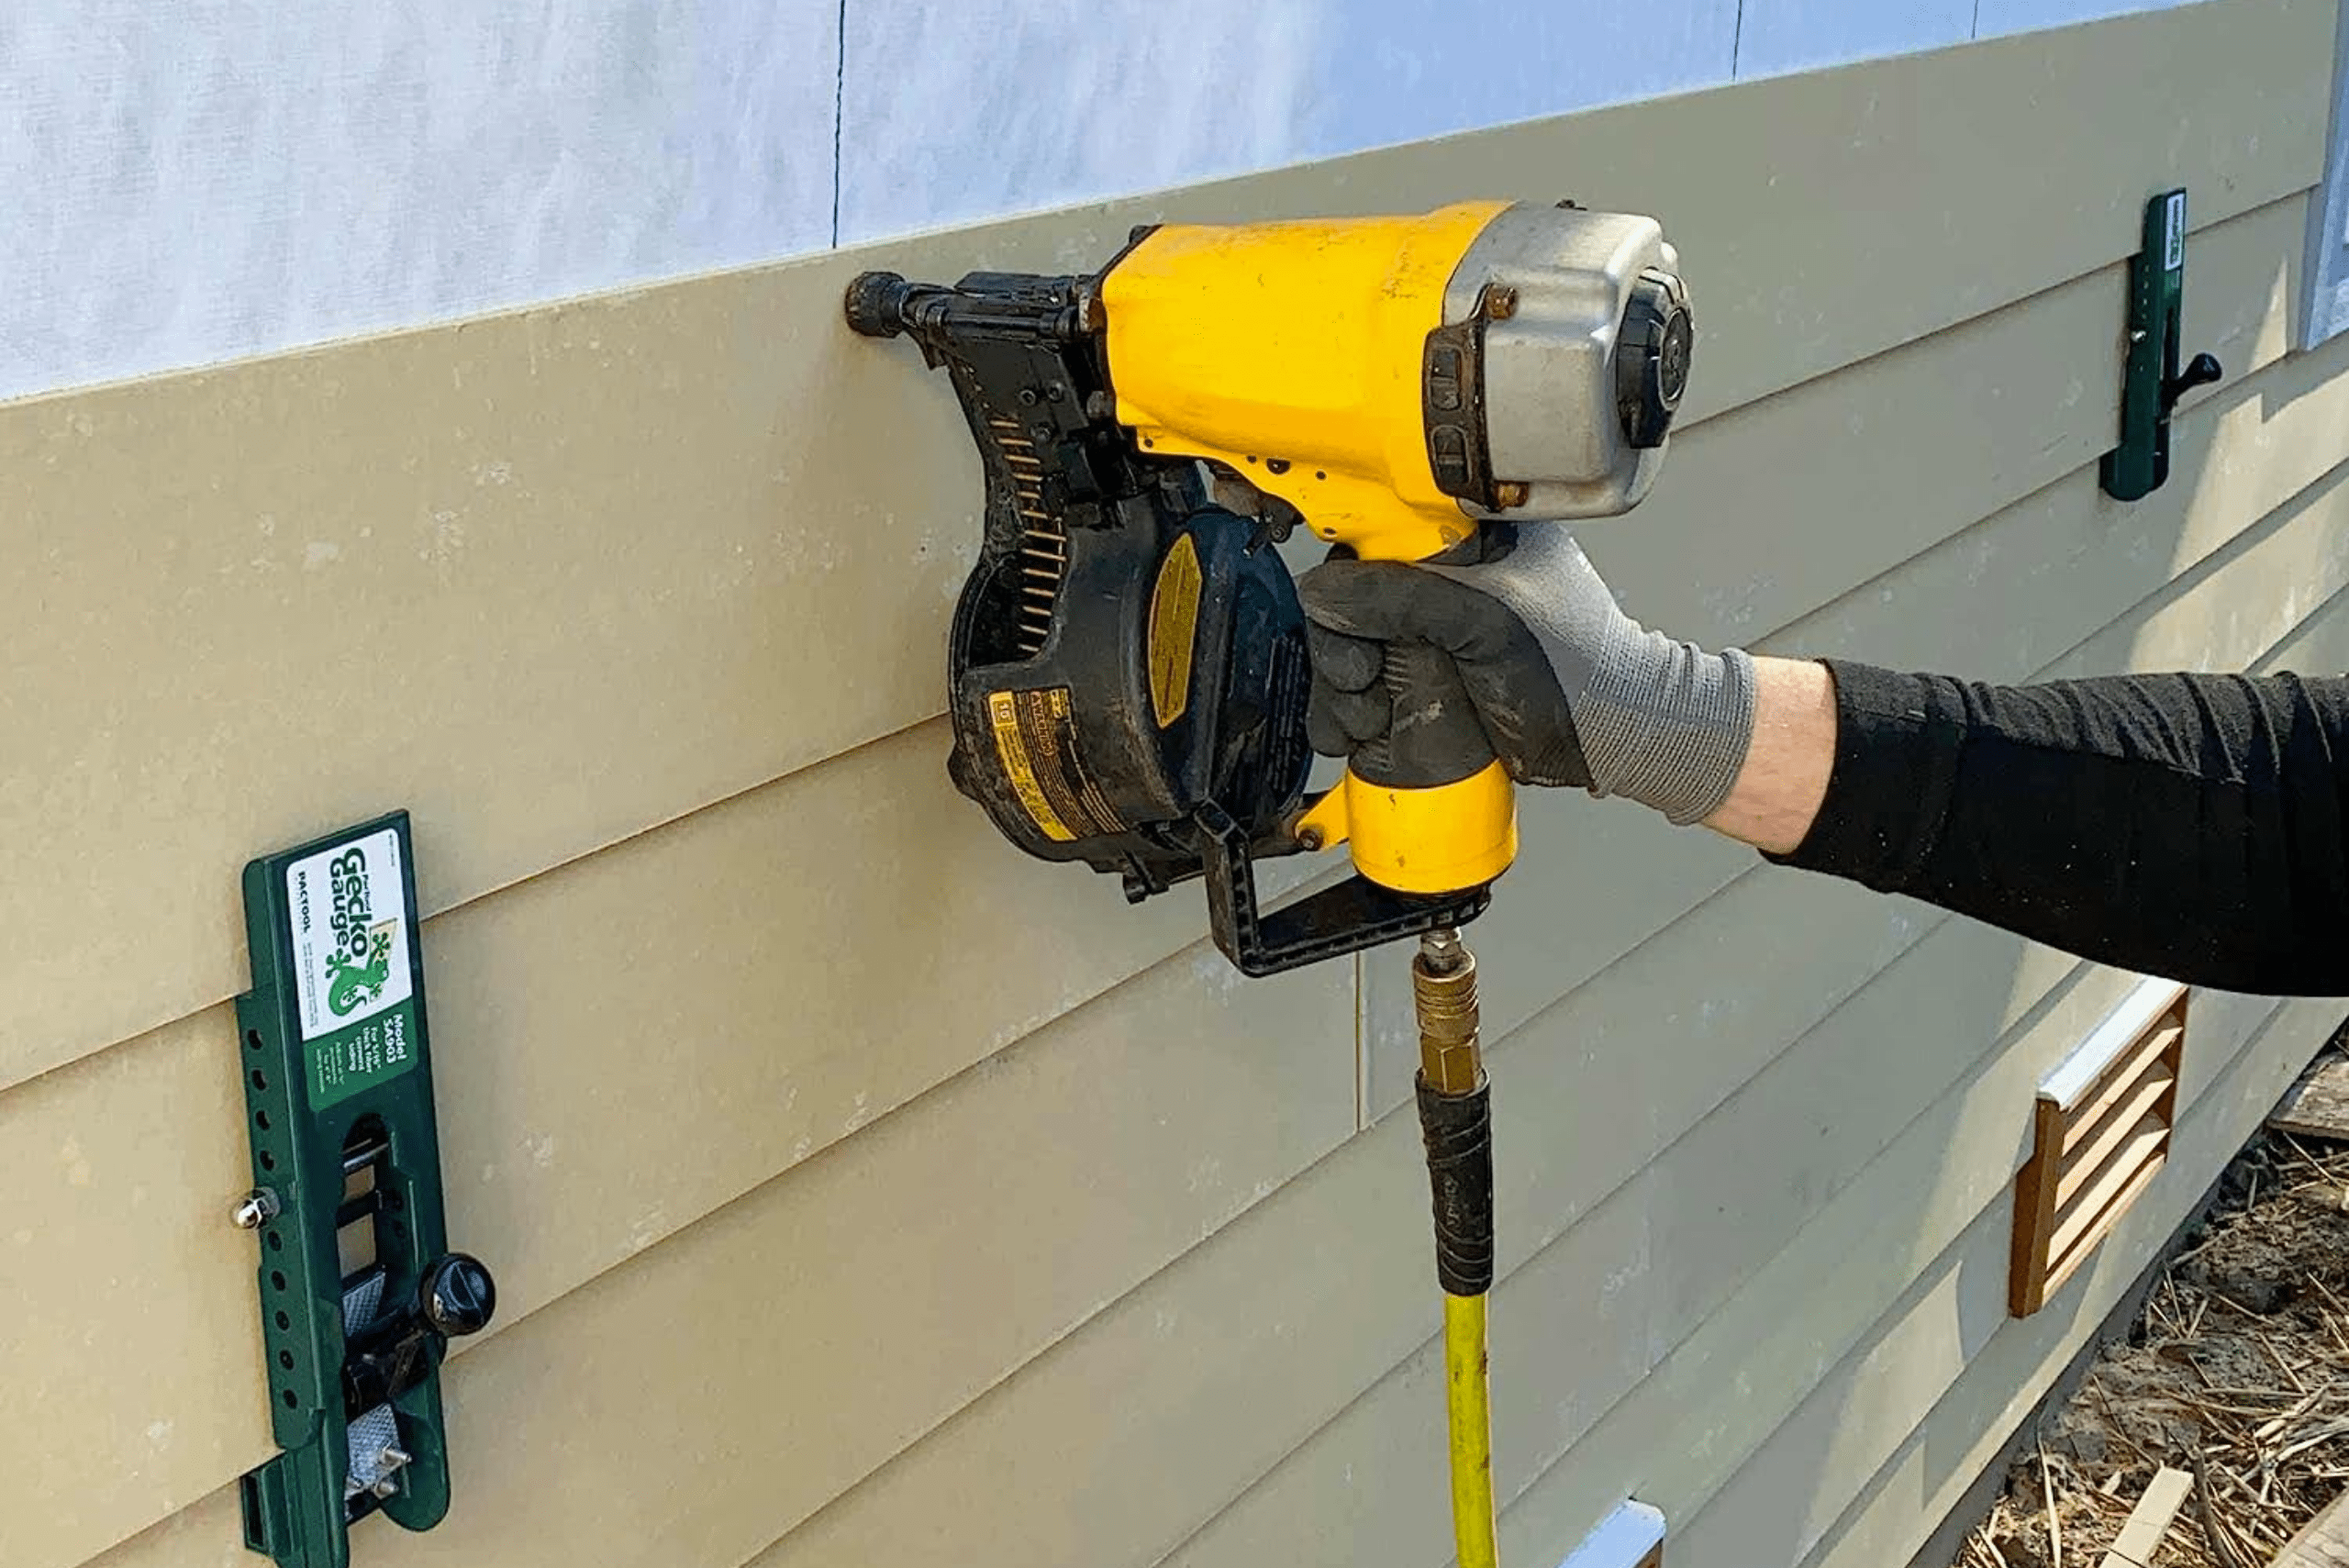
During installation, paying attention to the manufacturer’s guidelines is paramount. This includes recommendations on the type of nails or screws to use, as well as the appropriate spacing between them. Pre-drilling holes can make the installation process much smoother, particularly when working near the edges to reduce the risk of accidental cracks or splits.
Remember, taking your time to measure twice and cut once will always serve you well. Ensuring that each piece fits perfectly before securing it will not only make your project look more professional but also extend the lifespan of your installation. Following these tips after learning how to cut Hardie board will help you achieve a flawless finish on your next project.
Common Mistakes to Avoid
When learning how to cut Hardie board, it’s crucial to sidestep common pitfalls to achieve that professional-looking finish. One of the first mistakes many make is not using the right tools for the job. Cutting this material requires specific blades designed for fiber cement; using a regular saw blade can result in rough, jagged edges that compromise the aesthetics and integrity of your project.
Additionally, precision is key. Rushing through your cuts or not measuring twice before cutting can lead to uneven lines or the necessity to redo your work, wasting both materials and time.

Another oversight involves neglecting safety precautions. When you’re figuring out how to cut Hardie board, remember that the process generates a significant amount of dust, which can be harmful if inhaled. Always wear a suitable dust mask or respirator along with safety goggles to protect your eyes.
Skipping these safety steps can not only jeopardize your health but also impact the quality of the work. Poor visibility from dust in your eyes or discomfort from breathing in dust particles can lead to inaccuracies and a less than professional finish. Taking these precautions seriously ensures both the project’s success and your well-being.
Mastering the Art of Cutting Hardie Board
Now that we’ve navigated through the ins and outs of how to cut Hardie board, it’s clear that mastery in this skill can significantly elevate your DIY or professional projects. This robust material, while excellent for various applications due to its durability and resistance to elements, does require a certain finesse when cutting.
Whether you’re employing a circular saw equipped with a diamond blade or opting for the score and snap method, the key is precision and safety. Remember, practice makes perfect. As you refine your technique, you’ll find that cutting Hardie board becomes second nature, allowing you to achieve clean, precise cuts every time.

In wrapping up, mastering how to cut Hardie board is an invaluable skill that can take your projects to the next level. It’s not just about the right tools, but also about understanding the nuances of the material you’re working with. As you continue to work with Hardie board, let patience and careful planning be your guides.
With each cut, you’re not just slicing through a piece of building material; you’re crafting the foundation of a durable, beautiful, and long-lasting structure. So, here’s to mastering the art of cutting Hardie board – may your cuts be sharp, and your projects successful.
Frequently Asked Questions (FAQs)
How do I cut Hardie board?
To cut Hardie board, you can use a circular saw equipped with a carbide-tipped blade or a special score and snap tool designed for fiber cement products. Make sure to wear appropriate safety gear such as goggles and a dust mask.
Can Hardie board be painted?
Yes, Hardie board can be painted. Before painting, make sure the surface is clean and dry. Use a high-quality acrylic exterior paint and follow the manufacturer’s instructions for best results.
How do I install Hardie board siding?
Hardie board siding is typically installed over a moisture barrier and attached to the wall using special fasteners. Make sure to leave a small gap between the siding and any adjacent surfaces for expansion and contraction.
Is Hardie board resistant to fire and water?
Yes, Hardie board is highly resistant to fire, water, and pests. It is made of cement, sand, and cellulose fibers, making it a durable and long-lasting option for exterior siding.
Can I install Hardie board siding myself?
While it is possible to install Hardie board siding yourself, it is recommended to hire a professional contractor for the best results if you are not confident in your skills or not able to take the proper time and care to install. Improper installation can lead to issues such as water damage and voiding of the product warranty.
How do I clean Hardie board?
To clean Hardie board siding, use a soft brush or cloth with a mild detergent and water. Avoid using abrasive cleaners or high-pressure washers, as they can damage the surface of the siding.
Does Hardie board require maintenance?
Hardie board siding is low maintenance, but it is recommended to inspect it annually for any damage or signs of wear. Repainting may be necessary every 10-15 years to maintain its appearance and protection.
Ready to start your next project? Join our DIY community to receive tool tips, how-to guides, and exclusive creative insights. Subscribe to the ManMadeDIY newsletter now! Click here to unlock a world of hands-on inspiration.

