How To Drain a Washing Machine (Front & Top-Loading)
You hear the washing machine buzzer go off, telling you that your load of laundry is finished washing and is ready to be switched over to the dryer. When you open the lid on the machine though, you realize that all your clothes are still wet and there’s water left inside the inner drum! Now, what are you supposed to? If your washing machine isn’t draining properly, there are a couple of reasons why that might be. We’re ready to take through a few different quick reasons why your washing machine might not be working properly, and then if we’ve still got a problem, we’ll teach you how to drain a washing machine manually.
Jump To:
- The First Steps (For Both a Front- or Top-Loading Washer)
- Draining a Front-Load Washing Machine
- Draining a Top-Load Washing Machine
- Know When to Call a Professional
- Frequently Asked Questions
Before Draining Your Washer, Try These Troubleshooting Options
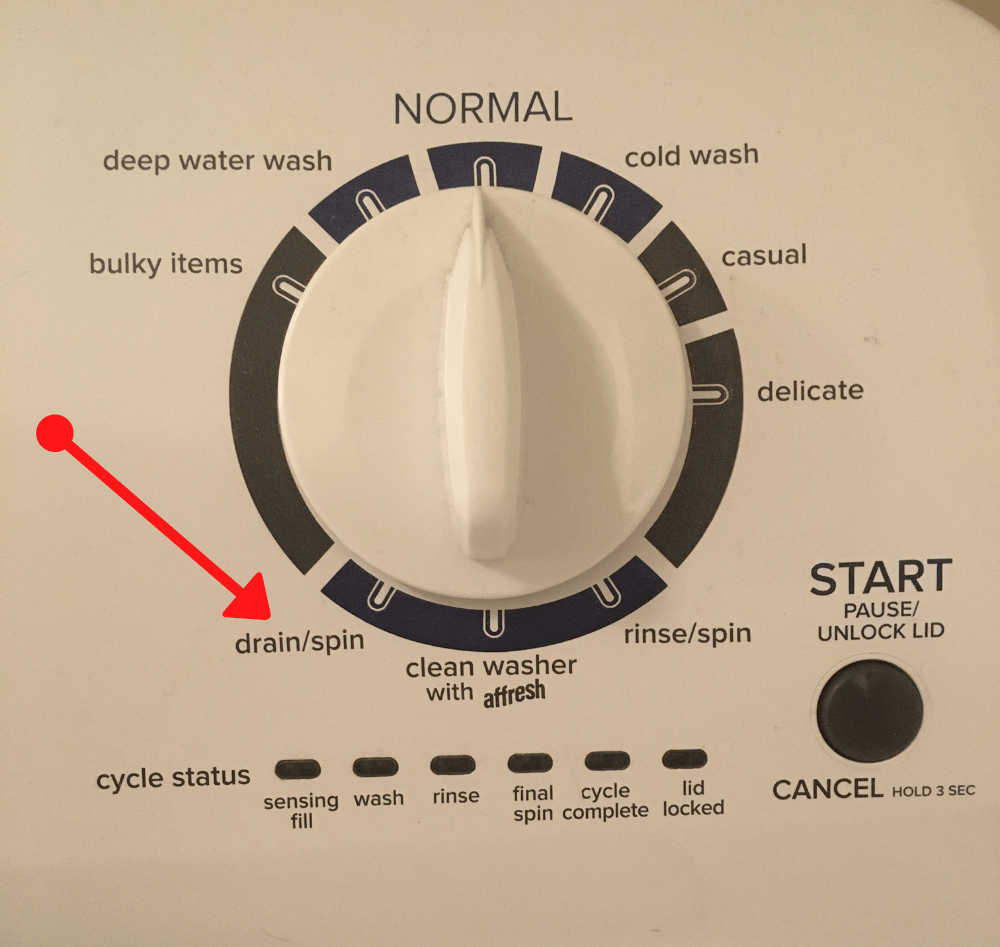
Run a short drain cycle
If your washing machine has the option, run a short drain cycle to see if that allows the water to drain from the inner drum. Another option if you don’t have a drain cycle is to use the rinse cycle. One thing to remember though is that the rinse cycle will fill the inner drum with more water, so you might need to manually remove some of the water first before you run a rinse cycle. Or, just make sure to monitor the cycle as it runs so it doesn’t overflow.
Check to see if the drain hose is kinked
A drain hose that’s twisted or kinked could be the simple answer to your problem, so check at the back of your washer to make sure everything is straightened out back there.
Could the lid switch be the problem?
A top-loading washing machine stopping mid-way through the cycle or not draining properly could mean there’s an issue with the lid switch. Try depressing the lid switch manually, listening for a click or switching noise, and watching to see if pressing the switch can cause the drum to drain. If nothing happens, that might be your issue.
If none of these things seem to fix your issue, it’s time to move on to manually draining the washing machine
The First Steps (For Both a Front- or Top-Loading Washer)
While the steps to drain a front-loading washing machine versus a top-loading are different, here are a few steps to start you off regardless of your washing machine:
Step 1: Remove the clothes
It may seem obvious, but sometimes it’s a good thing to state the obvious. While you could probably drain your washing machine while a load of laundry is still in there, it’s going to be much easier for you to accurately see what’s happening inside the drum if you take out the wet clothing.
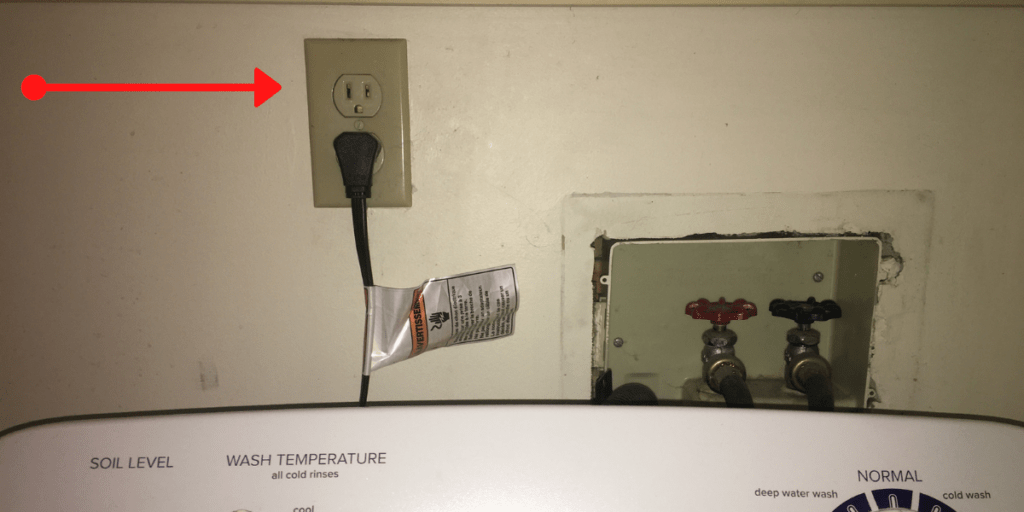
Step 2: Unplug the machine
To avoid an electrical shock, unplug your washing machine from its power source before you start. If your washer is hardwired into your electrical system, switch off the circuit breaker. To be extra cautious, you could also unplug or power off any major electrical appliances that are close to the washing machine, like your dryer.
Step 3: Decide where you’re going to put the water you drain
Are you emptying the drain hose into a bucket that you’re then going to carry outside to dump, draining it into the bathtub or shower that’s nearby, or are you going to be stuck with a puddle of water it starts draining onto the floor? Have a plan before you’re left with a lot of water and nowhere to put it.
Step 4: Let the water cool before working on the washing machine
If the last load of laundry you ran was a hot water cycle, you’ll want to let the water cool down to a manageable temperature.
Draining a Front-Load Washing Machine
What You’ll Need:
- Towels, a drop cloth or tarp to place on the ground beneath the washing machine
- A screwdriver
- A bucket or container to hold the water
- A second smaller, more shallow container
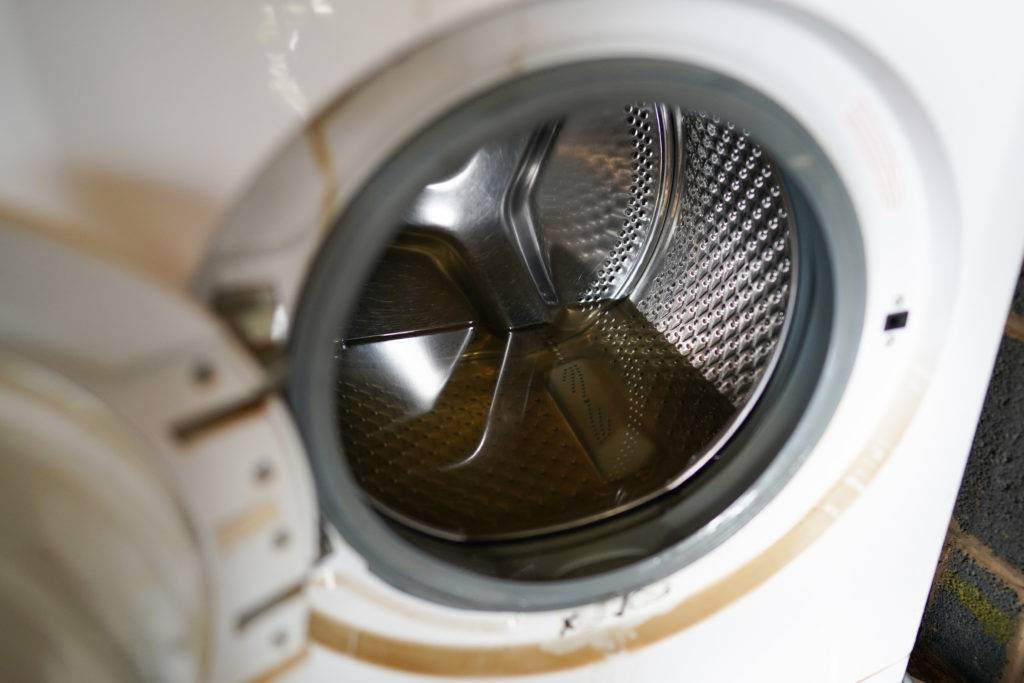
Step 1: Locate the drainage filter
The drainage filter for a front-load washing machine is typically going to be at the front of your machine, along the bottom panel. Most panels on newer washers are hinged so you won’t need tools, but an older washing machine might have a panel that is screwed in so you’ll need your screwdriver to remove it.
Don’t remove the cover panel yet, just locate it.
Step 2: Raise the front of the machine
If possible, raise the front end of your washing machine off of the ground using blocks of wood, a few bricks, or another sturdy prop. Since the drainage filter is at the bottom of the machine, it can be difficult to properly drain it if it’s only an inch or two from the ground.
Tipping the machine back can also make it easier to open the door of the washer without water leaking out since it’s angled towards the back of the machine.
Step 3: Remove the panel to access the drainage filter
Depending on the machine, there might be a drain tube along with the drainage filter. If there is, set that up to carry the water away from the machine and drain it into your bucket or container nearby. If there isn’t a drain tube with the filter, set your container directly below the filter.
Lay a towel or tarp down on the ground as well, directly below the drainage panel to keep the water from spilling onto the floor later.
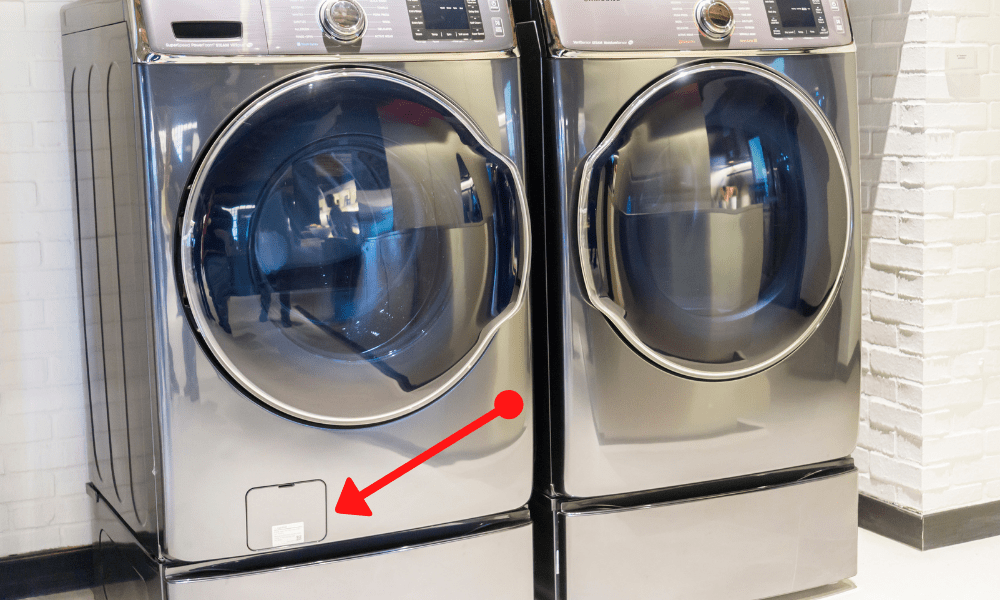
Step 4: Unscrew the drainage filter slowly
Once you’ve placed the towel or tarp down and your empty container is in place, you can begin to slowly unscrew the drainage filter. The water flow will get stringer the more you open the filter, so once it’s a steady stream, stop unscrewing it. Allow the container to fill with water, then tighter the screw on the filter. Empty the water from the container, bring it back to underneath the filter, and repeat the process until no more water comes out.
If you unscrew the drainage filter completely, you won’t be able to control the flow of water and can risk overflowing the container or spilling water onto the floor. This is why you only want to loosen it a little bit at a time.
Step 5: Lower the front of the washing machine back to the floor
To complete the draining process, seal the drainage filter back up and then remove the objects that are propping up the front end of the washer.
Once it’s flat, place your second, smaller container on the floor beneath the drainage filter and repeat the draining process until no more water comes out.
Step 6: Check the filter by hand
Now that all the water is drained out, you’re able to check the filter by hand to see if there’s a blockage. A potential blockage could be loose coins someone forgot to remove from the pockets, bobby pins, or a build-up of solid materials. If you find that the build-up seems to be soapy residue, this means you’re probably using too much laundry detergent per load.
Step 7: Clean the filter
To thoroughly clean the drainage filter before you seal it back up, you can take a soft-bristled brush and warm water to clean it out. Once it’s clean, you can replace the filter, replace the access panel and return your washing machine to normal.
Draining a Top-Load Washing Machine
What You’ll Need:
- Towels or a drop cloth to place on the floor under the washing machine
- Note: draining a top-load washing machine won’t be as messy as if you had a front-load, but it’s still never a bad thing to have towels on hand
- Towels or rags to mop up water inside the machine
- Bucket or container to drain the water into
- Empty bottle to drain the hose into
- Plumber’s snake
- Pliers
- Screwdriver
Step 1: Use a bucket to remove water from the washing machine
Using your bucket or container, remove as much water as you can out of the inner drum. Once you’ve removed as much water by hand as you can using your container-of-choice, take a few towels or rags to soak up the remaining water in the drum.
Step 2: Slowly pull the machine away from the wall
As you pull the machine out from the wall, be careful that you don’t pull too far or you risk pulling out any of the hoses attached to the wall.
If you’re worried about scratching the floor as you move the washing machine, you can tip up the front of the machine to lay down a drop cloth or towel. You can do the same with the back end too.
Step 3: Detach drain hose from the drainage pipe
The drain hose will be at the back of the washing machine along with the hot water and cold water supply tubes. Typically you’ll find that the hot water is a red tube, the cold water is a blue tube, and the drain hose will be the gray one. As an added precaution, turn off the cold and hot water supplies before removing any tubes.
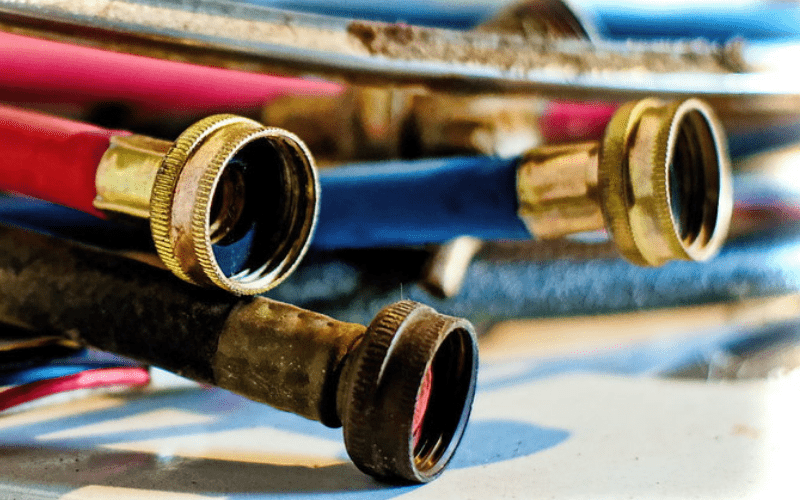
When you’re removing the drain hose, keep the hose raised higher than the machine itself so that gravity doesn’t continue to pump the water out of the hose. Even if it looks like you’ve drained all of the water out of the inner drum, there’s still water hidden underneath that could leak out.
Step 4: Feed the tube into a bucket
What if the hose isn’t draining?
Step 5: Drain the bucket and repeat the process
The hose isn’t clogged, but it’s still not draining properly
So you’ve checked the drain hose isn’t clogged but the water is still only trickling out or not coming out at all. This means there could be a clog in the drain pump, rather than the drain hose.
The drain pump is typically located at the back of the washing machine that you’ll need to remove with a screwdriver. If it’s not at the back of the machine, it could be located on the bottom of the machine. Before you go searching, you can consult your owner’s manual for the location.
Once you locate the pump, remove the spring clamps by squeezing with a pair of pliers. Use the pliers to clear any clogs that are in the pump. If there’s a clog, it will likely be a build-up of clothing fibers or lint, a small article of clothing like a child’s sock, or possibly pet hair. Replace the panel once you’ve removed the clog, then finish draining the washing machine as you were.
Know When to Call a Professional
If you’ve gone through all the steps to drain the washer manually, you’ve checked the none of the hoses are twisted, and you know there aren’t any blockages in the drain pump or hose yet the washing machine still isn’t draining properly, it’s time to call a professional. It could be a larger issue with the water pump or drive belt, which would require replacements parts or an expert eye to take a look.
Other issues you might encounter that should have you calling an expert include: your washing machine is making strange noises or rattling, which could indicate a damaged pump motor; or, your washing machine fills during the drain cycle, which could mean you have a defective water inlet valve, air dome hose, or electrical circuit.
Frequently Asked Questions
Why does my laundry come out of the washer soaking wet?
If at the end of the cycle you find that your clothing is coming out dripping wet (but the machine is draining properly), it could be that your loads are too large. A balanced load—your washer should be about 3/4 full of laundry at most—is important to ensure that the spin cycle can run effectively.
Should I put soaking wet clothing directly into the dryer?
In short? No. Putting soaking wet clothing into the dryer without draining off the excess water (whether by hand or in the washing machine) can lead to your dryer malfunctioning. It can send water into the electrical system of the dryer or clog up the air holes and vents that the dryer needs to work properly.
Can I pour boiling water down the drain hose to fix a blockage?
You already run hot water through the drain hose just by washing your clothes with hot water. Any blockage that is still left in the drain hose isn’t going to be broken down by boiling water.
Why does my washing machine overflow with water?
If you find your washing machine is overflowing with water during the drain cycle or at any point during the wash, this could indicate that the sensor is broken. A malfunction of the sensor would mean your machine isn’t able to tell how much water is already in the inner drum at any point during its cycle.
Is it bad to leave wet clothes in the washing machine?
It depends on how long you’re leaving the clothing for. Putting in a load of laundry before bed and then switching the clothing to the dryer in the morning shouldn’t be an issue—but don’t leave wet clothes in the washer for days on end. Leaving wet clothes to sit for too long allows for mold or bacteria to grow on the damp clothes.



![How To Clean Patio Pavers [Without a Pressure Washer!]](https://www.manmadediy.com/wp-content/uploads/sites/52/2024/06/broom-15377-238x170.png)
