How to Solder Copper Pipe Quick and Easy
When undertaking a home improvement project like learning how to solder copper pipe, it’s essential to arm yourself with the right knowledge and tools. The process might seem daunting at first, but with this step-by-step guide and some practice, you’ll be able to handle your plumbing needs with confidence, ensuring a leak-free result.
Understanding the Basics of Copper Pipe Soldering
Soldering copper pipe is a fundamental skill for both DIY enthusiasts and seasoned professionals. The technique involves heating copper pipes and a filler metal (solder) until the solder melts, creating a sturdy, watertight seal when it cools.

This method is commonly used in plumbing to ensure that the water system is secure and leak-proof. Before diving into the task, it’s crucial to understand the materials and tools you’ll need: a propane torch, solder, flux, pipe cutter, and cleaning brushes. Each tool plays a pivotal role in preparing and executing the perfect solder joint.
Preparing Your Copper Pipes – The Key to a Successful Soldering Project
Preparation is the cornerstone of how to solder copper pipe effectively. Start by cutting the copper pipe to the desired length using a pipe cutter, ensuring a clean, square cut that will fit snugly against the fittings.

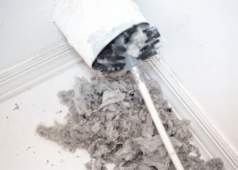
Once cut, clean the outside of the pipe and the inside of the fitting with a special cleaning brush or fine-grit sandpaper. This step is vital as it removes any oxidation and debris, providing a clean surface for the flux. Next, apply a thin layer of flux to both cleaned surfaces. The flux is crucial as it prevents oxidation during heating and helps the solder flow smoothly around the joint.
The Soldering Process – Techniques for a Leak-Free Finish
Once your pipes are prepped and ready, the actual soldering can begin. Start by heating the joint evenly with a propane torch. The goal is to bring the copper to a temperature hot enough to melt the solder, not just the flame itself.

Touch the solder to the joint; if it melts, run it around the circumference of the joint, allowing capillary action to pull it into the gap between the pipe and fitting. Remove the heat and allow the joint to cool naturally. It’s crucial not to disturb the joint while the solder is solidifying to avoid creating a weak joint that could lead to leaks.
Common Mistakes to Avoid When Learning How to Solder Copper Pipe
A successful soldering project is often about knowing what not to do. One common mistake is overheating the pipe, which can cause the flux to burn away and result in a poor seal. Another error is applying too much solder, which not only wastes material but can also block the pipe if it drips inside.

Moreover, ensure that the pipe and fitting are completely dry before starting, as any moisture can turn to steam and create pressure inside the pipe, leading to a weak joint. Don’t be discouraged if you make a mistake; just clean up the pipe and try again!
Wrapping Up – Gaining Confidence in Your DIY Plumbing Skills
Mastering how to solder copper pipe is a valuable skill that can save you time and money on plumbing repairs and renovations. With the right tools, careful preparation, and attention to technique, you can achieve professional-quality results.

Remember, practice makes perfect. Don’t be discouraged if your first few attempts aren’t flawless. Like any DIY skill, proficiency comes with practice, and every project you complete builds your confidence and capabilities.
Related Articles
- How to Make a Custom Copper Pipe Lamp
- How To Keep Pipes From Freezing [12 Easy Tips!]
- How to Replace Copper Pipe with PEX
By following this guide, you are well on your way to becoming proficient in soldering copper pipes, enabling you to tackle various home plumbing projects with ease and assurance. Whether you’re fixing a leak under the sink or installing a new water line, the skills you develop will serve you for years to come.
Ready to start your next project? Join our DIY community to receive tool tips, how-to guides, and exclusive creative insights. Subscribe to the ManMadeDIY newsletter now! Click here to unlock a world of hands-on inspiration.