7 Ways to Fix Your Leaking Outdoor Spigot
A leaking outdoor spigot can seem like a minor inconvenience at first, but if left unaddressed, it can quickly escalate into a significant issue. Not only does it waste water and increase your utility bills, but it can also lead to more serious problems such as water damage, mold growth, and even structural damage to your home. Understanding the common causes of a leaking outdoor spigot, as well as the steps you can take to fix it, is essential for every homeowner.
1. Tightening the Connection
Often, a simple tightening of the spigot’s connections can stop the leak. Use a wrench to tighten the packing nut located just behind the handle gently. Be careful not to overtighten, as this could damage the spigot or the pipes.

2. Replacing the Washer
A worn-out washer is a common cause of leaks. To replace it:
- Turn off the water supply to the spigot.
- Unscrew the packing nut and remove the handle.
- Take out the valve stem and replace the washer at the bottom.
- Reassemble the spigot and turn the water back on.

3. Using Teflon Tape
Teflon tape, also known as plumber’s tape, can help seal small leaks. Wrap the tape around the spigot’s threads before reattaching it. This creates a tighter seal and helps prevent future leaks.

4. Replacing the Spigot
For certain models, replacing the entire spigot might be the easiest solution. Simply unscrew the old spigot and screw on a new one. Make sure to use Teflon tape on the threads of the new spigot for a secure fit.

5. Inspecting and Replacing O-Rings
O-rings can wear out over time and cause leaks. To inspect and replace them:
- Turn off the water supply.
- Disassemble the spigot by removing the handle and valve stem.
- Locate and replace the O-rings.
- Reassemble the spigot and turn the water back on.

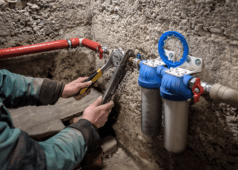
6. Checking for Pipe Damage

Sometimes, the leak may not be from the spigot itself but from the connecting pipes. Inspect the pipes for cracks or damage. If you find any, you may need to replace the damaged section of the pipe.
7. Cleaning the Spigot
Debris and mineral buildup can cause leaks. Soak the spigot in vinegar to dissolve mineral deposits. Use a brush to remove any remaining debris before reassembling the spigot.

Additional Tips and Tricks
Spotting a Leaking Spigot
- Water Stains: Look for water stains or damp areas around the spigot.
- Dripping: Even a small, occasional drip indicates a leak.
- Soggy Ground: Check for unusually soggy ground or puddles near the spigot.
- Increased Water Bill: A sudden spike in your water bill can signal a hidden leak.

Preventative Maintenance
- Regular Inspections: Periodically check your spigot and connections for signs of wear.
- Winterizing: In colder climates, disconnect hoses and insulate the spigot to prevent freezing and cracking.
- Proper Use: Avoid using excessive force when opening and closing the spigot to extend its lifespan.
By following these DIY methods and tips, you can fix a leaking outdoor spigot and ensure it functions properly for years to come. Regular maintenance and inspections will help you catch issues early and save water and money in the long run.
Related Articles
- Step-by-Step Guide for Fixing a Leaky Bathtub Faucet
- 8 Home DIY Projects That Will Improve Your Handyman Skills
- How to Solder Copper Pipe Quick and Easy
Ready to start your next project? Join our DIY community to receive tool tips, how-to guides, and exclusive creative insights. Subscribe to the ManMadeDIY newsletter now! Click here to unlock a world of hands-on inspiration.
Frequently Asked Questions (FAQs)
Why is my outdoor spigot leaking when it’s turned off?
A common reason for an outdoor spigot to leak when it’s turned off is a worn-out washer or gasket inside the spigot. Over time, these components can degrade, causing water to seep through even when the valve is closed. Replacing the washer or gasket typically resolves the issue.
What tools do I need to fix a leaking outdoor spigot?
To fix a leaking outdoor spigot, you will need a few basic tools, including an adjustable wrench, pliers, a screwdriver, plumber’s tape, and possibly a replacement washer or gasket. Depending on the specific problem, you might also need a seat wrench if the valve seat inside the spigot needs replacing.
Can a leaking outdoor spigot cause damage to my home?
Yes, a leaking outdoor spigot can lead to several issues. If the leak is close to your home’s foundation, it can cause water damage and potentially lead to structural problems over time. Additionally, it can create a damp environment that encourages mold growth and can attract pests. Addressing the leak promptly can help prevent these issues.
How do I replace a washer in my outdoor spigot?
To replace a washer in your outdoor spigot, first turn off the water supply to the spigot. Use a wrench to unscrew the packing nut and remove the valve stem. Locate the washer at the end of the valve stem and replace it with a new one of the same size. Reassemble the spigot and turn the water supply back on to check for leaks.
What should I do if my outdoor spigot is still leaking after replacing the washer?
If your outdoor spigot is still leaking after replacing the washer, the problem might be with the valve seat, the packing around the stem, or the spigot itself might be damaged. You can try replacing the packing or the entire valve seat. If the spigot is old and corroded, it might be best to replace the entire fixture. If you’re unsure, it may be wise to consult a professional plumber for a thorough inspection and repair.