The Complete Guide to Basic Woodworking Tools
Woodworking can be an invaluable skill. Being able to create and modify a variety of projects means being able to make your wildest dreams come true. It takes time to develop those skills. It also takes having the right tools for the job.
There are a wide array of woodworking tools that every woodworker, amateur or experienced, should have. Power and hand saws, sanders, files, planes, hammers and mallets, measuring tools, sawhorses, a workbench, a screw gun, a drill, and more are all required. With the right tools, even the most amateur of woodworkers will have all that they need to create their next project from scratch.
The Importance of Woodworking Tools
Jumping into woodworking can feel overwhelming if you don’t know where to start. The same can be said about determining which tools should be in your woodworking arsenal. There are dozens of different types of tools available, making it easy to rack up thousands of dollars in woodworking tools for your workshop.
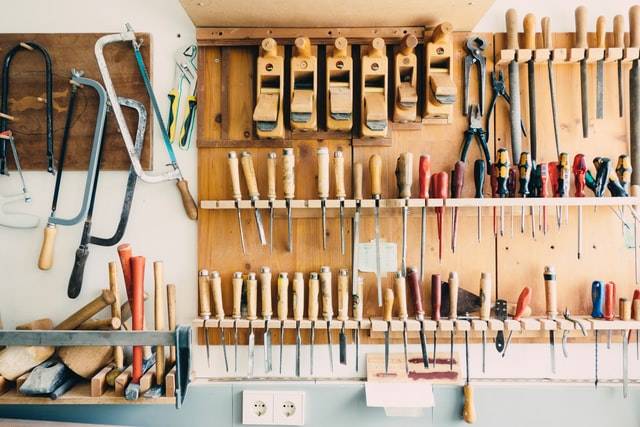
For beginners, nothing has to be too elaborate or costly. The point of learning basic woodworking tools is to allow you to understand when the tool is used and how to use it properly. Whether your goal is to be handier around the house or create woodworking projects that you can sell for profit, this guide will teach you all the must-have tools for woodworking and what to look out for.
The 5 Classes of Woodworking Tools
For an easier breakdown, there are five classes of basic woodworking tools: measure, cut, assemble, finish, and hold. That is what any woodworking project can be broken down to at its heart.
Measuring
Perhaps the most important part of woodworking. Without the proper measurements, none of the other things really matter. This means being able to take consistent, accurate measurements on any project. The more accurate the measurements, the more precise the cuts will be, and the better things will fit together.
Cutting
After measuring twice, it’s time to cut once. When you have the measurements that you need to ensure the job will be done the right way, it’s time to put them into action. Having a variety of methods in which to cut can mean cutting faster, more accurately, or in bulk.
Cutting takes time and patience, sometimes more depending on the project. While the concept of cutting might seem like a simple one, there are a variety of saws that are meant to take on different means of cutting. All to create a better workpiece.
Assembling
With the pieces cut, it’s time to put all the pieces together. While this can come down largely to the accuracy of the cuts, there are other tools that can help woodworkers of all experiences lock pieces into place for a greater assembly.
The cool thing is that the more comprehensive your abilities get, the more complex the assembly process will be. It will involve more intricate cuts that require greater care in order to properly assemble.
Holding
The assembly won’t matter if you don’t have the proper means to hold everything together. Sometimes that means an adhesive, like wood glue. It could mean nails, screws, or some other type of fastener that holds things together.
By having the necessary tools on hand, you can ensure that your next project stays together through it all. Besides, there is nothing worse than taking the time to assemble a project only for it to fall apart because it was being improperly held.
Finishing
After everything has been put together and has been structurally assembled, it’s time to give it the final look. This is the finishing process. Finishing includes things like stains and paints, but also the supplies needed to sand and provide the proper touches.
Finishing tools can vary depending on the caliber of the project that you are taking on. For amateurs, keeping the finishes simple is a good way to go and that skill level can be built up over time to get more and more intricate.
Measurement Tools
Now it’s time to take a closer look at everything individually. Let’s start with the most important tools at your disposal: the measurement tools. Without the proper measurements, all of the cuts that you make would be guesswork at best. That is the quickest path to a project that simply doesn’t work.
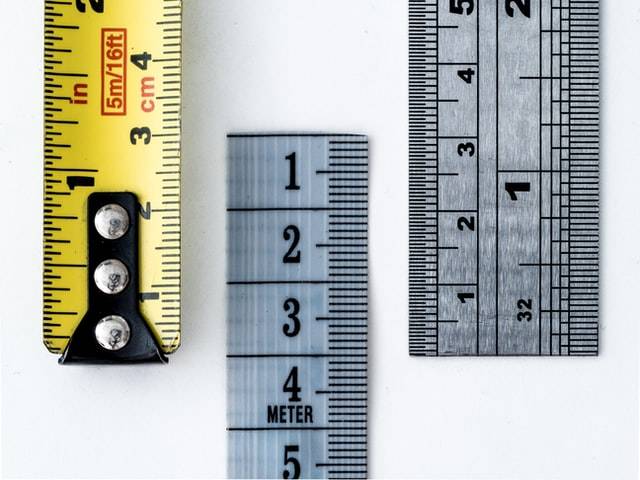
The old saying is to “measure twice, cut once.” It’s probably the single piece of advice that any woodworker can use. But there is another piece of advice: buy quality measuring equipment. You want something that is both easy to read and accurate so that any angles or other measurements can be taken effortlessly and confidently. Here are some of the angle checking and measuring tools that any beginning woodworker can make use of.
Tape Measurers
You won’t find a woodworker that doesn’t have one of these. Even for your basic DIYers who don’t do woodworking of any kind, there should be a tape measurer somewhere within the home. They are some of the most basic, versatile tools that you can have in your arsenal.
Though there are many different kinds of tape measurers out there, there are four basic types: flexible reel tapes, retractable steel tapes, folding rules, and yardsticks or other straight edges.
Retractable Steel Tapes. These are without a doubt the most common type of measuring tape that you will find on the market today. You can find them in compact sizes of under 10 feet but they are more commonly available in sizes that range from 12 to 30 feet.
Flexible Reel Tapes. These come in either steel or fabric and are meant for much larger spaces. The length can come well over 100 feet, making it ideal for the larger projects out there, which is something that most beginners are not going to concern themselves with.
Folding Rules. Don’t get it mistaken: these aren’t the rulers that you might be thinking of. These are more rigid sticks that are meant for high accuracy measurements (down to millimeters in most cases). They can also fold into multiple sections for easier use and storage when it comes time to put them away.
Straight Edges and Yardsticks. This is the family ruler. You generally don’t want to rely on these for regular woodworking. That said, they can work fine for quick takeoffs or for laying a straight line when you need one. Still, invest in one of the options above if you plan on doing regular woodworking.
Squares
While your tape measurer is going to be invaluable to your woodworking efforts, it’s going to be almost impossible to create a quality woodworking project if you don’t have a regular assortment of squares at your disposal.
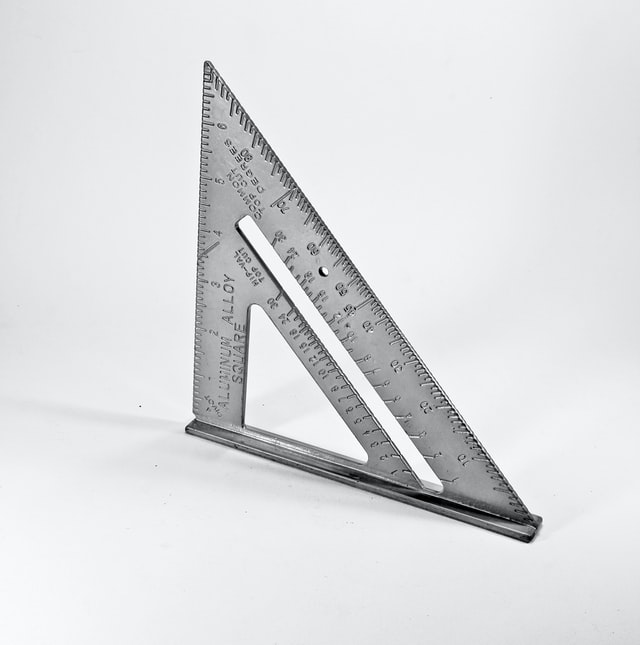
Having good squares means being able to not only create but also verify a lot of different angles. For the most part, squares have measuring markings engraved on the surface of the tool which lets them double as measuring tools. Here are some of the basic squares that you need.
Try Squares. These are smaller and also right-hand in nature. You want to use this type of square for quickly determining the squareness of your work.
Framing Squares. These are the most common squares that you will find in the average hardware or home improvement store. These are large, right-angle tools that are best for working on bigger pieces that are a little less intricate.
Combination Squares. These are great for not only checking how precise an angle is but also distances. Think of this as an all-in-one tool.
Speed Squares. The more experienced woodworkers out there likely have a speed square or two. These are great for when you need to quickly check 45- and 90-degree angles. Check out our guide on how to use a speed square for more info.
Miter Squares. As the name suggests, these are best for setting any angle miter cuts that you may be performing.
Bevel Squares. The bevel square lets you transfer patterns but what is really cool about it’s that it lets you recreate an existing angle. A little more complex but a cool tool to have in your arsenal no less.
There are also compasses, depth gauges, and dividers, but those aren’t really in either category. They are both invaluable and simple to use and kind of straddle the line between rules and measuring tapes. Having a wider array of measurement tools means being able to do more complex projects as you learn and grow your skillset.
Cutting Tools
When you feel confident with the measurements and angles that you have taken, it’s time to get down to the action. Just about every component in a woodworking project begins (after measuring, of course) by cutting materials.
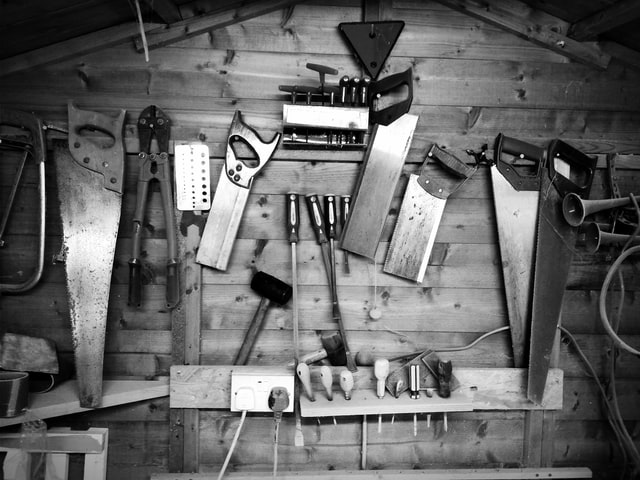
Any of the most interesting pieces that you have seen built all started as a rough length of wood. No matter the kind of wood in question, that wood stick needs to be both ripped and crosscut before it can start to take the shape that you want.
This is why saws are going to be one of your most essential tools. Saws come in a huge array of sizes and shapes. Not only that, but each saw comes for a certain kind of cutting task. Let’s take a deeper look at the variety of saws out there.
Jigsaws
It doesn’t matter what level of woodworker you consider yourself to be, you better have a jigsaw. There is a chance that you may hear them called “saber saws” due to the reciprocating blade, which is “saber-like.”
These are electric or battery-powered tools that are designed to make the more detailed, intricate cuts, whether they be curved, straight, or serpentine. Think about any jigsaw puzzle that you have ever seen. That is what a jigsaw can do with wood and other materials.
They are also totally different than the later-mentioned circular saws. For the latter, the blades revolve. Jigsaws, on the other hand, use a back and forth/up and down motion instead. The blades can come in a number of compositions and with a variety of tooth numbers. Jigsaws can also be used to cut both metal and plastic in addition to wood.
Coarse-tooth blades are better for roughing things in and getting results quickly. If you need something a little more intricate and detailed, though, going with a fine-tooth blade is the right way to go. Even better, you can operate a jigsaw with one hand, which leaves the other to hold the workpiece steadily.
Jigsaws are best for interior cuts, things like inner rectangles and circles. All you do is drill the pilot hole and then insert the blade. Before long, you will be experienced enough to start making plunge cuts.
Circular Saws
Right up there with the jigsaw, if there is going to be any kind of saw in the “beginner woodworker toolbox,” it’s going to be a circular saw. There are a ton of different brands but they all have one feature in common and that is the circular or round blade that has those razor-sharp teeth.
Circular saws come in electric, though there are more than a few power ratings to choose from and most of them are corded though there are some cordless available. Depending on who you ask, some think that circular saws are more for rough carpentry than they would be for finer woodworking. But in the right hands (and with the right blade), a circular saw can make clean, straight lines.
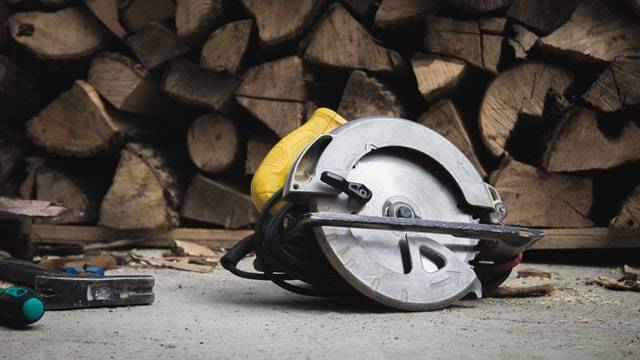
There are three different blade types to consider when it comes to your circular saw. There is the ripping blade, which can cut either with or against the grain lengthwise on the material. There is the crosscut blade, which is for sawing specifically across the grain, and the combination blade which can both crosscut and rip.
The difference between blades is the teeth. Crosscuts have staggered teeth while ripping blades have even spacing. As you may have guessed, combination blades have both. Blade diameters also play a role, with 10” blades being the most common and 12” being used for larger dimensions.
Finally, there are two designs that you are going to see most circular saws in. There is the direct drive, where the saw blade gets mounted directly on the arbor and 90 degrees to the motor. These are the most common among circular saws and also the most affordable. There are worn drive saws that are made for heavier jobs. They have the same blade designs, the only difference being that the blade is gear-driven ahead of the motor.
Handsaws
No matter how things skew towards electric tools, there will be a place for handsaws. That is because they are quick, easy, and simple to use. They are also great where more precise, detailed cuts are necessary. They are also lighter and have no cords, which means they are ready to go anywhere.
There are a few different designs of handsaws to consider. Ripping handsaws go with the grain while crosscut goes against; combo handsaws do both. Hacksaws have braced backs for miter cuts while carcass handsaws are for stronger and larger backsaws. Coping handsaws are similar to bandsaws and jigsaws; great for making curved cuts.
Any beginner should invest in a few quality handsaws. The only downside is that the blades can sometimes dull quickly, but getting a blade that has sharp teeth can mean cutting through wood almost as true and fast as an electric saw.
Bandsaw
A bandsaw can make both intricate, curved cuts or rip right through rough stock. This is a combo of the saber and circular saws. The teeth are set to a continuous loop and revolved around lower and upper pulleys while there is a flat table mounted between that can be titled when angle cuts are required.
Like other saws on the list, there are different sizes and types. Depending on how intricate a cut is and the size of the stock, there are generally going to be two characteristics of the bandsaw that you want to be aware of when choosing the size.
The first is the throat depth. This is what measures the teeth of the blade to the back part of the support frame. This lets you know how wide the stock can be. It also makes it to make curved cuts when the workpiece requires turning.
The second is the depth capacity. This is how far the blade will be exposed between the pulleys. You may also hear it called the face opening. It can vary between 4” for your smaller bandsaws and go up to 12” for the bigger ones. This is the determining factor in how thick the material capacity will be.
Assembly Tools
After the cutting has been done (for now, at least), it’s time to assemble all of those components together. This can come after some of the finishing depending on what the project in question may be. Successful assembly comes down to two things: precision joints and the right tools to assemble and then properly fasten them.
There are four basic tools that will fall into most repertoires: the hammer, mallet, screw gun, and drill. Let’s take a closer look at each of these assembly tools to see their importance to the job as a whole.
Hammer
While there is no “universal” hammer, the claw hammer is pretty close to it. That said, there are dozens of different claw hammers to choose from as well. Generally, woodworking hammers are needed to pry and pound.
Design. There are a couple of factors that can determine how well they’ll do the job. The first is the face weight and size. Some heads are smoother, like finishing hammers. There are other faces that are serrated, which makes them good for gripping nails and other fasteners.
The claw design (which includes curve and length) is also important. Finishing hammers tend to have more pronounced claws while a framing hammer would use straight edges in order to split any materials. The handle composition is important for comfort; you need to have a good grip on any hammer that you are using. Composite or wooden handles are best for beginners because they handle shock better.
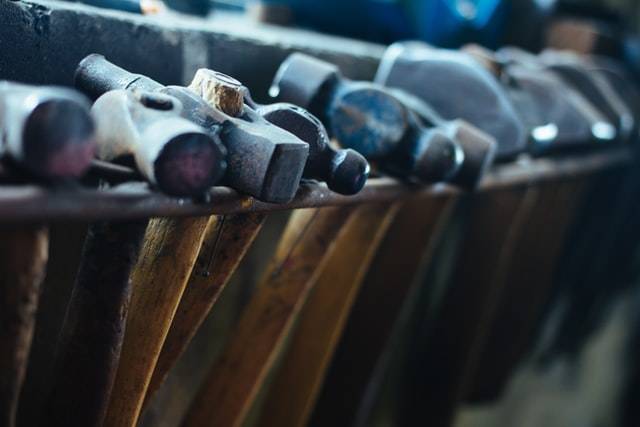
Finally, there is the weight to consider. Measured in ounces, your lightweight hammers are in the 8-10 ounce range, the intermediate hammers in the 16-20 ounce range, and the heavy-duty hammers weighting 24-32 ounces.
Purpose. The purpose of the hammer can matter just as much as the composition. Beginners should identify what it’s they’ll be using the hammer for before making their choice. There are finishing hammers, which are all-purpose, so grab one of those right away.
If you want something a little more durable and tougher but they can be overkill on a lot of your standard woodworking projects. Tack hammers are great for smaller projects and also have a couple of different head sizes that don’t come with claws. Perfect if you just need to give something small a tap without going overboard.
Mallet
it’s important to state this from the start: hammers and mallets are not the same thing. Yes, both are used to hit things, but the applications in which they are used are totally different. For starters, the hammer has a steel face generally (some can be plastic or brass). Mallets, on the other hand, have either leather, rubber, or wooden heads to them that are detachable, which means that you can have a variety of sizes.
The main difference between the two is their surface impression and striking shock. Mallets are a lot softer than the average hammer, which means that they absorb shock rather than deliver it. Because of this, they also leave far fewer strike marks than hammers do. If you are tapping wood joints together, the mallet is your tool.
Important note for amateur woodworkers: never, ever, ever use a steel hammer on chisels. The shock can mean jabbing or stabbing at the wood with the chisel, which can leave a rougher finish than you may have intended. With a mallet, you can get smooth, accurate slices that don’t gauge too deeply.
Screw Gun
If you are looking for the best kind of fastener for woodworking, you can’t go wrong with screws. Not only do they hold on tight, but they can also be removed when it comes to disassembling. When there are mistakes or temporary joints, having a screw gun can be invaluable.
Make sure that you have screwdrivers, sure, but a powered screw gun can make it a lot quicker to drive those screws. When you have a job with a plethora of screws, they can come in real handy.
For the most part, your average screw gun is now cordless, ramping up the convenience level along the way. Though they are part of the power drill family (more on those later), the inside shape of the chuck is the real difference. Screw guns can accommodate hexagonal bit shanks, which makes them virtually slip-proof.
Power Drill
Having a drill handy is something that every woodworker should have, from amateurs to experts. There are some old-timers that will use a brace and bit, but electric drills are common for a lot of reasons and not just drilling holes. With all the different attachments available, you can get a lot of variety out of your power drill.
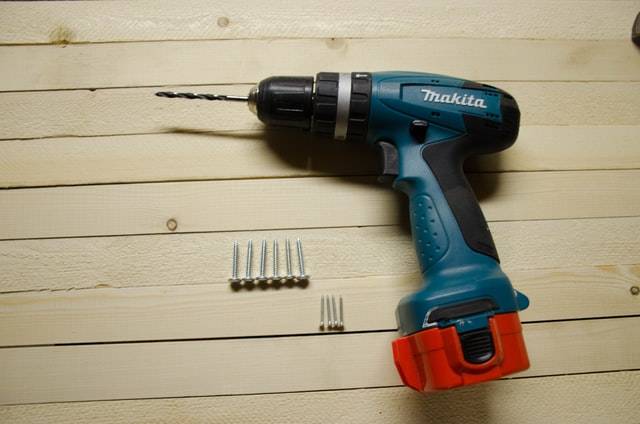
If you don’t know where to start, get a corded model to start. For one, they are super cheap these days because so many are now available in cordless. Corded, however, tend to have more longevity and torque than their cordless counterparts. The cord can be cumbersome, but you’ll never run into a weak charge.
That said, if you prefer cordless, know the voltage rating. What began with 7.5-volts has since evolved into the 18-volt standard. You can save a few bucks and go with a 14-volt, but the 18-volt delivers a lot more punch for your dollar.
Power drills are not just rated based on voltage, but on chuck size as well. The most common chuck size is 3/8” with the more heavy-duty option being ½”. There are also keyless and keyed chucks that can make it easier to change out your components.
Holding Tools (Adhesives)
Though it was covered pretty thoroughly in the assembly section, there are other ways of holding your workpiece together for the long haul. If you want something that offers a little bit of a cleaner look than screws or nails, wood glue is for you.
The thing is that there are a variety of different wood glues and we’re not talking manufacturer. As a matter of fact, there are five different types of wood glue that you need to take into consideration for your next project.
Polyvinyl Acetate (PVA). The most modern option actually replaced hide glue as the standard. There are different variants of PVA like dyed, water-resistant, water-proof, and more. It all depends on what kind of project you are working on.
The best thing about PVA is that it’s everywhere. You can find it at small-time hardware stores or big home improvement chains. Also, while some other glues can change color over time, PVA doesn’t yellow over time.
What really makes PVA so great is that there is almost no breakdown throughout the years. That said, if the glue-up isn’t done the right way, then the pieces may come apart. Just make sure that you are using ample PVA.
Polyurethane. A stronger adhesive when used the right way. It doesn’t have the same moisture content to it that some of the water-based glues out there do. This isn’t water-based glue so wood pores won’t draw this glue type so much.
The bond in polyurethane does not require an uptake into the wood pores. That means that you can glue finished pieces together without any damage to the finish itself. It also cures thanks to a chemical reaction from moisture. Compared to PVA, it means adhering to a high-moisture surface much more easily.
Cyanoacrylate. Also known as CA, this is what we term “super glue”. This is great for gluing pieces together and using them as a clamp because the adhesive strength is still low despite the great holding properties of the glue.
This is more of a general-purpose glue, though it can be a little pricier than PVA and some of the other common types of glue. That said, it’s great for trim, crown molding, and furniture repair because it can not only repair quickly, but it’s also clear so it won’t be seen as easily.
Animal or hide. This is the OG glue. Though it’s still made for bow making and other instruments, it has basically become limited to traditional woodworkers. it’s a little tougher to find, though it’s possible to make your own animal or hide glue.
Epoxy. This is a little different in that it’s a mixture made up of two parts. The reaction comes when they are combined. The great thing about epoxy is that it’s not only a good filler, but it’s totally waterproof as well.
The downside to epoxy is that it takes a lot longer to cure than some of the other glues. If you are looking for a quick-set, epoxy is not the way to go. If you have joints that are a little off and need filling, then epoxy is a great choice.
Finishing Tools
Though we generally think of the finish as things like paint or stain (which come later), the finishing tools in question are about smoothing, shaping, and forming the material in question so that it can fit together as precisely as possible.
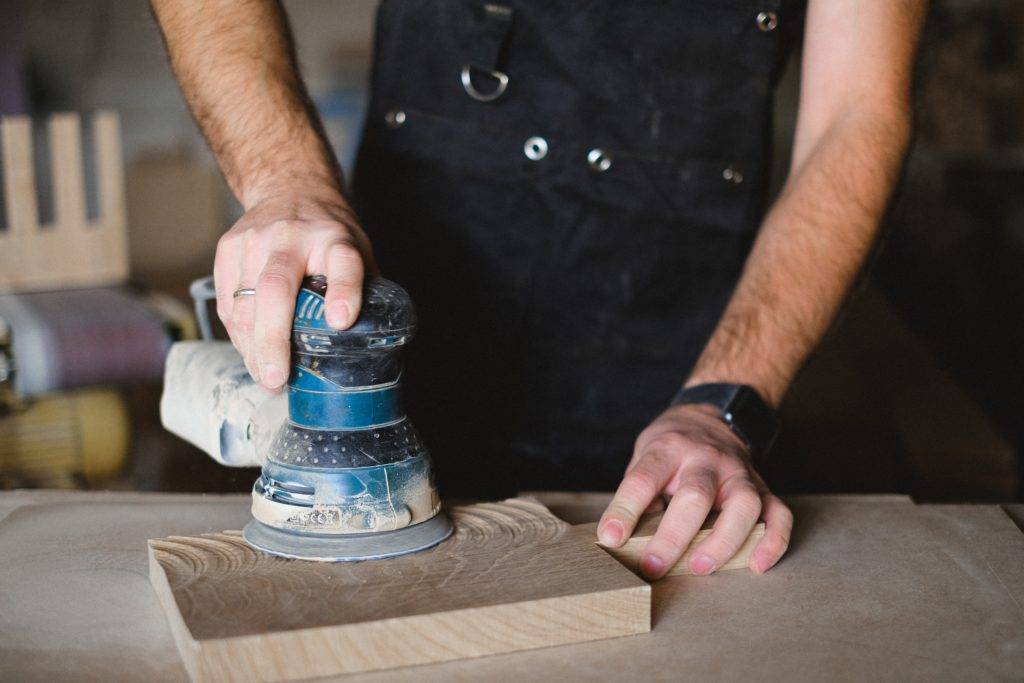
Generally speaking, some of the finishing will be done once the wood has been cut into rough pieces. In order to fit them together, they need to be in smoother, more accurate dimensions. Not to mention the fact that they will look a lot more attractive when they aren’t so rough and torn.
It doesn’t matter how fine a saw blade you choose: you have to do sanding, planning, and filing of some sort to get that finished look. Here are a few of the most important finishing tools.
Orbital Sander
If push came to shove and you had to buy a single wood-finishing tool, then the orbital sander would be it. These are great for covering the larger surfaces of the wood with fast sanding motions. They take much of the strain out of sanding and can shorten the sanding process exponentially.
These are different from your inline sanders (think belt sanders). They have circular sandpaper pads that revolve in an orbital or circular manner. They take the more abrasive pieces of sandpaper and spin them rapidly in a circle.
While they do remove material pretty quickly, they can also leave swirl marks that, if not desired, can be difficult to remove. Grab a random orbital sander because they don’t circulate, oscillating instead. That means leaving the wood in a mark-free, smooth condition.
Planes
Though a sander can do a lot of your smoothing for you, there are times when you need something a little more intricate and accurate. Instead of being abrasive, like a sander, a plane is a cutting tool. There are also a ton of different hand planes that can help to shave those wood fibers away, making the piece smoother as you go.

If you are new to the world of woodworking, you will no doubt hear a variety of names mentioned. Rabbet planes, jack planes, jointers, spokeshaves, and blocks. Here’s what the variety of planes do:
Block Plane. Smaller but a lot more stout. If you need to do tight work where having very smooth joints is of the utmost importance, then this is the plane you would want to use.
Jack Plane. Great for removing a lot of material at once. it’s also known as a “jack-of-all-trades” tool because there are straight edge and curved jack planes available. The former is for jointing while the latter is for smoothing.
Rabbet Planes. If you need to cut right-angle grooves along the edge of the grain, this is the tool for you.
Joining Planes. These are similar to jack planes but the main difference is that they smooth the edges so that pieces can join together. Most of the time, joining planes will have long frames.
Spokeshaves. For curved surfaces, this is the tool to go with. They were created for wagon wheel spokes, which is where the name comes from, but have since become useful for a number of other curved surfaces.
Scraper Planes. This plane is good for getting the fine fibers out of wood surfaces in order to create a super-smooth finish. You might also hear them called cabinet scrapers.

